Lexmark Multifunction Laser C77x - Setup Guide
Lexmark Multifunction Laser Manual
 |
View all Lexmark Multifunction Laser manuals
Add to My Manuals
Save this manual to your list of manuals |
Lexmark Multifunction Laser manual content summary:
- Lexmark Multifunction Laser | C77x - Setup Guide - Page 1
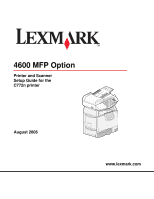
4600 MFP Option Printer and Scanner Setup Guide for the C772n printer August 2006 www.lexmark.com - Lexmark Multifunction Laser | C77x - Setup Guide - Page 2
Stability Information CAUTION: Certain floor-mounted configurations require additional furniture for stability. More information is available on our Lexmark Web site at www.lexmark.com/multifunctionprinters. Stability Information 1 - Lexmark Multifunction Laser | C77x - Setup Guide - Page 3
English - Lexmark Multifunction Laser | C77x - Setup Guide - Page 4
only a 26 AWG or larger telecommunications (RJ-11) cord when connecting this product to the public switched telephone network. CAUTION: Refer service or repairs, other than those described in the operating instructions, to a professional service person. CAUTION: This product is designed, tested, and - Lexmark Multifunction Laser | C77x - Setup Guide - Page 5
installing memory or option cards sometime after setting up the printer, turn the printer off, and unplug the power cord from the wall outlet before continuing. CAUTION: Connect set up this product or make any electrical or cabling connections, such as the power cord or telephone, during a lightning - Lexmark Multifunction Laser | C77x - Setup Guide - Page 6
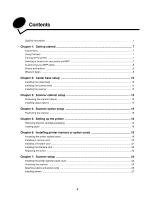
a location for your printer and MFP 7 Customizing your MFP option ...8 Drivers and options ...9 Where to begin ...9 Chapter 2: Caster base setup 10 Installing the caster base ...10 Installing the scanner shelf ...11 Installing the scanner ...12 Chapter 3: Scanner cabinet setup 13 Positioning the - Lexmark Multifunction Laser | C77x - Setup Guide - Page 7
Contents Fax setup ...28 Verify MFP setup ...31 Chapter 8: Distributing MFP user information 33 Finding user instructions ...33 Distributing user information ...33 Limiting MFP use ...33 Chapter 9: Solve setup problems 34 Getting more help ...34 6 - Lexmark Multifunction Laser | C77x - Setup Guide - Page 8
identifies something that could damage your product hardware or software. Using this book This guide is intended to help you set up your printer and scanner (MFP option). If you do not have an option listed here, you can skip that portion of the guide and continue to the next task. If you need - Lexmark Multifunction Laser | C77x - Setup Guide - Page 9
are installing options after setting up the printer, turn the printer off, and unplug the power cord from the wall outlet before continuing. 1 Scanner cabinet or caster base 2 2000-sheet drawer 3 500-sheet drawer 4 Duplex unit 5 Printer 6 Scanner shelf or output options 7 MFP option (scanner) The - Lexmark Multifunction Laser | C77x - Setup Guide - Page 10
the MFP drivers located on the 4600 MFP Software and Documentation CD that came with the MFP. For more information on installing the drivers and verifying the printer options are installed, see Installing drivers on page 27. Where to begin The initial setup procedures are determined by your scanner - Lexmark Multifunction Laser | C77x - Setup Guide - Page 11
following components: • Caster base • Printer • 4600 MFP option (scanner) You may also have the following: • Optional drawers • Optional duplex unit • Scanner shelf • Printer memory or option cards If you do not have an option listed here, you can skip that portion of the setup and continue to the - Lexmark Multifunction Laser | C77x - Setup Guide - Page 12
Caster base setup Installing the scanner shelf Note: If you do not have a scanner shelf, go to Scanner cabinet setup on page 13 or Scanner option setup on page 15. 1 Remove the top cover from the printer. You will not need the cover when the scanner shelf is attached. Store the cover; it will be - Lexmark Multifunction Laser | C77x - Setup Guide - Page 13
on the 4600 MFP Software and Documentation CD. 4 Connect the two scanner cables. Note: To prevent errors and scanner malfunction, make sure the scanner cable thumbscrews are tightened securely. 5 Go to Removing the print cartridge packaging on page 16, and follow the printer setup instructions. For - Lexmark Multifunction Laser | C77x - Setup Guide - Page 14
(part number 16C0700) • Printer • 4600 MFP option (scanner) You may also have the following: • Caster base • Optional drawers • Optional duplex unit • Printer memory or option cards • Output options If you do not have an option listed here, you can skip that portion of the setup and continue to the - Lexmark Multifunction Laser | C77x - Setup Guide - Page 15
, expander, or mailbox. 1 2 5 Go to Removing the print cartridge packaging on page 16, and follow the printer setup instructions. For information on installing the interface card and memory and firmware cards, go to Installing printer memory or option cards on page 19. Installing output options 14 - Lexmark Multifunction Laser | C77x - Setup Guide - Page 16
Guide located on the Software and Documentation CD. 4 Connect the two scanner cables. Note: To prevent errors and scanner malfunction, make sure the scanner cable thumbscrews are tightened securely. 5 Go to Removing the print cartridge packaging on page 16, and follow the printer setup instructions - Lexmark Multifunction Laser | C77x - Setup Guide - Page 17
5 Setting up the printer Removing the print cartridge packaging Note: If you are installing a scanner after initial printer setup, the print cartridge packaging has already been removed. 1 Remove all exterior packing tape. 2 Open the front door. 3 Remove the packing strips. 4 Remove the tabs from - Lexmark Multifunction Laser | C77x - Setup Guide - Page 18
6 Shake the print cartridge. 7 Remove the cartridge cover. Warning: Do not touch the photoconductor. 8 Reinsert the print cartridge into the printer. The print cartridge will drop down and snap into place. 9 Repeat steps 6 through 8 to insert the remaining print cartridges. 10 Close the front cover - Lexmark Multifunction Laser | C77x - Setup Guide - Page 19
Setting up the printer Loading paper Complete these instructions to load paper into any of the standard or optional trays. All trays are loaded in the same way. 1 Remove the tray. 2 Adjust the length and width guides to the correct position for the size of paper you are loading. 3 Flex the sheets of - Lexmark Multifunction Laser | C77x - Setup Guide - Page 20
. After installing memory or option cards, go to Scanner setup on page 24. The instructions in this section help you install the interface card, memory card, and firmware card. Information about other memory or option cards can be found in the printer User's Guide. Accessing the printer system board - Lexmark Multifunction Laser | C77x - Setup Guide - Page 21
Installing printer memory or option cards Installing a memory card Note: Printer memory cards designed for other Lexmark printers may not work with the printer. 1 Remove the system board access cover. (See Accessing the printer system board.) Warning: Printer memory cards are easily damaged by - Lexmark Multifunction Laser | C77x - Setup Guide - Page 22
Installing printer memory or option cards Installing a firmware card Note: Firmware cards designed for other Lexmark printers will not work with the printer. 1 Remove the system board access cover. (See Accessing the printer system board.) Note: If a firmware card has been installed, you must remove - Lexmark Multifunction Laser | C77x - Setup Guide - Page 23
something metal such as the printer frame before you touch an interface card. 1 Locate the card connectors on the system board. 2 Remove the screw and the cover plate, and save them. 3 Unpack the scanner interface card and cable. Save the packaging materials. a Connect the USB interconnect cable to - Lexmark Multifunction Laser | C77x - Setup Guide - Page 24
Replacing the shield After you have installed options on the printer system board, follow these steps to reattach the shield and close the doors. 1 Align the slots at the top of the access cover with the screws near the top of the printer. 2 Slide the cover up under the top cover lip as far - Lexmark Multifunction Laser | C77x - Setup Guide - Page 25
7 Scanner setup Installing the printer operator panel cover A printer operator panel cover is provided with the MFP. The installation of this cover is optional. To install the cover: 1 Open the front door. 2 Remove the two operator panel cover retaining screws 3 Close the front door. 4 Remove the - Lexmark Multifunction Laser | C77x - Setup Guide - Page 26
Scanner setup 5 Install the new operator panel cover. 6 Open the front door. 7 Insert and gently tighten the two operator panel cover retaining screws 8 Close the front door. 1 3 2 Unlocking the scanner 1 Locate the lock switch on the side of the scanner, and then slide the switch down. 2 Lift - Lexmark Multifunction Laser | C77x - Setup Guide - Page 27
Connect the scanner cable to the scanner and printer. 2 Connect the printer to a LAN drop or hub using standard cabling that is compatible with your network. 3 Connect line outlet. To connect a telephone to the MFP, plug the telephone into the right modem port on the back of the scanner. Step 1 - Lexmark Multifunction Laser | C77x - Setup Guide - Page 28
instructions to install the printer drivers. 3 Place the 4600 MFP Software and Documentation CD in the computer CD drive, and follow the onscreen instructions to install the MFP drivers. 4 Verify the computer recognizes your installed options. a Open the Printers folder. b Right-click the new MFP - Lexmark Multifunction Laser | C77x - Setup Guide - Page 29
the printer. Scanner setup Fax setup When you first turn on the MFP or if the MFP has User's Guide on the MFP Software and Documentation CD. There are two methods to enter your fax setup information: • Manually enter the information through the MFP control panel; see "Performing manual fax setup - Lexmark Multifunction Laser | C77x - Setup Guide - Page 30
assigned after connecting the network cable to the printer. 1 Look for the address under the "TCP/IP" heading on the network setup page. To print a network setup page a Touch the key icon on the MFP control panel. b Touch Reports. c Touch Network Setup Page or Network Setup Page. 2 Go - Lexmark Multifunction Laser | C77x - Setup Guide - Page 31
prompt if using Windows 2000). If the printer is active on the network, a reply is sent. Performing browser fax setup Note: Configuration is a task usually done by a system support person. If you are prompted for a password during the following instructions, see your system support person for help - Lexmark Multifunction Laser | C77x - Setup Guide - Page 32
Scanner setup Verify MFP setup Printing a menu settings page 1 Touch the key icon on the MFP control panel. 2 Touch Reports. 3 Touch Menu Settings Page. 4 Verify the options you installed are correctly listed under "Installed Features" and "Printer Information." Printing the Help pages We recommend - Lexmark Multifunction Laser | C77x - Setup Guide - Page 33
document to the directory or application you specified. If you touch Profiles on the home screen, locate your shortcut on the list. 9 Return to your computer to view your file. Your output file is saved in the location you specified or launched in the application you specified. Verify MFP setup 32 - Lexmark Multifunction Laser | C77x - Setup Guide - Page 34
, and manually deliver them to users. • Copy the PDFs containing the user instructions, and store them in a convenient, common location on your network or intranet. The PDFs are stored in the Pubs directory on the 4600 MFP Software and Documentation CD. • Browse the Lexmark Web site (www.lexmark.com - Lexmark Multifunction Laser | C77x - Setup Guide - Page 35
the fax setup. See Fax setup on page 28. 3 See the online information on the 4600 MFP Software and Documentation CD. Click View Documentation Use MFP Solving fax problems. Getting more help Launch the printer Software and Documentation CD, and then click Contact Lexmark for a complete list of phone
-
 1
1 -
 2
2 -
 3
3 -
 4
4 -
 5
5 -
 6
6 -
 7
7 -
8
-
9
-
10
-
11
-
12
-
13
-
14
-
15
-
16
-
17
-
18
-
19
-
20
-
21
-
22
-
23
-
24
-
25
-
26
-
27
-
28
-
29
-
30
-
31
-
32
-
33
-
34
-
35
 |
 |
www.lexmark.com
Printer and Scanner
Setup Guide for the
C772n printer
4600 MFP Option
August 2006