Lexmark Optra S 1250 Network Scan Drivers
Lexmark Optra S 1250 Manual
 |
View all Lexmark Optra S 1250 manuals
Add to My Manuals
Save this manual to your list of manuals |
Lexmark Optra S 1250 manual content summary:
- Lexmark Optra S 1250 | Network Scan Drivers - Page 1
Network Scan Driver User's Guide January 2011 www.lexmark.com - Lexmark Optra S 1250 | Network Scan Drivers - Page 2
in conjunction with other products, programs, or services, except those expressly designated by the manufacturer, are the user's responsibility. For Lexmark technical support, visit support.lexmark.com. For information on supplies and downloads, visit www.lexmark.com. If you don't have access to - Lexmark Optra S 1250 | Network Scan Drivers - Page 3
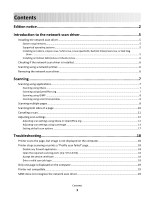
window ...8 Scanning multiple pages...8 Scanning both sides of a page...10 Canceling a scan...11 Adjusting scan settings...12 Adjusting scan settings using XSane or OpenOffice.org 12 Adjusting scan settings using scanimage ...13 Setting default scan options ...17 Troubleshooting 18 Printer - Lexmark Optra S 1250 | Network Scan Drivers - Page 4
XSane displays garbage characters...20 Index...21 Contents 4 - Lexmark Optra S 1250 | Network Scan Drivers - Page 5
. • Your computer is properly configured to communicate with a supported network printer over TCP/IP. • Your printer has an internal network card and can communicate through an IPv4 network. External network adapters are not supported. Supported operating systems Make sure you are running any of the - Lexmark Optra S 1250 | Network Scan Drivers - Page 6
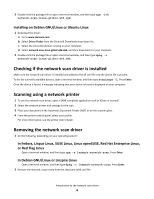
, see the printer User's Guide. Removing the network scan driver 1 Do the following, depending on your operating system: In Fedora, Linpus Linux, SUSE Linux, Linux openSUSE, Red Hat Enterprise Linux, or Red Flag Linux Open a terminal window, and then type rpm -e lexmark-network-scan. Press - Lexmark Optra S 1250 | Network Scan Drivers - Page 7
From the "device detection" dialog, navigate to: Available devices > select your printer > OK 3 From the "Network:scanner" dialog, click Window > Show standard options. 4 If necessary, adjust other scan settings. 5 From the "Network:scanner" dialog, click Scan. 6 Place your document in the Automatic - Lexmark Optra S 1250 | Network Scan Drivers - Page 8
10.3, refer to http://en.opensuse.org/Xlib.lock for troubleshooting information. Scanning multiple pages The default paper source for scanning is the Automatic Document Feeder (ADF). If there are no documents loaded in the ADF, the printer scans from the scanner glass. You can scan multiple pages - Lexmark Optra S 1250 | Network Scan Drivers - Page 9
. 2 From the "Device Used" menu, select your printer. 3 From the "Options" area, click Image Settings > source. 4 From the "source" menu, select Multiple terminal window, and then type xsane. Press Enter. 2 From the "device detection" dialog, navigate to: Available devices > select your printer > OK - Lexmark Optra S 1250 | Network Scan Drivers - Page 10
scanimage -b --scan-both-sides=yes -d [device_name]. Press Enter. 2 Place your document in the ADF. 3 From the printer control panel, select your scan job. Using scanadf 1 Open a terminal window, and then type scanadf --scan-both-sides=yes -d [device_name]. Press Enter. 2 Place your document in the - Lexmark Optra S 1250 | Network Scan Drivers - Page 11
Multiple Pages. 5 From the "Options" area, navigate to: Image Settings > scan-both-sides 6 Select the scan-both-sides check box. Window > Show standard options. 5 Select the Scan both sides checkbox. 6 From the "Network:scanner" dialog, click Scan. 7 Place your document in the ADF. 8 From the printer - Lexmark Optra S 1250 | Network Scan Drivers - Page 12
2 From the "device detection" dialog, navigate to: Available devices > select your printer > OK 3 From the "Network:scanner" main dialog, do either of the following: - Click Window > Show standard options. - Click Window > Show advanced options. • Using OpenOffice.org Note: You may use Writer, Calc - Lexmark Optra S 1250 | Network Scan Drivers - Page 13
is found only in XSane. Mirror Image Note: Mirror Image is found only in XSane. Note: Your printer may not support all the options. To check, see the printer User's Guide. Adjusting scan settings using scanimage Scanimage is a command-line-only application that uses the first scanner found and the - Lexmark Optra S 1250 | Network Scan Drivers - Page 14
Select a scan resolution scan-resolution Note: Resolutions for all the printers are displayed as options. Select a color depth mode Values 75 150 200 300 400 600 1200 Note: Make sure the printer supports the resolution you select. 1-bit Black & White 8-bit Grayscale 24-bit Color Scanning 14 - Lexmark Optra S 1250 | Network Scan Drivers - Page 15
Oficio (Mexico) Folio Statement Universal Custom Scan Size ID Card 3x5 Photo 4x6 Photo Business Card Book Original Auto Size Mixed Size 4x8 in 5x7 in 3.5x4 in 8x10 in 9x13 cm 10x20 cm 20x25 cm 10x15 cm 3x18 cm L L2 Hagaki Note: Make sure the printer supports the size you select. Scanning 15 - Lexmark Optra S 1250 | Network Scan Drivers - Page 16
orientation Select a brightness setting brightness Select a contrast setting contrast Scan a single- Laser Color Laser Inkjet Plain Inkjet Glossy Retail Photo Photo Magazine Newspaper Press General Office Auto Other Notes: • Make sure the printer supports the size you select. • The printer - Lexmark Optra S 1250 | Network Scan Drivers - Page 17
also type scanimage --help to get a list of supported options. • Your printer may not support all these options. To check, see the printer User's Guide. Setting default scan options All default scan options are stored in the scan driver configuration file, /etc/sane.d/lexmark_nscan.conf. Changing - Lexmark Optra S 1250 | Network Scan Drivers - Page 18
Troubleshooting Printer scans the page, but image is not displayed on the computer Make sure that the IP address of your computer matches the IP address assigned to your network interface card. 1 Open a terminal window the SANE driver configuration file and specify the appropriate network interface - Lexmark Optra S 1250 | Network Scan Drivers - Page 19
2 From the "Options" area, click Image Settings > source. 3 From the "source" menu, printer is a multifunction printer. • The network scan driver supports your printer. For more information on your printer's compatibility, see the printer User's Guide. SANE does not recognize the network scan driver - Lexmark Optra S 1250 | Network Scan Drivers - Page 20
• For some SANE installations, you may need to set the LD_LIBRARY_PATH: 1 Open a terminal window, and then type export LD_LIBRARY_PATH=/usr/lib. 2 Press Enter. XSane displays garbage characters Run XSane version 0.90 or higher, which supports more languages than its earlier versions. Note: If you - Lexmark Optra S 1250 | Network Scan Drivers - Page 21
on the computer 19 P printer is not compatible 19 printer scans but image not displayed 18 printer stops scanning 18 S scan settings OpenOffice.org Writer 12 using XSane 8 setting default values 17 supported operating systems 5 system requirements 5 U uninstalling network scan driver 6 X XSane
-
 1
1 -
 2
2 -
 3
3 -
 4
4 -
 5
5 -
 6
6 -
 7
7 -
8
-
9
-
10
-
11
-
12
-
13
-
14
-
15
-
16
-
17
-
18
-
19
-
20
-
21
 |
 |

Network Scan Driver
User's Guide
January 2011
www.lexmark.com