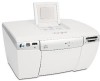
Lexmark P450 User's Guide
Lexmark P450 Manual
 |
View all Lexmark P450 manuals
Add to My Manuals
Save this manual to your list of manuals |
Lexmark P450 manual content summary:
- Lexmark P450 | User's Guide - Page 1
450 Series Memory Maker User's Guide August 2005 www.lexmark.com Lexmark and Lexmark with diamond design are trademarks of Lexmark International, Inc., registered in the United States and/or other countries. © 2005 Lexmark International, Inc. All rights reserved. 740 West New Circle Road - Lexmark P450 | User's Guide - Page 2
could include technical inaccuracies or typographical errors. Changes are periodically made to the services, except those expressly designated by the manufacturer, are the user's responsibility. © 2005 Lexmark International, Inc. All rights reserved. UNITED STATES GOVERNMENT RIGHTS This software - Lexmark P450 | User's Guide - Page 3
and printing photos 17 Printing an index page 17 Printing all photos from a photo storage device 19 Printing multiple copies of a photo 19 Changing the print quality 19 Selecting and editing photos 21 Adjusting the print area 21 Adjusting the appearance of photos 22 Using Color Effects - Lexmark P450 | User's Guide - Page 4
32 Bluetooth wireless support 32 Using a PictBridge-enabled digital camera to control printing photos............34 Printing a DPOF selection 34 Maintaining the printer 36 Maintaining the cartridge 36 Refilling the print cartridge 42 Troubleshooting 43 General troubleshooting 43 Photo storage - Lexmark P450 | User's Guide - Page 5
power supply and power cord provided with this product or the manufacturer's authorized replacement power supply and power cord. • Connect the power supply cord to an electrical outlet that is near the product and easily accessible. • Refer service or repairs, other than those described in the user - Lexmark P450 | User's Guide - Page 6
at a time. Bluetooth adapters • An adapter is not included with the printer. • Consult the Lexmark Web site at www.lexmark.com for late-breaking information about supported Bluetooth adapters. • Follow the instructions provided with your Bluetooth-enabled device to view and print photos. CD • Insert - Lexmark P450 | User's Guide - Page 7
find this document in the setting up hardware. printer box or on the Lexmark Web site. User's Guide Description Where to find The User's Guide gives you instructions for using the printer and other information such as: • Maintenance • Troubleshooting • Safety You can find this document in the - Lexmark P450 | User's Guide - Page 8
paths for the Web site are subject to change. Visit our Web site at www.lexmark.com. 1 Go to the Web site. 2 Select a language from the drop-down Record the following information (located on the store receipt and the back of the printer), and have it ready when you contact us so that we may serve - Lexmark P450 | User's Guide - Page 9
is a standalone device that can be used to: • View • Print • Save photos. Printer parts Use the 1 Paper support 2 Access cover 3 Memory card slots 4 Paper exit tray 5 CD drive To Load paper. Access the print cartridge. Insert memory cards. Stack paper as it exits. Insert a CD in the CD drive - Lexmark P450 | User's Guide - Page 10
the 6 PictBridge port 7 Power button 8 Control panel 9 Display To Connect a PictBridge-enabled digital camera or USB flash drive to the printer. Turn the printer on and off. Use to turn the printer on and off. Note: .After the printer is idle for five minutes, the ink level screen appears. Operate - Lexmark P450 | User's Guide - Page 11
port Using the control panel To Connect the printer to a power source. Connect a TV to the printer using a super video cable. Connect a Bluetooth adapter (only) to the printer. If you want to print a photo while using the control panel, a photo storage device must be inserted in or connected - Lexmark P450 | User's Guide - Page 12
settings on a submenu item. • Display the previous or next picture. Left Select Return Edit Start/Print • Select a menu or menu option. • Select or clear a photo from the list to be printed. • Apply a photo-editing feature. Note: This button is only lit when available. Return to the previous or - Lexmark P450 | User's Guide - Page 13
to choose one of the available options. Use 1 Setup 2 Print All / Index 3 View & Print 4 Save / Copy 5 Slide Show To Select printer settings and options, and perform maintenance tasks Print all photos or an index page. Select, edit, and print photos. Copy photos onto a CD or USB flash drive. View - Lexmark P450 | User's Guide - Page 14
options for printer operation. Some of the available options include: • Language • Power Save • Clear Settings • Restore Defaults • Bluetooth Mode • Video Output Format 1 Insert a memory card, CD, or USB flash drive; connect a PictBridge-enabled digital camera; or make sure a Bluetooth adapter is - Lexmark P450 | User's Guide - Page 15
Everyday Photo, Lexmark Premium Photo Using supported paper types • 4 x 6 in • A6 • 10 x 15 cm •L • Hagaki Before loading paper Make sure: • The paper is not used or damaged. • You do not force paper into the printer. Do not attempt to overload the paper support. Loading paper 1 Move the paper guide - Lexmark P450 | User's Guide - Page 16
Selecting the paper size 1 From the main screen, press or until Setup appears. 2 Press . 3 Press or until Paper Size appears. 4 Press . 5 Press or until the paper size you want appears. 6 Press . Selecting the paper type 1 From the main screen, press or until Setup appears. 2 Press . 3 Press or - Lexmark P450 | User's Guide - Page 17
This chapter contains basic information about printing photos using the printer operator panel. For information about printing from specific photo storage devices, see "Using photo storage devices" on page 27. Previewing photos 1 Insert a memory card, CD, or USB flash drive. 2 Press or until View - Lexmark P450 | User's Guide - Page 18
Format (DPOF) is a feature available on some digital cameras and camera phones. Index print is not available if the photo storage device contains a DPOF file. 1 Insert a memory card, CD, or USB flash drive. 2 Press until Print All / Index appears. 3 Press . If there is no DPOF information on the - Lexmark P450 | User's Guide - Page 19
device 1 Insert a memory card, CD, or USB flash drive. 2 Press until Print All / Index appears. 3 Press . 4 Press 5 Press to print each photo on its own page. to begin printing. Printing multiple copies of a photo You can print from one to ten copies of each image. 1 Insert a memory card, CD - Lexmark P450 | User's Guide - Page 20
3 Press or until Print Quality appears. 4 Press . 5 Press or until the quality you want appears. 6 Press . 7 Press to return to the previous display. 20 - Lexmark P450 | User's Guide - Page 21
photo, adjusting the brightness, removing red eye, or other color effects to edit the photos before printing or saving. All photos print area You can adjust the area of your finished prints. Notes: • Make sure a photo storage device is inserted in the printer. For more information, see "Using photo - Lexmark P450 | User's Guide - Page 22
you want it. 12 Press . 13 Press . Note: You can edit more photos before printing. Adjusting the appearance of photos You can adjust the appearance of your photos to remove red-eye, change brightness, and make other changes before printing. 1 Insert a memory card, CD, or USB flash drive. 2 Press or - Lexmark P450 | User's Guide - Page 23
Image Enhance appears. 8 Press . 9 Press or until On, Off, or Manual appears. If you select Manual, press or to move the slider and adjust the brightness. 10 Press . 11 Press to return to the previous display. 12 Press to print your photos. Removing Red Eye 1 Insert a memory card, CD, or USB flash - Lexmark P450 | User's Guide - Page 24
. 9 Press or until On appears. 10 Press . 11 Press 12 Press to return to the previous display. to print your photos. Using Color Effects The Color Effects feature lets you print in tones of Sepia, Antique Brown, Antique Gray, or black and white (B/W). Note: This setting remains in effect only - Lexmark P450 | User's Guide - Page 25
11 Press to return to the previous display. 12 Press to begin printing. Note: You can select and edit more photos before printing. 25 - Lexmark P450 | User's Guide - Page 26
flash drive; connect a PictBridge-enabled digital camera; or make sure a Bluetooth adapter is attached. 2 Press repeatedly until Slide Show appears. 3 Press . 4 Press to view the photos on the display, or press , and then press to view the photos on your TV. 5 Press . 6 Press to begin the slide show - Lexmark P450 | User's Guide - Page 27
• See the section on the device you want to use for instructions on its use. • To select and print photos from a photo storage device, see "Selecting and printing photos" on page 17. Note: The printer will not read a memory card if a second memory card is inserted, or if a PictBridge-enabled digital - Lexmark P450 | User's Guide - Page 28
faces up. Insert the card all the way in quickly. Bottom slot with adapter • xD Picture Card • Memory Stick Duo • Mini SD • RS-MMC • TransFlash Note: Be sure to connect the memory card to the adapter that came with it before inserting it in the slot. 3 Wait for a - Lexmark P450 | User's Guide - Page 29
drive into the PictBridge port on the front of the printer. Notes: • An adapter may be necessary if your USB flash drive does not fit directly into the port. • The printer reads only one photo storage device at a time. 2 Wait for the light on the printer to come on. The light blinks to indicate the - Lexmark P450 | User's Guide - Page 30
the USB flash drive. 9 Press to select Finished. Using the CD drive You can print photos from a CD, save photos to a CD, and view photos stored on a CD. You can use a CD as a source for a slide show. Your printer has been designed to work with standard high quality CD-R media. Look for the following - Lexmark P450 | User's Guide - Page 31
5 Press . 6 Press . 7 Press or to choose Copy All # Photos or Select Photos. 8 Press . Ready to Copy? appears. 9 Press . The photos are copied to the CD. 10 Press or to choose Copy to Another or Finished. 11 Press twice. 12 Press . Print an index page to store with your CD. For more information, see - Lexmark P450 | User's Guide - Page 32
documentation that came with your mobile phone for printing instructions. Bluetooth wireless support Insert a USB Bluetooth adapter into the USB port located on the rear of the printer. Note: An adapter is not included with the printer. Turning Bluetooth Mode On or Off This option lets you choose - Lexmark P450 | User's Guide - Page 33
Non-Discoverable or Discoverable appears. Notes: • Off means that Bluetooth is off. • Discoverable means that Bluetooth is on. The printer looks for other units and can be found by other units. • Non-Discoverable means that Bluetooth is on. The printer looks for other units but cannot be found by - Lexmark P450 | User's Guide - Page 34
. 3 Follow the instructions in the camera documentation to select and print photos. Printing a DPOF selection Digital Print Order Format (DPOF) is a feature available on some digital cameras and camera phones. If your digital camera supports DPOF, you can specify which photos to print, and how many - Lexmark P450 | User's Guide - Page 35
3 Insert a DPOF-enabled photo storage device. For more information, see "Inserting a memory card" on page 27. If a DPOF file is found on the memory card, the message Print All-or- Print DPOF appears. 4 Press . 5 Press or until Print DPOF appears. 6 Press . 7 Press . 35 - Lexmark P450 | User's Guide - Page 36
or until Ink Level appears. 4 Press . 5 Press to accept Done. 6 Press to return to the previous menu. Ordering supplies To order supplies or to locate a dealer near you, visit our Web site at www.lexmark.com. Item Color cartridge Part number 33 or 35 Note: Photo paper and other supplies are also - Lexmark P450 | User's Guide - Page 37
Removing a used print cartridge 1 Make sure the printer is on. 2 Lift the access cover. The print cartridge carrier moves and stops at the loading position, unless the printer is busy. 3 Press down on the cartridge lever to raise the cartridge lid. 4 Remove the used print cartridge. 37 - Lexmark P450 | User's Guide - Page 38
Installing a print cartridge 1 Remove the sticker and tape from the back and bottom of the cartridge. Warning: Do not touch the gold contact area on the back or the metal nozzles on the bottom of the cartridge. 2 Insert the cartridge in the carrier. 3 Snap the lid closed. 38 - Lexmark P450 | User's Guide - Page 39
new cartridge • Want to improve print quality 1 Press or until Setup appears. 2 Press . 3 Press or until Align Cartridge appears. 4 Press . 5 Press to accept Align. 6 Press to accept Done. 7 Press to return to the previous menu. If you aligned the cartridge to improve print quality, print your photo - Lexmark P450 | User's Guide - Page 40
4 Press . 5 Press to accept Clean. 6 Press to accept Done. 7 Print your photo again. If print quality has not improved, continue with the following procedure. Wiping the print cartridge nozzles and contacts Wipe the print cartridge nozzles and contacts when you: • Notice blank or faint areas in the - Lexmark P450 | User's Guide - Page 41
. 5 Press to return to the Setup menu. Using a genuine Lexmark print cartridge When you install a print cartridge, one of the following messages appears: • Lexmark recommends genuine ink. • Non-Lexmark cartridge detected. See user guide for details. • Thank you for using genuine Lexmark supplies. 41 - Lexmark P450 | User's Guide - Page 42
cartridge. Refilling a cartridge can affect print quality and may cause damage to the printer. For best results, use Lexmark supplies. Recycling Lexmark products To return Lexmark products to Lexmark for recycling: 1 Visit our Web site at www.lexmark.com/recycle. 2 Follow the instructions on - Lexmark P450 | User's Guide - Page 43
not print or printer does not respond" on page 44 • "Poor photo quality" on page 45 • "Poor quality at the edges of the page" on page 46 • "Paper jam" on page 46 • "Paper misfeeds" on page 46 • "Printer does not feed paper" on page 46 Power button is not lit 1 Disconnect the power supply cord from - Lexmark P450 | User's Guide - Page 44
4 Press . 5 Press ten times. 6 Press . 7 Press or until the language you want appears. 8 Press . Page does not print or printer does not respond If an error message appears, see "Error messages on display" on page 47. If the Power button light is not on, see "Power button is not lit" on page 43. 44 - Lexmark P450 | User's Guide - Page 45
remove the power supply from the printer. 4 Push firmly to reconnect the power supply to the printer. 5 Reinsert the power supply cord into the wall outlet. 6 Press . Poor photo quality Examples of poor photo quality include: • Blank pages • Dark print • Faded print • Incorrect colors • Light and - Lexmark P450 | User's Guide - Page 46
print Check the ink level, and install a new print cartridge if necessary. Use a different brand of paper. Each paper brand accepts ink differently and prints with color variations. Use only new off the printer. 2 Firmly grasp the paper, and gently pull it out. 3 Press to turn the printer back on. - Lexmark P450 | User's Guide - Page 47
sheet at a time. Photo storage device troubleshooting • "Memory card cannot be inserted" on page 47 • "Nothing happens when a memory card is inserted" on page 47 • "Error messages on display" on page 47 • "PictBridge-enabled device not recognized" on page 47 • "Cannot print from PictBridge-enabled - Lexmark P450 | User's Guide - Page 48
from PictBridge-enabled devices Enable PictBridge printing on the device by selecting the correct the memory card from the printer. Error messages • "Start errors" on page 48 • "Run errors" on page 48 Start errors The printer was unable to start. This includes the following errors: • 0000 • 0001 • - Lexmark P450 | User's Guide - Page 49
Press to turn the printer off. 2 Disconnect the power supply cord from the wall outlet. 3 Gently remove the power supply from the printer. 4 Push firmly to reconnect the power supply to the printer. 5 Reinsert the power supply cord into the wall outlet. 6 Press . Contact Lexmark Customer Support. 49 - Lexmark P450 | User's Guide - Page 50
The LexmarkTM P450, type 4350 in accordance with the instructions, may cause harmful user's authority to operate this equipment. Any questions regarding this compliance information statement should be directed to: Director of Lexmark Technology & Services Lexmark International, Inc. 740 West New - Lexmark P450 | User's Guide - Page 51
designed for use within certain voltage limits. A declaration of conformity with the requirements of the directives has been signed by the Director of Manufacturing and Technical Support, Lexmark International, Inc., S.A., Boigny, France. This product satisfies the Class B limits of EN 55022 and - Lexmark P450 | User's Guide - Page 52
dBA Printing 44 dBA Waste from Electrical and Electronic Equipment (WEEE) directive The Lexmark Web site at www.lexmark.com for your local sales office phone number. Power consumption The following table documents the power consumption characteristics of the product. Mode Description Printing - Lexmark P450 | User's Guide - Page 53
after this product is not used for a specified period of time, called the Power Saver Timeout. The factory default Power Saver Timeout for this product is 20 minutes. By using the printer configuration menus, the Power Saver Timeout can be modified between 10 minutes and 30 minutes. Setting the - Lexmark P450 | User's Guide - Page 54
Index A access cover 9 adjusting print area 21 Align Cartridge feature 39 aligning print cartridge from the control panel 39 all photos printing 19 Antique Brown 24 Antique Gray 24 B B/W (black and white) 24 black and white printing 24 Bluetooth 32 Mode 32 UAA 32 brightness, adjusting 23 buttons 11 - Lexmark P450 | User's Guide - Page 55
16 Paper Size setting 16 paper support 9 Paper Type setting 16 part number cartridge 36 personal digital assistant 32 phone camera 32 photo storage device troubleshooting 47 photos adjusting print area 21 cropping 21 editing 21 previewing 17 printing from PictBridge-enabled camera 34 rotating - Lexmark P450 | User's Guide - Page 56
quality 19 selecting paper types 16 Sepia Tone Print 24 Setup 13 Slide Show 13 slide show, viewing 26 supplies, ordering 36 T Test Page feature 41 test page, printing 41 troubleshooting general 43 photo storage device 47 troubleshooting error messages 0000-0003 48 0200 48 1003 48 1102 48 1200-1207
-
 1
1 -
 2
2 -
 3
3 -
 4
4 -
 5
5 -
 6
6 -
 7
7 -
8
-
9
-
10
-
11
-
12
-
13
-
14
-
15
-
16
-
17
-
18
-
19
-
20
-
21
-
22
-
23
-
24
-
25
-
26
-
27
-
28
-
29
-
30
-
31
-
32
-
33
-
34
-
35
-
36
-
37
-
38
-
39
-
40
-
41
-
42
-
43
-
44
-
45
-
46
-
47
-
48
-
49
-
50
-
51
-
52
-
53
-
54
-
55
-
56
 |
 |
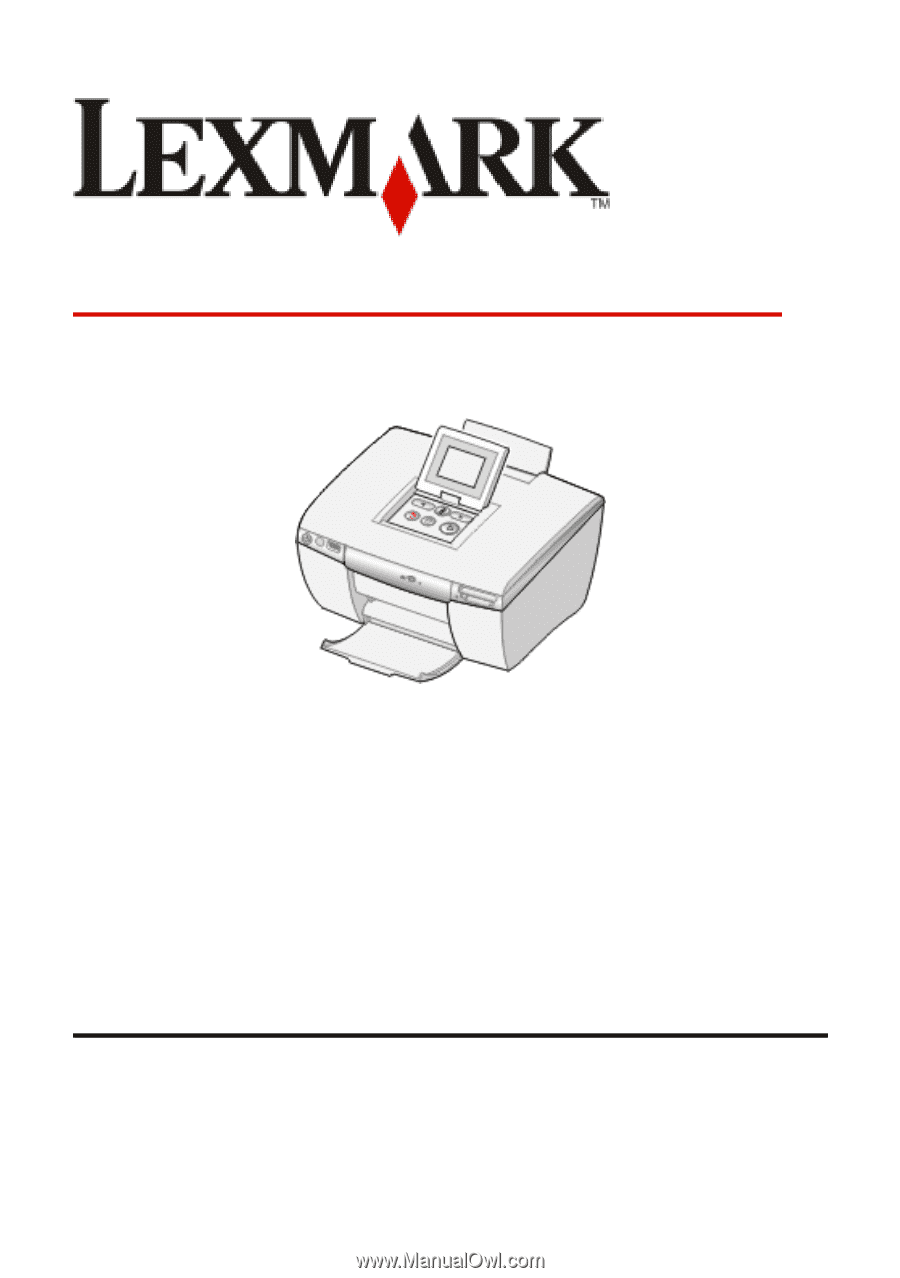
450 Series Memory Maker
User's Guide
August 2005
www.lexmark.com
Lexmark and Lexmark with diamond design are trademarks of Lexmark International, Inc.,
registered in the United States and/or other countries.
© 2005 Lexmark International, Inc.
All rights reserved.
740 West New Circle Road
Lexington, Kentucky 40550