Lexmark Pinnacle Pro901 User's Guide - Page 112
Switching between USB, Ethernet, and wireless connections (Macintosh only), Selecting the printer - driver windows 8
 |
View all Lexmark Pinnacle Pro901 manuals
Add to My Manuals
Save this manual to your list of manuals |
Page 112 highlights
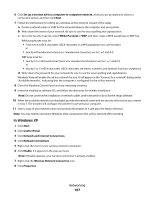
3 Follow the instructions on the computer screen for configuring a printer on an Ethernet network. 4 Select the Network printer (see "Selecting the printer" on page 112). Note: You will need a USB cable to complete the configuration. Selecting the printer 1 Click or Start. 2 In the Start Search or Run box, type control printers. 3 Press Enter, or click OK. The printer folder opens. 4 Right-click the printer you want to use, either Network or USB. 5 Select Set as Default Printer from the menu. 6 Close the Printers or Printers and Faxes window. Switching between USB, Ethernet, and wireless connections (Macintosh only) You can change the way you access your printer depending on your needs. The following procedures below assume that you have configured your printer for one type of connection and that the drivers are installed on the computer. See related topics on troubleshooting specific connection types if you encounter difficulties during configuration. Note: The printer supports one active local connection (USB) and one active network connection (Ethernet or wireless) at a time. It is not possible to use both Ethernet and wireless at the same time. Using the printer wirelessly Select the connection type that describes how you currently access your printer: If the printer is currently set up locally (using USB connection) 1 Close all open software applications. 2 Insert the installation software CD. If the installation dialog does not appear after a minute, then click the CD icon on the desktop. 3 Double-click the Lexmark Extras folder. 4 Double-click Lexmark Setup Assistant. 5 Follow the instructions on the computer screen for configuring the printer wirelessly. Note: There is no need to remove the USB cable connecting the printer to the computer during wireless configuration. If the printer is currently set up for Ethernet 1 Unplug the Ethernet cable from the printer. 2 Place the printer close to the computer you want to use to configure the printer for wireless access. Note: You will need to connect the printer to the computer with a USB cable. Make sure the printer is close enough to the computer for your USB cable to reach both. Networking 112
-
 1
1 -
2
-
3
-
4
-
5
-
6
-
7
-
8
-
9
-
10
-
11
-
12
-
13
-
14
-
15
-
16
-
17
-
18
-
19
-
20
-
21
-
22
-
23
-
24
-
25
-
26
-
27
-
28
-
29
-
30
-
31
-
32
-
33
-
34
-
35
-
36
-
37
-
38
-
39
-
40
-
41
-
42
-
43
-
44
-
45
-
46
-
47
-
48
-
49
-
50
-
51
-
52
-
53
-
54
-
55
-
56
-
57
-
58
-
59
-
60
-
61
-
62
-
63
-
64
-
65
-
66
-
67
-
68
-
69
-
70
-
71
-
72
-
73
-
74
-
75
-
76
-
77
-
78
-
79
-
80
-
81
-
82
-
83
-
84
-
85
-
86
-
87
-
88
-
89
-
90
-
91
-
92
-
93
-
94
-
95
-
96
-
97
-
98
-
99
-
100
-
101
-
102
-
103
-
104
-
105
-
106
-
 107
107 -
 108
108 -
 109
109 -
 110
110 -
 111
111 -
 112
112 -
 113
113 -
 114
114 -
 115
115 -
 116
116 -
 117
117 -
118
-
119
-
120
-
121
-
122
-
123
-
124
-
125
-
126
-
127
-
128
-
129
-
130
-
131
-
132
-
133
-
134
-
135
-
136
-
137
-
138
-
139
-
140
-
141
-
142
-
143
-
144
-
145
-
146
-
147
-
148
-
149
-
150
-
151
-
152
-
153
-
154
-
155
-
156
-
157
-
158
-
159
-
160
-
161
-
162
-
163
-
164
-
165
-
166
-
167
-
168
-
169
-
170
-
171
-
172
-
173
-
174
-
175
-
176
-
177
-
178
-
179
-
180
-
181
-
182
-
183
-
184
-
185
-
186
-
187
-
188
-
189
-
190
-
191
-
192
-
193
-
194
-
195
-
196
-
197
-
198
-
199
 |
 |
