Lexmark Pinnacle Pro901 User's Guide - Page 130
Creating and customizing printer solutions, Using the printer software, Using a Web browser
 |
View all Lexmark Pinnacle Pro901 manuals
Add to My Manuals
Save this manual to your list of manuals |
Page 130 highlights
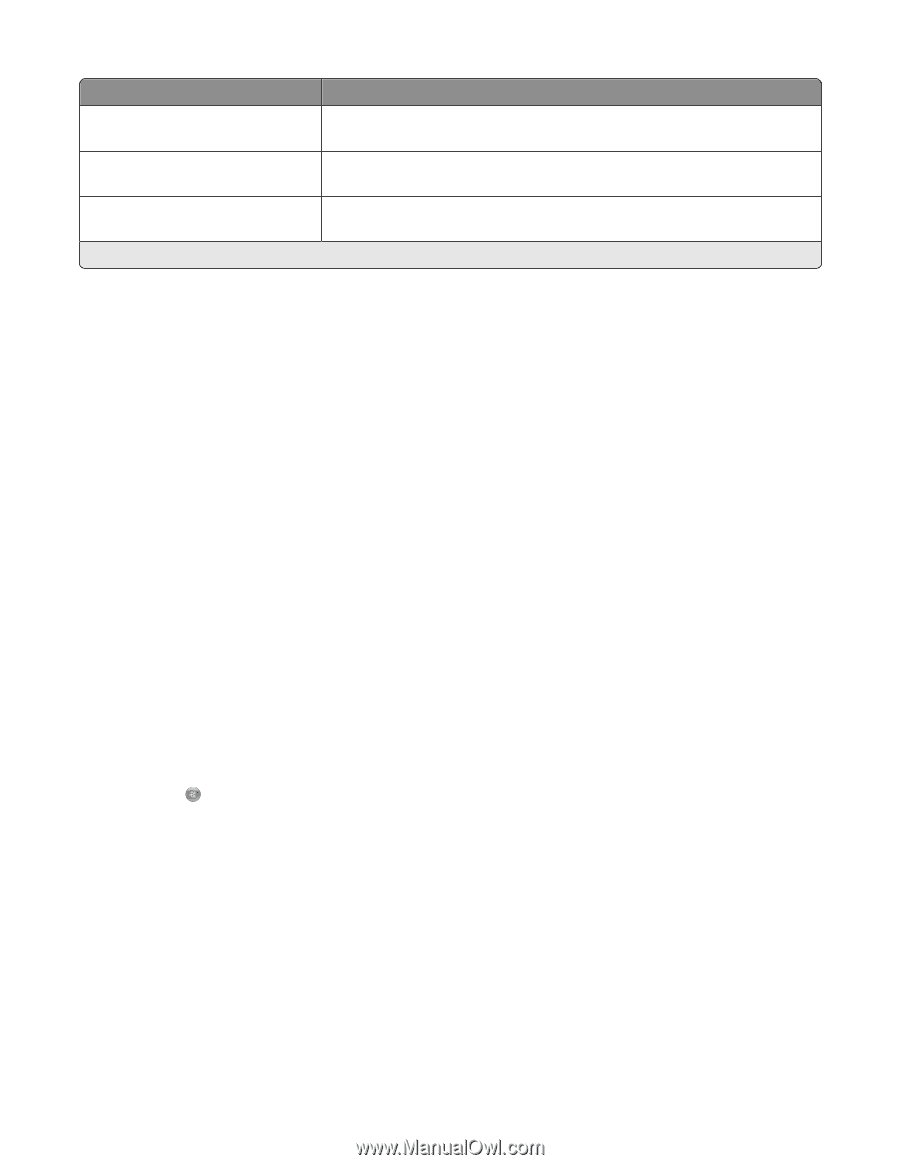
Solution Description Scan to Email E-mail scanned documents directly from the printer using pre-defined names or contacts from the address book. Scan to Fax Fax documents directly from the printer using pre-defined names or contacts from the address book. Scan to File Scan and save files to a previously selected directory on a computer using pre-defined settings. * You can select one or more of these solutions as your printer screen saver. Examples: • If you are a business owner or supervisor who frequently prints a work schedule, then you could create a Print a File solution. Specify the location of your schedule file, and then name the solution Print Schedule. The next time you need to print a copy of the current schedule, simply select Print Schedule from the SmartSolutions menu on the printer control panel. The printer automatically finds the file and prints it. • If you frequently scan and fax a document to your lawyer using the same settings, then you could create a Scan to Fax solution and name it Fax to Lawyer. The next time you want to fax a document, you simply have to load the document and select Fax to Lawyer from the SmartSolutions menu on the printer control panel. The printer automatically applies your chosen settings, selects your lawyer as the fax recipient, and then sends the fax. Note: You need to add your printer to the Solution Center before you can start creating or customizing solutions. Creating and customizing printer solutions Before you begin, make sure: • Your printer and computer are each connected to the Internet through an Ethernet or wireless connection. • Your printer is powered on. 1 Launch the SmartSolutions Web site: Using the printer software a Open the printer program folder: For Windows users 1 Click or Start. 2 Click All Programs or Programs, and then select the printer program folder from the list. For Macintosh users From the Finder desktop, double-click the printer program folder. b Click Visit Lexmark SmartSolutions. Using a Web browser a Open a Web browser. b Type smartsolutions.lexmark.com in the address bar, and then press Enter. 2 From the SmartSolutions Web site, log in or create an account. Using SmartSolutions 130
-
 1
1 -
2
-
3
-
4
-
5
-
6
-
7
-
8
-
9
-
10
-
11
-
12
-
13
-
14
-
15
-
16
-
17
-
18
-
19
-
20
-
21
-
22
-
23
-
24
-
25
-
26
-
27
-
28
-
29
-
30
-
31
-
32
-
33
-
34
-
35
-
36
-
37
-
38
-
39
-
40
-
41
-
42
-
43
-
44
-
45
-
46
-
47
-
48
-
49
-
50
-
51
-
52
-
53
-
54
-
55
-
56
-
57
-
58
-
59
-
60
-
61
-
62
-
63
-
64
-
65
-
66
-
67
-
68
-
69
-
70
-
71
-
72
-
73
-
74
-
75
-
76
-
77
-
78
-
79
-
80
-
81
-
82
-
83
-
84
-
85
-
86
-
87
-
88
-
89
-
90
-
91
-
92
-
93
-
94
-
95
-
96
-
97
-
98
-
99
-
100
-
101
-
102
-
103
-
104
-
105
-
106
-
107
-
108
-
109
-
110
-
111
-
112
-
113
-
114
-
115
-
116
-
117
-
118
-
119
-
120
-
121
-
122
-
123
-
124
-
 125
125 -
 126
126 -
 127
127 -
 128
128 -
 129
129 -
 130
130 -
 131
131 -
 132
132 -
 133
133 -
 134
134 -
 135
135 -
136
-
137
-
138
-
139
-
140
-
141
-
142
-
143
-
144
-
145
-
146
-
147
-
148
-
149
-
150
-
151
-
152
-
153
-
154
-
155
-
156
-
157
-
158
-
159
-
160
-
161
-
162
-
163
-
164
-
165
-
166
-
167
-
168
-
169
-
170
-
171
-
172
-
173
-
174
-
175
-
176
-
177
-
178
-
179
-
180
-
181
-
182
-
183
-
184
-
185
-
186
-
187
-
188
-
189
-
190
-
191
-
192
-
193
-
194
-
195
-
196
-
197
-
198
-
199
 |
 |