Lexmark Prestige Pro800 SmartSolutions User's Guide - Page 21
Saving scanned items (Scan to File), Save and Sync, Browse Icons, Preview, More Options
 |
View all Lexmark Prestige Pro800 manuals
Add to My Manuals
Save this manual to your list of manuals |
Page 21 highlights
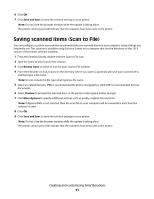
6 Click OK. 7 Click Save and Sync to send the solution settings to your printer. Note: Do not close the browser window while the update is taking place. The printer control panel will indicate that the solutions have been sent to the printer. Saving scanned items (Scan to File) You can configure a custom scan solution to automatically save scanned items on your computer using settings you frequently use. This solution is available using Solution Center on a computer that has the Windows or Mac OS X version of the printer software installed. 1 From the Solution Library, double-click the Scan to File icon. 2 Type the name of your Scan to File solution. 3 Click Browse Icons to select an icon for your Scan to File solution. 4 From the Filename section, browse to the directory where you want to automatically save your scanned item, and then type a file name. Note: Do not include the file type when typing a file name. 5 Select an output file type. JPEG is recommended for photos and graphics, while PDF is recommended for text documents. 6 Select Preview to preview the scanned item on the printer control panel before saving it. 7 Click More Options to specify additional settings such as quality, original size and color. Note: If Append Date is not selected, then the scan file on your computer will be overwritten each time the solution is used. 8 Click OK. 9 Click Save and Sync to send the solution settings to your printer. Note: Do not close the browser window while the update is taking place. The printer control panel will indicate that the solutions have been sent to the printer. Creating and customizing SmartSolutions 21
-
 1
1 -
2
-
3
-
4
-
5
-
6
-
7
-
8
-
9
-
10
-
11
-
12
-
13
-
14
-
15
-
 16
16 -
 17
17 -
 18
18 -
 19
19 -
 20
20 -
 21
21 -
 22
22 -
 23
23 -
 24
24 -
 25
25 -
 26
26 -
27
-
28
-
29
-
30
-
31
-
32
-
33
-
34
-
35
-
36
-
37
-
38
-
39
-
40
-
41
-
42
-
43
-
44
-
45
-
46
-
47
-
48
-
49
-
50
-
51
 |
 |