Lexmark Prestige Pro800 SmartSolutions User's Guide - Page 33
Cannot add printer, NTERNET, CONNECTION, WIRELESS
 |
View all Lexmark Prestige Pro800 manuals
Add to My Manuals
Save this manual to your list of manuals |
Page 33 highlights
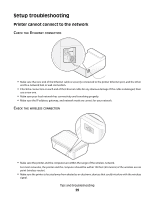
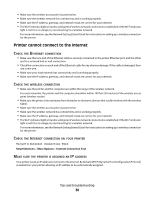
Cannot add printer Connection problems prevent communication between the printer and computer. Make sure all connections are working properly. CHECK THE INTERNET CONNECTION Make sure the printer and computer are each connected to the Internet. You may need to configure proxy settings on the printer to enable it to connect to the Internet. For more information, see "What is a proxy?" on page 44. CHECK THE USB CONNECTION Note: If the printer is only connected to the computer through a USB cable, you will need to connect it to a wired or wireless network with Internet connection. • Check the USB cable for any obvious damage. If the cable is damaged, then use a new one. • Remove and reconnect the USB cable connected to your printer or computer: 1 Unplug and firmly plug the square end of the USB cable into the back of the printer. 2 Unplug and firmly plug the rectangular end of the USB cable into the USB port of the computer. The USB port is marked with a USB symbol. If you continue to have problems, then try another USB port on the computer. You may have connected to a defective port. CHECK THE ETHERNET CONNECTION • Make sure that one end of the Ethernet cable is securely connected to the printer Ethernet port, and the other end to a network hub or wall connection. • Check the connectors on each end of the Ethernet cable for any obvious damage. If the cable is damaged, then use a new one. • Make sure your local network has connectivity and is working properly. • Make sure the IP address, gateway, and network mask are correct for your network. CHECK THE WIRELESS CONNECTION • Make sure the printer and the computer are within the range of the wireless network. For most networks, the printer and the computer should be within 100 feet (30 meters) of the wireless access point (wireless router). • Make sure the printer is located away from obstacles or electronic devices that could interfere with the wireless signal. • Make sure the wireless access point is powered on. • Make sure your local network has connectivity and is working properly. • Make sure the IP address, gateway, and network mask are correct for your network. • The Wi-Fi indicator light is lit and is solid green if wireless network connection is established. If the Wi-Fi indicator light is not lit or is orange, try reconnecting to a wireless network. For more information, see the Network Getting Started Guide for instructions in setting up a wireless connection for the printer. Tips and troubleshooting 33
-
 1
1 -
2
-
3
-
4
-
5
-
6
-
7
-
8
-
9
-
10
-
11
-
12
-
13
-
14
-
15
-
16
-
17
-
18
-
19
-
20
-
21
-
22
-
23
-
24
-
25
-
26
-
27
-
 28
28 -
 29
29 -
 30
30 -
 31
31 -
 32
32 -
 33
33 -
 34
34 -
 35
35 -
 36
36 -
 37
37 -
 38
38 -
39
-
40
-
41
-
42
-
43
-
44
-
45
-
46
-
47
-
48
-
49
-
50
-
51
 |
 |