Lexmark Pro915 User's Guide - Page 158
Make sure to enter a valid recipient e-mail address, Make sure the recipient mailbox is not full
 |
View all Lexmark Pro915 manuals
Add to My Manuals
Save this manual to your list of manuals |
Page 158 highlights
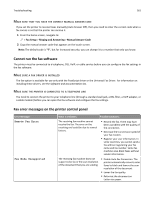
Troubleshooting 158 MAKE SURE TO ENTER A VALID RECIPIENT E‑MAIL ADDRESS MAKE SURE THE RECIPIENT MAILBOX IS NOT FULL This causes e‑mail to bounce back to your inbox. Cannot attach files SELECT A SUPPORTED FILE TYPE (JPEG OR PDF) MAKE SURE THE FILE SIZE IS NOT TOO LARGE Fax troubleshooting Note: The fax function is available only in select printer models. • "Fax troubleshooting checklist" on page 158 • "Cannot send faxes" on page 159 • "Cannot receive faxes" on page 160 • "Cannot run the fax software" on page 161 • "Fax error messages on the printer control panel" on page 161 For detailed descriptions of common terms and tasks, see the following: • "Setting up the printer to fax" on page 71 • "Faxing FAQ" on page 88 Fax troubleshooting checklist If you encounter problems sending and receiving faxes, then check the connection first: 1 Check for a dial tone on the telephone line by plugging an analog telephone into the wall jack, DSL filter, VoIP device, or cable modem where you connected the printer. Make sure you plug the telephone into the same port. If you do not hear a dial tone, then contact your line provider. 2 While the printer is connected to the telephone line, check for a dial tone by plugging an analog telephone into the port of the printer. If you do not hear a dial tone, then use the checklist below. Listen for a dial tone after checking each item. If you hear a dial tone but still have problems sending and receiving faxes, then see the other topics in this section. Connection checklist • Make sure that the printer and other devices on the line (if applicable) are set up and configured correctly according to your setup scenario. • Make sure that the cables are connected to the correct ports. • Make sure that the cables are securely plugged in.
-
 1
1 -
2
-
3
-
4
-
5
-
6
-
7
-
8
-
9
-
10
-
11
-
12
-
13
-
14
-
15
-
16
-
17
-
18
-
19
-
20
-
21
-
22
-
23
-
24
-
25
-
26
-
27
-
28
-
29
-
30
-
31
-
32
-
33
-
34
-
35
-
36
-
37
-
38
-
39
-
40
-
41
-
42
-
43
-
44
-
45
-
46
-
47
-
48
-
49
-
50
-
51
-
52
-
53
-
54
-
55
-
56
-
57
-
58
-
59
-
60
-
61
-
62
-
63
-
64
-
65
-
66
-
67
-
68
-
69
-
70
-
71
-
72
-
73
-
74
-
75
-
76
-
77
-
78
-
79
-
80
-
81
-
82
-
83
-
84
-
85
-
86
-
87
-
88
-
89
-
90
-
91
-
92
-
93
-
94
-
95
-
96
-
97
-
98
-
99
-
100
-
101
-
102
-
103
-
104
-
105
-
106
-
107
-
108
-
109
-
110
-
111
-
112
-
113
-
114
-
115
-
116
-
117
-
118
-
119
-
120
-
121
-
122
-
123
-
124
-
125
-
126
-
127
-
128
-
129
-
130
-
131
-
132
-
133
-
134
-
135
-
136
-
137
-
138
-
139
-
140
-
141
-
142
-
143
-
144
-
145
-
146
-
147
-
148
-
149
-
150
-
151
-
152
-
 153
153 -
 154
154 -
 155
155 -
 156
156 -
 157
157 -
 158
158 -
 159
159 -
 160
160 -
 161
161 -
 162
162 -
 163
163 -
164
-
165
-
166
-
167
-
168
-
169
-
170
-
171
-
172
-
173
-
174
-
175
-
176
-
177
-
178
-
179
-
180
-
181
-
182
-
183
-
184
-
185
-
186
-
187
-
188
-
189
-
190
-
191
-
192
-
193
-
194
-
195
-
196
-
197
-
198
-
199
-
200
 |
 |