Lexmark Pro915 User's Guide - Page 174
Enter, Configuration, TCP/IP, Set static IP address, Submit, KNOWN, ISSUES, ACCESS, POINT, WIRELESS
 |
View all Lexmark Pro915 manuals
Add to My Manuals
Save this manual to your list of manuals |
Page 174 highlights
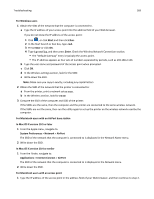
Troubleshooting 174 To assign a static IP address to the printer: 1 Complete the wireless setup, allowing the printer to receive a DHCP address from a DHCP server on the network. 2 Print a network setup page to see what IP address is currently assigned to the printer. 3 Open a Web browser and then type the printer IP address in the address field. Press Enter. 4 Click Configuration > TCP/IP > Set static IP address. 5 In the Address field, type the IP address you want to assign to the printer, and then click Submit. Confirm that the IP address is updated by typing the static IP address in the browser address field and checking to see if the printer Web page reloads. For more information on assigning static IP addresses, see the documentation that came with your router and operating system. CHECK FOR KNOWN ISSUES WITH THE ACCESS POINT Some wireless routers have documented defects that were identified and resolved by the manufacturers. Visit the company Web site of the router manufacturer. Check for firmware updates and other advice from the manufacturer. See the documentation that came with your wireless router if you are not sure how to reach the manufacturer Web site. CHECK FOR WIRELESS NETWORK ADAPTER UPDATES If you are having trouble printing from one particular computer, then check the Web site of the manufacturer of the wireless network adapter card in that computer. It is possible that there is an updated driver available that could resolve the issue. CHANGE ALL NETWORK DEVICES TO THE SAME TYPE While it is possible to successfully mix 802.11b, 802.11g, and 802.11n devices on the same wireless network, the faster devices will sometimes prevent the slower devices from communicating. Try turning on only the network devices of the same type and see if network communications improve. If this solves the problem, then you may want to upgrade your older devices with newer wireless network adapters. PURCHASE A NEW ROUTER If your router is several years old, then it may not be fully compatible with the newer wireless devices on your network. Consider purchasing a newer router that is fully compliant with the 802.11 IEEE specifications.
-
 1
1 -
2
-
3
-
4
-
5
-
6
-
7
-
8
-
9
-
10
-
11
-
12
-
13
-
14
-
15
-
16
-
17
-
18
-
19
-
20
-
21
-
22
-
23
-
24
-
25
-
26
-
27
-
28
-
29
-
30
-
31
-
32
-
33
-
34
-
35
-
36
-
37
-
38
-
39
-
40
-
41
-
42
-
43
-
44
-
45
-
46
-
47
-
48
-
49
-
50
-
51
-
52
-
53
-
54
-
55
-
56
-
57
-
58
-
59
-
60
-
61
-
62
-
63
-
64
-
65
-
66
-
67
-
68
-
69
-
70
-
71
-
72
-
73
-
74
-
75
-
76
-
77
-
78
-
79
-
80
-
81
-
82
-
83
-
84
-
85
-
86
-
87
-
88
-
89
-
90
-
91
-
92
-
93
-
94
-
95
-
96
-
97
-
98
-
99
-
100
-
101
-
102
-
103
-
104
-
105
-
106
-
107
-
108
-
109
-
110
-
111
-
112
-
113
-
114
-
115
-
116
-
117
-
118
-
119
-
120
-
121
-
122
-
123
-
124
-
125
-
126
-
127
-
128
-
129
-
130
-
131
-
132
-
133
-
134
-
135
-
136
-
137
-
138
-
139
-
140
-
141
-
142
-
143
-
144
-
145
-
146
-
147
-
148
-
149
-
150
-
151
-
152
-
153
-
154
-
155
-
156
-
157
-
158
-
159
-
160
-
161
-
162
-
163
-
164
-
165
-
166
-
167
-
168
-
 169
169 -
 170
170 -
 171
171 -
 172
172 -
 173
173 -
 174
174 -
 175
175 -
 176
176 -
 177
177 -
 178
178 -
 179
179 -
180
-
181
-
182
-
183
-
184
-
185
-
186
-
187
-
188
-
189
-
190
-
191
-
192
-
193
-
194
-
195
-
196
-
197
-
198
-
199
-
200
 |
 |