Lexmark Pro915 User's Guide - Page 93
How do I view the fax history of the printer?, How do I print a fax on both sides of the paper?
 |
View all Lexmark Pro915 manuals
Add to My Manuals
Save this manual to your list of manuals |
Page 93 highlights
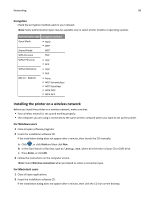
Faxing 93 How do I view the fax history of the printer? You can view the fax history of the printer on the display. You can also print reports of sent or received faxes, or both. From the printer control panel, navigate to: > Fax Setup > Fax Reports > History on Screen How do I print a fax on both sides of the paper? 1 From the home screen, navigate to: > Fax Setup > 2‑Sided Faxes 2 Select a duplex setting: • Never-Incoming faxes are never printed on both sides of the paper. • Always-Incoming faxes are always printed on both sides of the paper. 3 Touch Accept. How do I forward a fax? When you enable this option, all the faxes that you receive are automatically forwarded until you disable it. 1 From the home screen, navigate to: > Fax Setup > Ringing and Answering > Fax Forward 2 Select Forward or Print & Forward, and then touch Accept. 3 Enter the number to which you want to forward the fax, and then touch Accept. To disable fax forwarding, return to the Fax Forward menu, and then select Off. How do I block faxes? You can block faxes from specific numbers. You can also block junk faxes and faxes from unidentified senders (senders without a Caller ID). This feature is helpful if you want to receive faxes automatically but want to filter the faxes that you receive. Blocking faxes from specific numbers 1 From the home screen, navigate to: > Fax Setup > Fax Blocking > Turn On/Off > On > Accept 2 Add a number to block. a Navigate to: Block Faxes From > Add a Number to Block > Add a Name b Enter the contact name, and then touch . c Touch Add a Fax Number. d Enter the fax number of the contact, and then touch Accept. e Touch Accept again. You can block up to 50 numbers.
-
 1
1 -
2
-
3
-
4
-
5
-
6
-
7
-
8
-
9
-
10
-
11
-
12
-
13
-
14
-
15
-
16
-
17
-
18
-
19
-
20
-
21
-
22
-
23
-
24
-
25
-
26
-
27
-
28
-
29
-
30
-
31
-
32
-
33
-
34
-
35
-
36
-
37
-
38
-
39
-
40
-
41
-
42
-
43
-
44
-
45
-
46
-
47
-
48
-
49
-
50
-
51
-
52
-
53
-
54
-
55
-
56
-
57
-
58
-
59
-
60
-
61
-
62
-
63
-
64
-
65
-
66
-
67
-
68
-
69
-
70
-
71
-
72
-
73
-
74
-
75
-
76
-
77
-
78
-
79
-
80
-
81
-
82
-
83
-
84
-
85
-
86
-
87
-
 88
88 -
 89
89 -
 90
90 -
 91
91 -
 92
92 -
 93
93 -
 94
94 -
 95
95 -
 96
96 -
 97
97 -
 98
98 -
99
-
100
-
101
-
102
-
103
-
104
-
105
-
106
-
107
-
108
-
109
-
110
-
111
-
112
-
113
-
114
-
115
-
116
-
117
-
118
-
119
-
120
-
121
-
122
-
123
-
124
-
125
-
126
-
127
-
128
-
129
-
130
-
131
-
132
-
133
-
134
-
135
-
136
-
137
-
138
-
139
-
140
-
141
-
142
-
143
-
144
-
145
-
146
-
147
-
148
-
149
-
150
-
151
-
152
-
153
-
154
-
155
-
156
-
157
-
158
-
159
-
160
-
161
-
162
-
163
-
164
-
165
-
166
-
167
-
168
-
169
-
170
-
171
-
172
-
173
-
174
-
175
-
176
-
177
-
178
-
179
-
180
-
181
-
182
-
183
-
184
-
185
-
186
-
187
-
188
-
189
-
190
-
191
-
192
-
193
-
194
-
195
-
196
-
197
-
198
-
199
-
200
 |
 |
