Lexmark T620 Finisher Quick Reference
Lexmark T620 Manual
 |
View all Lexmark T620 manuals
Add to My Manuals
Save this manual to your list of manuals |
Lexmark T620 manual content summary:
- Lexmark T620 | Finisher Quick Reference - Page 1
to ensure the stapler is functioning properly. 10 Close the finisher output bin cover. Troubleshooting If stapled print jobs do not bind together in a neat set, you may need to replace the paper alignment wheels. To order replacement wheels with a maintenance kit, use part number 99A2480. Refer to
-
 1
1
 |
 |
Lexmark™ T620 and T622
StapleSmart™ Finisher
Quick Reference
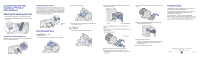
Attaching the stacking paper bail
1
Lift the finisher output bin cover until it locks into position.
2
Snap
the two paper bail posts into the slots under the output
bin cover.
Adjusting the stacking paper bail
Slide the end of the paper bail in or out until the paper size for your
print job is aligned with the arrow.
Using the paper bail hook
The paper bail hook prevents individual sheets in the output bin
from sliding forward when a large stapled or offset job is pushed
into the output bin. To use the paper bail hook, adjust the paper
bail to the longest paper size in your printer and rotate the hook
from the storage position. When not using the paper bail hook,
snap
it back into the storage position.
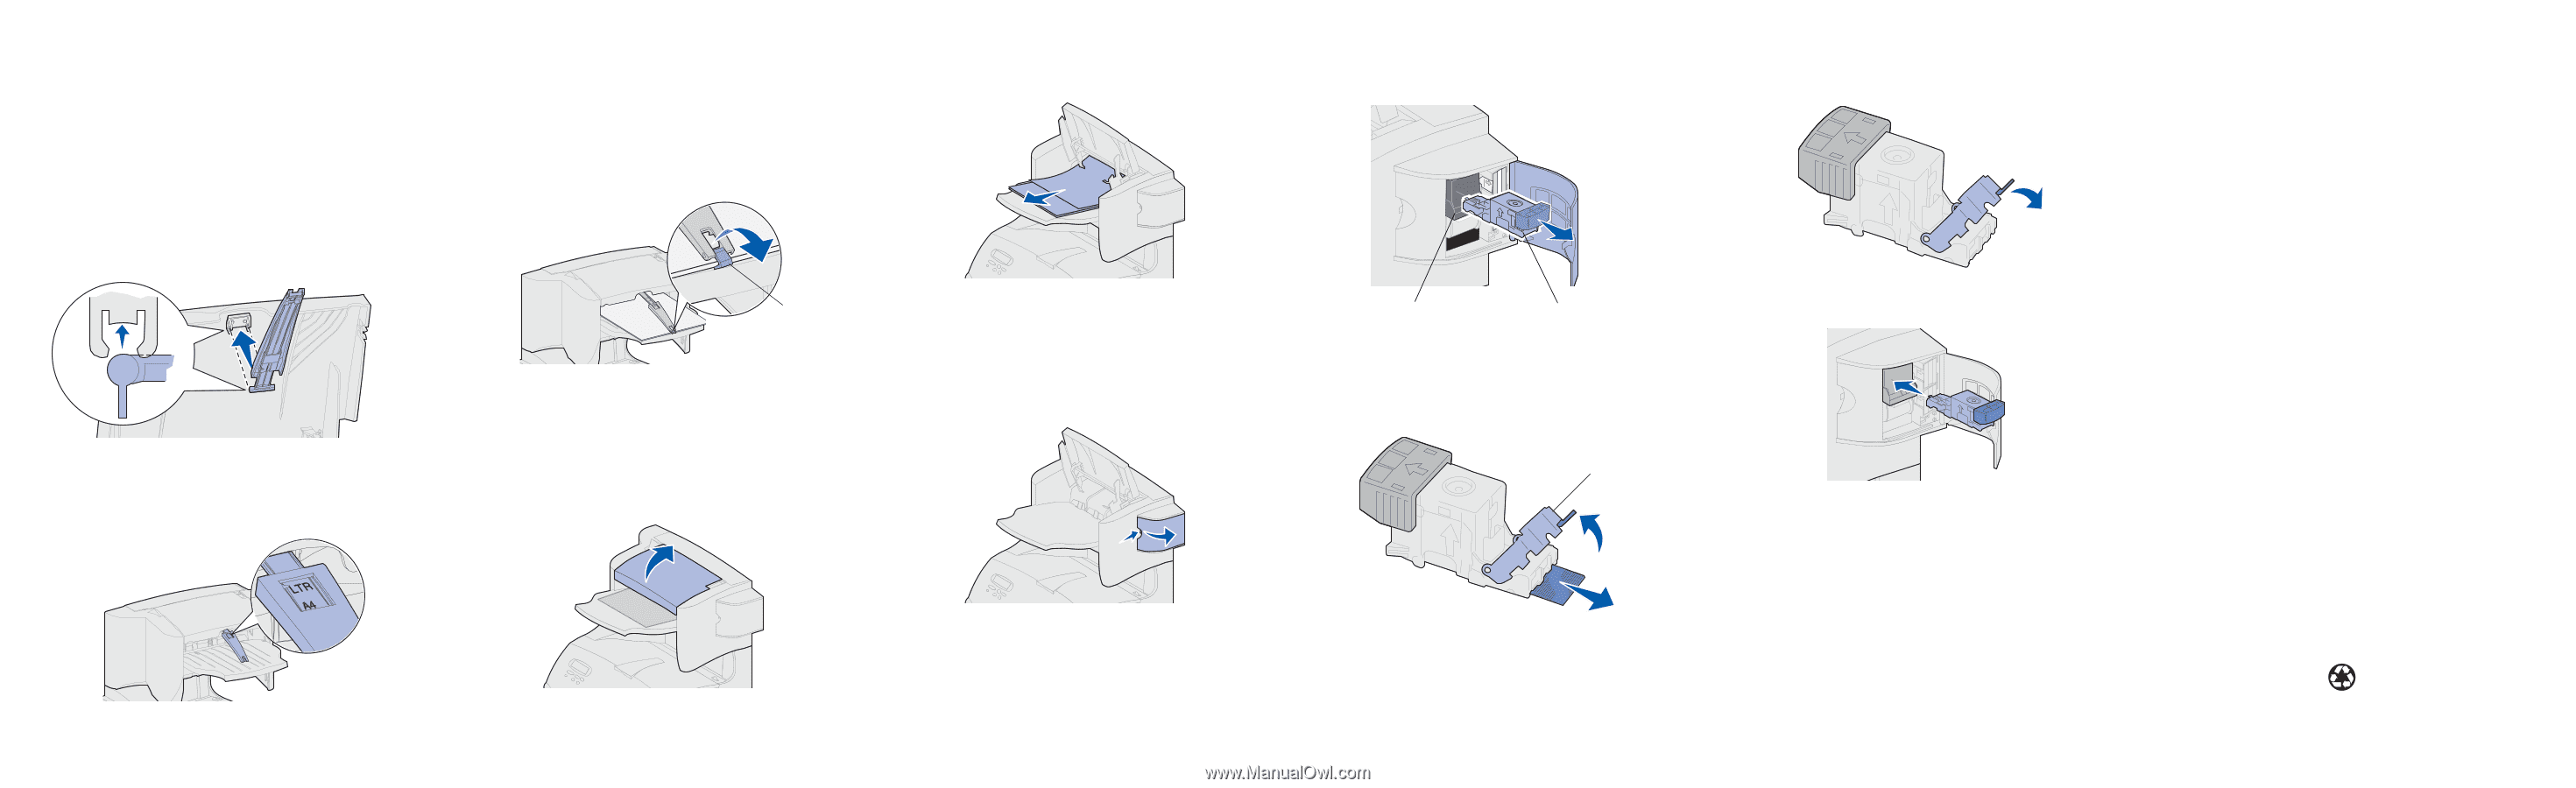
Clearing staple jams
281
(or 282)
Staple Jam
Check Stapler
1
Lift the finisher output bin cover until it locks into position.
2
Remove the stack of paper.
3
Continue with step 1 in the
283 Staple Jam
section (for
282 Staple Jam
only).
283 Staple Jam
Check Stapler
1
Press the latch to open the stapler access door.
2
Firmly pull the colored tab to remove the staple cartridge
holder from the stapler.
3
Orient the cartridge holder as shown in the illustration in
step 4.
4
Use the metal tab to lift the staple guard, and then pull out the
sheet of staples.
Discard the entire sheet.
5
Remove any loose staples inside the staple guard.
6
Look through the clear covering on the bottom of the
cartridge holder to make sure no staples are jammed in the
entry throat.
7
Press down on the staple guard until it
snaps
securely into
place.
8
Push the cartridge holder firmly into the stapler until the
cartridge holder
clicks
into place.
9
Close the stapler access door.
Priming Stapler
appears on the operator panel display.
Priming occurs automatically to ensure the stapler is
functioning properly.
10
Close the finisher output bin cover.
Troubleshooting
If stapled print jobs do not bind together in a neat set, you may
need to replace the paper alignment wheels.
To order replacement wheels with a maintenance kit, use part
number 99A2480. Refer to the
Publications
CD for more
information on maintenance kits.
If you are in the U.S. or Canada, call 1-800-438-2468 for
information about Lexmark authorized supplies dealers in your
area, or visit the Lexmark Web site at
www.lexmark.com
. In other
countries, contact the place where you bought your printer.
Paper bail
hook
Staple cartridge holder
Stapler
Staple guard
E.C. 1K1255
P/N 11K3892
Copyright © 2001 Lexmark International, Inc. All rights reserved.
Printed in U.S.A.
This document is printed on recycled paper.
2
/01