Lexmark X204N User's Guide - Page 122
Moving the printer to another location - photoconductor
 |
UPC - 734646157643
View all Lexmark X204N manuals
Add to My Manuals
Save this manual to your list of manuals |
Page 122 highlights
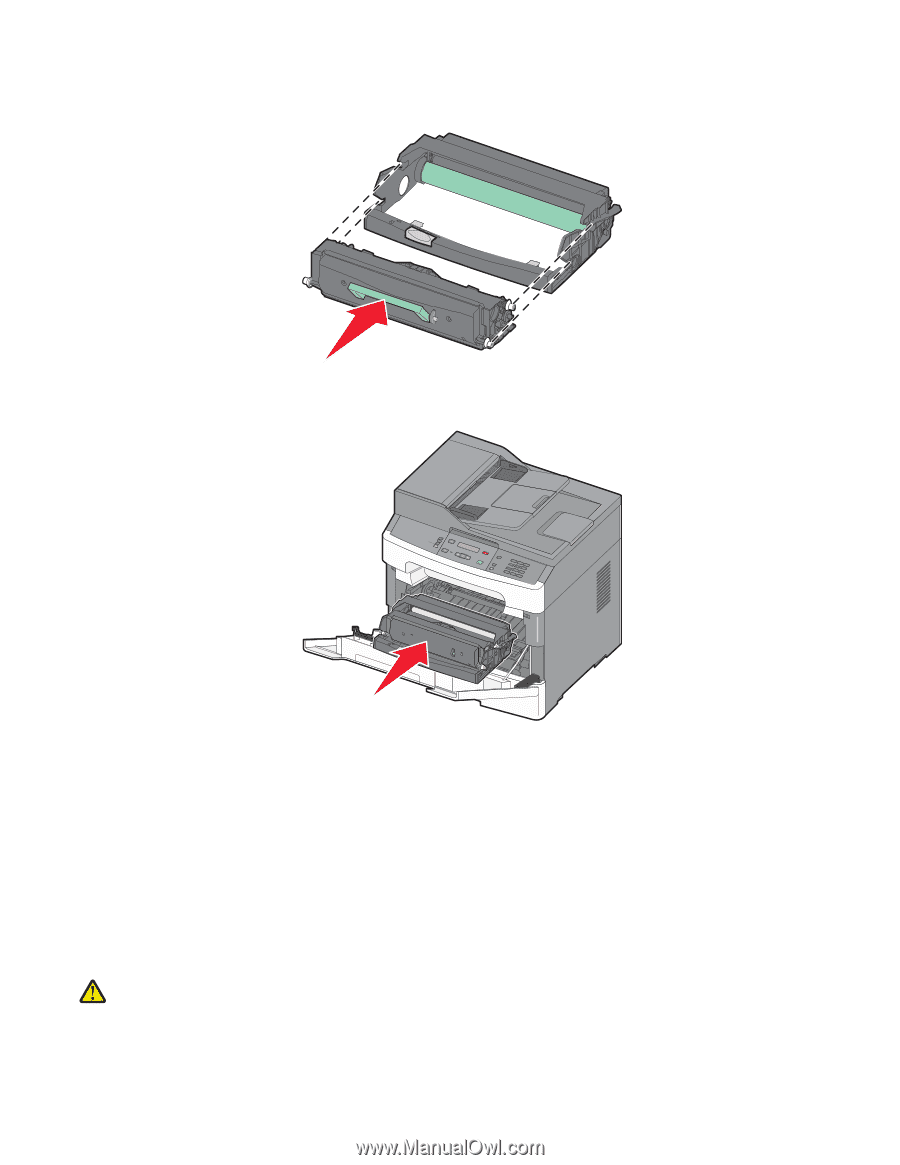
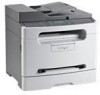
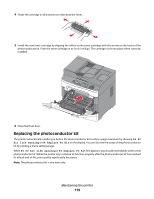
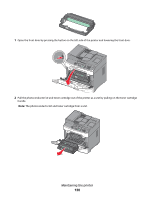
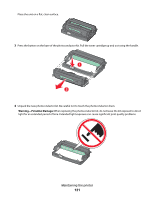
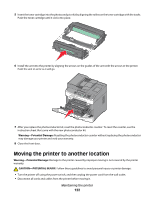
5 Insert the toner cartridge into the photoconductor kit by aligning the rollers on the toner cartridge with the tracks. Push the toner cartridge until it clicks into place. 6 Install the unit into the printer by aligning the arrows on the guides of the unit with the arrows in the printer. Push the unit in as far as it will go. 1@!. 4 GHI 2 ABC 5 JKL 3 DEF 7 PQRS 8 TUV 6 MNO * 9 WXYZ 0 # 7 After you replace the photoconductor kit, reset the photoconductor counter. To reset the counter, see the instruction sheet that came with the new photoconductor kit. Warning-Potential Damage: Resetting the photoconductor counter without replacing the photoconductor may damage your printer and void your warranty. 8 Close the front door. Moving the printer to another location Warning-Potential Damage: Damage to the printer caused by improper moving is not covered by the printer warranty. CAUTION-POTENTIAL INJURY: Follow these guidelines to avoid personal injury or printer damage: • Turn the printer off using the power switch, and then unplug the power cord from the wall outlet. • Disconnect all cords and cables from the printer before moving it. Maintaining the printer 122
-
 1
1 -
2
-
3
-
4
-
5
-
6
-
7
-
8
-
9
-
10
-
11
-
12
-
13
-
14
-
15
-
16
-
17
-
18
-
19
-
20
-
21
-
22
-
23
-
24
-
25
-
26
-
27
-
28
-
29
-
30
-
31
-
32
-
33
-
34
-
35
-
36
-
37
-
38
-
39
-
40
-
41
-
42
-
43
-
44
-
45
-
46
-
47
-
48
-
49
-
50
-
51
-
52
-
53
-
54
-
55
-
56
-
57
-
58
-
59
-
60
-
61
-
62
-
63
-
64
-
65
-
66
-
67
-
68
-
69
-
70
-
71
-
72
-
73
-
74
-
75
-
76
-
77
-
78
-
79
-
80
-
81
-
82
-
83
-
84
-
85
-
86
-
87
-
88
-
89
-
90
-
91
-
92
-
93
-
94
-
95
-
96
-
97
-
98
-
99
-
100
-
101
-
102
-
103
-
104
-
105
-
106
-
107
-
108
-
109
-
110
-
111
-
112
-
113
-
114
-
115
-
116
-
 117
117 -
 118
118 -
 119
119 -
 120
120 -
 121
121 -
 122
122 -
 123
123 -
 124
124 -
 125
125 -
 126
126 -
 127
127 -
128
-
129
-
130
-
131
-
132
-
133
-
134
-
135
-
136
-
137
-
138
-
139
-
140
-
141
-
142
-
143
-
144
-
145
-
146
-
147
-
148
-
149
-
150
-
151
-
152
-
153
-
154
-
155
-
156
-
157
-
158
-
159
-
160
-
161
-
162
-
163
-
164
-
165
-
166
-
167
-
168
-
169
-
170
-
171
-
172
-
173
-
174
-
175
-
176
-
177
-
178
-
179
-
180
-
181
-
182
-
183
-
184
 |
 |