Lexmark X204N User's Guide - Page 132
Scanner Disabled, Clearing jams, Avoiding jams
 |
UPC - 734646157643
View all Lexmark X204N manuals
Add to My Manuals
Save this manual to your list of manuals |
Page 132 highlights
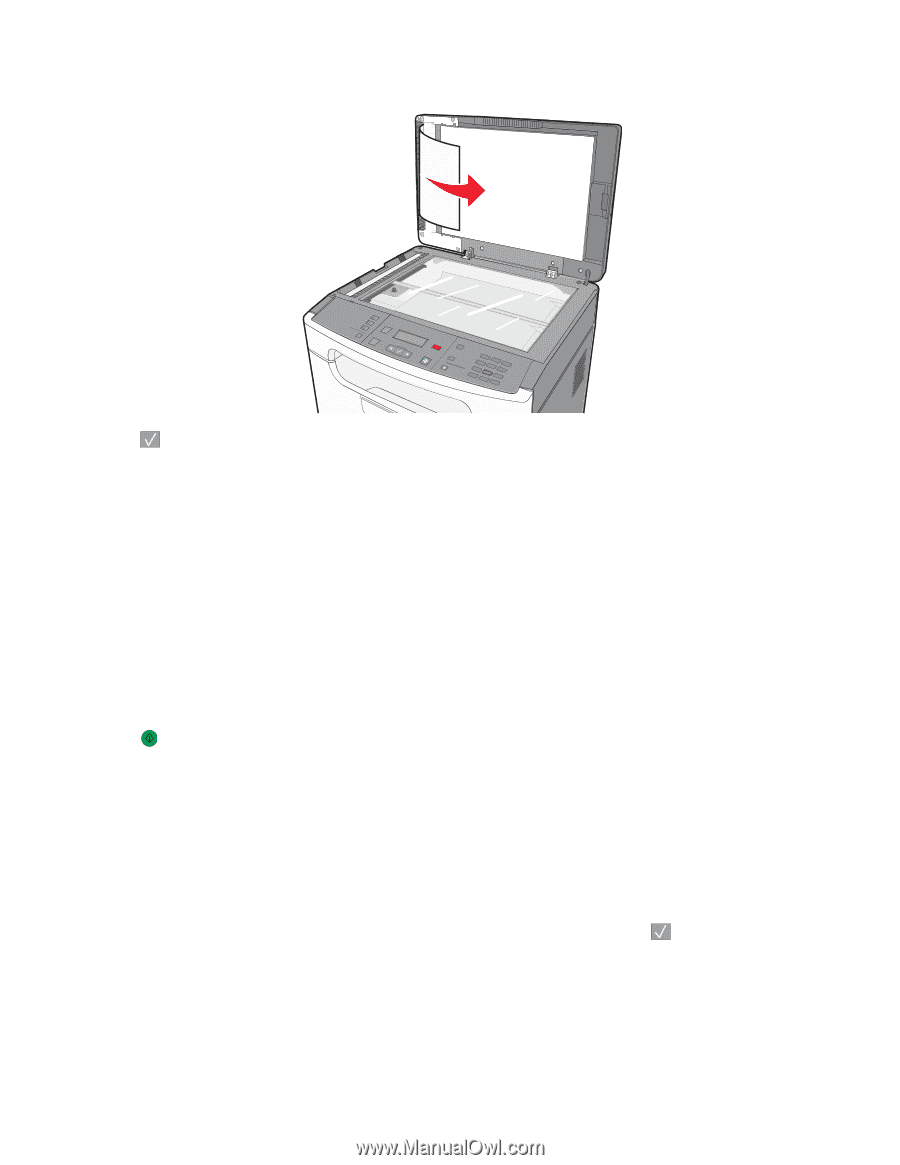
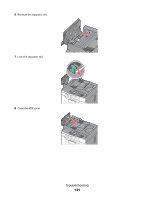
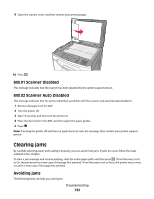
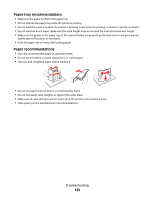
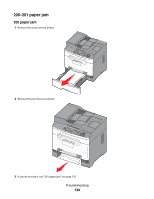
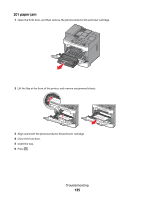
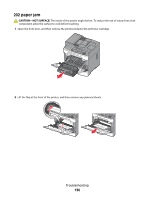
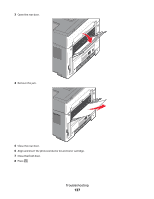
9 Open the scanner cover, and then remove any jammed pages. 1@!. 4 GHI 7 PQRS 2 ABC 5 JKL 3 DEF 8 TUV 6 MNO * 9 WXYZ 0 # 10 Press . 840.01 Scanner Disabled This message indicates that the scanner has been disabled by the system support person. 840.02 Scanner Auto Disabled This message indicates that the printer identified a problem with the scanner and automatically disabled it. 1 Remove all pages from the ADF. 2 Turn the printer off. 3 Wait 15 seconds, and then turn the printer on. 4 Place the document in the ADF, and then adjust the paper guides. 5 Press . Note: If turning the printer off and then on again does not clear the message, then contact your system support person. Clearing jams By carefully selecting paper and loading it properly, you can avoid most jams. If jams do occur, follow the steps outlined in this chapter. To clear a jam message and resume printing, clear the entire paper path, and then press . If Jam Recovery is set to On, the printer prints a new copy of the page that jammed. If Jam Recovery is set to Auto, the printer may or may not print a new copy of the page that jammed. Avoiding jams The following hints can help you avoid jams: Troubleshooting 132
-
 1
1 -
2
-
3
-
4
-
5
-
6
-
7
-
8
-
9
-
10
-
11
-
12
-
13
-
14
-
15
-
16
-
17
-
18
-
19
-
20
-
21
-
22
-
23
-
24
-
25
-
26
-
27
-
28
-
29
-
30
-
31
-
32
-
33
-
34
-
35
-
36
-
37
-
38
-
39
-
40
-
41
-
42
-
43
-
44
-
45
-
46
-
47
-
48
-
49
-
50
-
51
-
52
-
53
-
54
-
55
-
56
-
57
-
58
-
59
-
60
-
61
-
62
-
63
-
64
-
65
-
66
-
67
-
68
-
69
-
70
-
71
-
72
-
73
-
74
-
75
-
76
-
77
-
78
-
79
-
80
-
81
-
82
-
83
-
84
-
85
-
86
-
87
-
88
-
89
-
90
-
91
-
92
-
93
-
94
-
95
-
96
-
97
-
98
-
99
-
100
-
101
-
102
-
103
-
104
-
105
-
106
-
107
-
108
-
109
-
110
-
111
-
112
-
113
-
114
-
115
-
116
-
117
-
118
-
119
-
120
-
121
-
122
-
123
-
124
-
125
-
126
-
 127
127 -
 128
128 -
 129
129 -
 130
130 -
 131
131 -
 132
132 -
 133
133 -
 134
134 -
 135
135 -
 136
136 -
 137
137 -
138
-
139
-
140
-
141
-
142
-
143
-
144
-
145
-
146
-
147
-
148
-
149
-
150
-
151
-
152
-
153
-
154
-
155
-
156
-
157
-
158
-
159
-
160
-
161
-
162
-
163
-
164
-
165
-
166
-
167
-
168
-
169
-
170
-
171
-
172
-
173
-
174
-
175
-
176
-
177
-
178
-
179
-
180
-
181
-
182
-
183
-
184
 |
 |