Lexmark X2550 User's Guide - Page 61
Improving print quality, Poor text and graphic quality, Photo Paper. - reviews
 |
UPC - 734646044585
View all Lexmark X2550 manuals
Add to My Manuals
Save this manual to your list of manuals |
Page 61 highlights
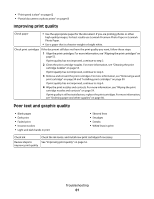
• "Print speed is slow" on page 62 • "Partial document or photo prints" on page 63 Improving print quality Check paper • Use the appropriate paper for the document. If you are printing photos or other high-quality images, for best results use Lexmark Premium Photo Paper or Lexmark Photo Paper. • Use a paper that is a heavier weight or bright white. Check print cartridges If the document still does not have the print quality you want, follow these steps: 1 Align the print cartridges. For more information, see "Aligning the print cartridges" on page 52. If print quality has not improved, continue to step 2. 2 Clean the print cartridge nozzles. For more information, see "Cleaning the print cartridge nozzles" on page 53. If print quality has not improved, continue to step 3. 3 Remove and reinsert the print cartridges. For more information, see "Removing a used print cartridge" on page 50 and "Installing print cartridges" on page 50. If print quality has not improved, continue to step 4. 4 Wipe the print nozzles and contacts. For more information, see "Wiping the print cartridge nozzles and contacts" on page 54. If print quality is still not satisfactory, replace the print cartridges. For more information, see "Ordering paper and other supplies" on page 56. Poor text and graphic quality • Blank pages • Dark print • Faded print • Incorrect colors • Light and dark bands in print • Skewed lines • Smudges • Streaks • White lines in print Check ink Review steps to improve print quality Check the ink levels, and install new print cartridges if necessary. See "Improving print quality" on page 52. Troubleshooting 61
-
 1
1 -
2
-
3
-
4
-
5
-
6
-
7
-
8
-
9
-
10
-
11
-
12
-
13
-
14
-
15
-
16
-
17
-
18
-
19
-
20
-
21
-
22
-
23
-
24
-
25
-
26
-
27
-
28
-
29
-
30
-
31
-
32
-
33
-
34
-
35
-
36
-
37
-
38
-
39
-
40
-
41
-
42
-
43
-
44
-
45
-
46
-
47
-
48
-
49
-
50
-
51
-
52
-
53
-
54
-
55
-
 56
56 -
 57
57 -
 58
58 -
 59
59 -
 60
60 -
 61
61 -
 62
62 -
 63
63 -
 64
64 -
 65
65 -
 66
66 -
67
-
68
-
69
-
70
-
71
-
72
-
73
-
74
-
75
-
76
-
77
-
78
-
79
-
80
-
81
-
82
-
83
-
84
 |
 |