Lexmark X2550 User's Guide - Page 72
Removing and reinstalling the software, Color cartridge, replacement required, Black and Color
 |
UPC - 734646044585
View all Lexmark X2550 manuals
Add to My Manuals
Save this manual to your list of manuals |
Page 72 highlights
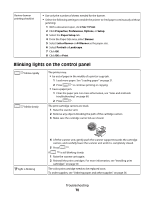
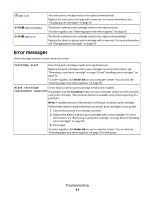
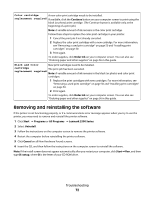
Color cartridge A new color print cartridge needs to be installed. replacement required If available, click the Continue button on your computer screen to print using the black (or photo) print cartridge. (The Continue button is available only at the beginning of a print job.) Note: A variable amount of ink remains in the color print cartridge. Follow these steps to replace the color print cartridge in your printer: 1 Cancel the print job if not already canceled. 2 Replace the color print cartridge with a new cartridge. For more information, see "Removing a used print cartridge" on page 50 and "Installing print cartridges" on page 50. 3 Print again. To order supplies, click Order Ink on your computer screen. You can also see "Ordering paper and other supplies" on page 56 in this guide. Black and Color New print cartridges need to be installed. cartridge The print job has been canceled. replacement required Note: A variable amount of ink remains in the black (or photo) and color print cartridges. 1 Replace the print cartridges with new cartridges. For more information, see "Removing a used print cartridge" on page 50 and "Installing print cartridges" on page 50. 2 Print again. To order supplies, click Order Ink on your computer screen. You can also see "Ordering paper and other supplies" on page 56 in this guide. Removing and reinstalling the software If the printer is not functioning properly, or if a communications error message appears when you try to use the printer, you may need to remove and reinstall the printer software. 1 Click Start ΠPrograms or All Programs ΠLexmark 2500 Series. 2 Select Uninstall. 3 Follow the instructions on the computer screen to remove the printer software. 4 Restart the computer before reinstalling the printer software. 5 Click Cancel on all New Hardware Found screens. 6 Insert the CD, and then follow the instructions on the computer screen to reinstall the software. Note: If the install screen does not appear automatically after you restart your computer, click Start ΠRun, and then type D:\setup, where D is the letter of your CD-ROM drive. Troubleshooting 72
-
 1
1 -
2
-
3
-
4
-
5
-
6
-
7
-
8
-
9
-
10
-
11
-
12
-
13
-
14
-
15
-
16
-
17
-
18
-
19
-
20
-
21
-
22
-
23
-
24
-
25
-
26
-
27
-
28
-
29
-
30
-
31
-
32
-
33
-
34
-
35
-
36
-
37
-
38
-
39
-
40
-
41
-
42
-
43
-
44
-
45
-
46
-
47
-
48
-
49
-
50
-
51
-
52
-
53
-
54
-
55
-
56
-
57
-
58
-
59
-
60
-
61
-
62
-
63
-
64
-
65
-
66
-
 67
67 -
 68
68 -
 69
69 -
 70
70 -
 71
71 -
 72
72 -
 73
73 -
 74
74 -
 75
75 -
 76
76 -
 77
77 -
78
-
79
-
80
-
81
-
82
-
83
-
84
 |
 |