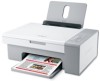
Lexmark X2570 User's Guide
Lexmark X2570 Manual
 |
View all Lexmark X2570 manuals
Add to My Manuals
Save this manual to your list of manuals |
Lexmark X2570 manual content summary:
- Lexmark X2570 | User's Guide - Page 1
All-In-One User's Guide December 2006 www.lexmark.com Lexmark and Lexmark with diamond design are trademarks of Lexmark International, Inc., registered in the United States and/or other countries. All other trademarks are the property of their respective owners. © 2007 Lexmark International, Inc - Lexmark X2570 | User's Guide - Page 2
the scanner unit. SAVE THESE INSTRUCTIONS. Operating system notice All features and functions are operating system-dependent. For complete descriptions: • Windows users-See the User's Guide. • Macintosh users-If your product supports Macintosh, see the Mac Help installed with the printer software. - Lexmark X2570 | User's Guide - Page 3
about the printer 12 Understanding the parts of the printer...12 Using the control panel buttons...14 Learning about the software 15 Using the printer software...15 Using the Lexmark Imaging Studio...15 Using the Solution Center...17 Using Print Properties...18 Opening Print Properties ...18 - Lexmark X2570 | User's Guide - Page 4
transparencies...29 Printing envelopes...29 Printing iron-on transfers...30 Printing cards...30 Printing multiple pages on one sheet...31 Working with photos 32 Retrieving and managing photos...32 Transferring all photos from a media device using the computer 32 Transferring selected photos - Lexmark X2570 | User's Guide - Page 5
supplies...56 Using genuine Lexmark print cartridges...56 Refilling a print cartridge...57 Recycling Lexmark products...57 Troubleshooting 58 Setup troubleshooting...58 Power button is not lit ...58 Software does not install...58 Page does not print...59 Print troubleshooting...60 Improving print - Lexmark X2570 | User's Guide - Page 6
print quality...68 Jams and misfeeds troubleshooting...68 Paper jams...68 Paper or specialty media misfeeds...68 Printer does not feed paper, envelopes, or specialty media 69 Banner paper jams ...69 Blinking lights on the control panel...70 Error messages...71 Removing and reinstalling the software - Lexmark X2570 | User's Guide - Page 7
setting up hardware and software (on Windows operating systems) and some basic instructions for using the printer. You can find this document in the printer box or on the Lexmark Web site at www.lexmark.com. Note: If your printer supports Macintosh operating systems, see the Mac Help: 1 From the - Lexmark X2570 | User's Guide - Page 8
gives you instructions for using the When you install the printer software, the User's Guide printer and other information such as: will be installed. • Using the software (on Windows operating systems) 1 Click Start Œ Programs or All Programs Œ • Loading paper Lexmark 2500 Series. • Printing - Lexmark X2570 | User's Guide - Page 9
and times may change without notice. For the most recent phone numbers available, see the printed warranty statement that shipped with your printer. E-mail support For e-mail support, visit our Web site: www.lexmark.com. E-mail support varies by country or region, and may not be available in - Lexmark X2570 | User's Guide - Page 10
Record the following information (located on the store receipt and the back of the printer), and have it ready when you contact us so that we may serve you faster: • Machine Type number • Serial number • Date purchased • Store where purchased Finding information about the printer 10 - Lexmark X2570 | User's Guide - Page 11
be installed into the printer. 2 Color print cartridge Note: Cartridge combinations vary depending on the product purchased. 3 Power cord Attaches to the power supply port located at the back of the printer. Note: Your power cord may look different from the one shown. 4 Installation software CD - Lexmark X2570 | User's Guide - Page 12
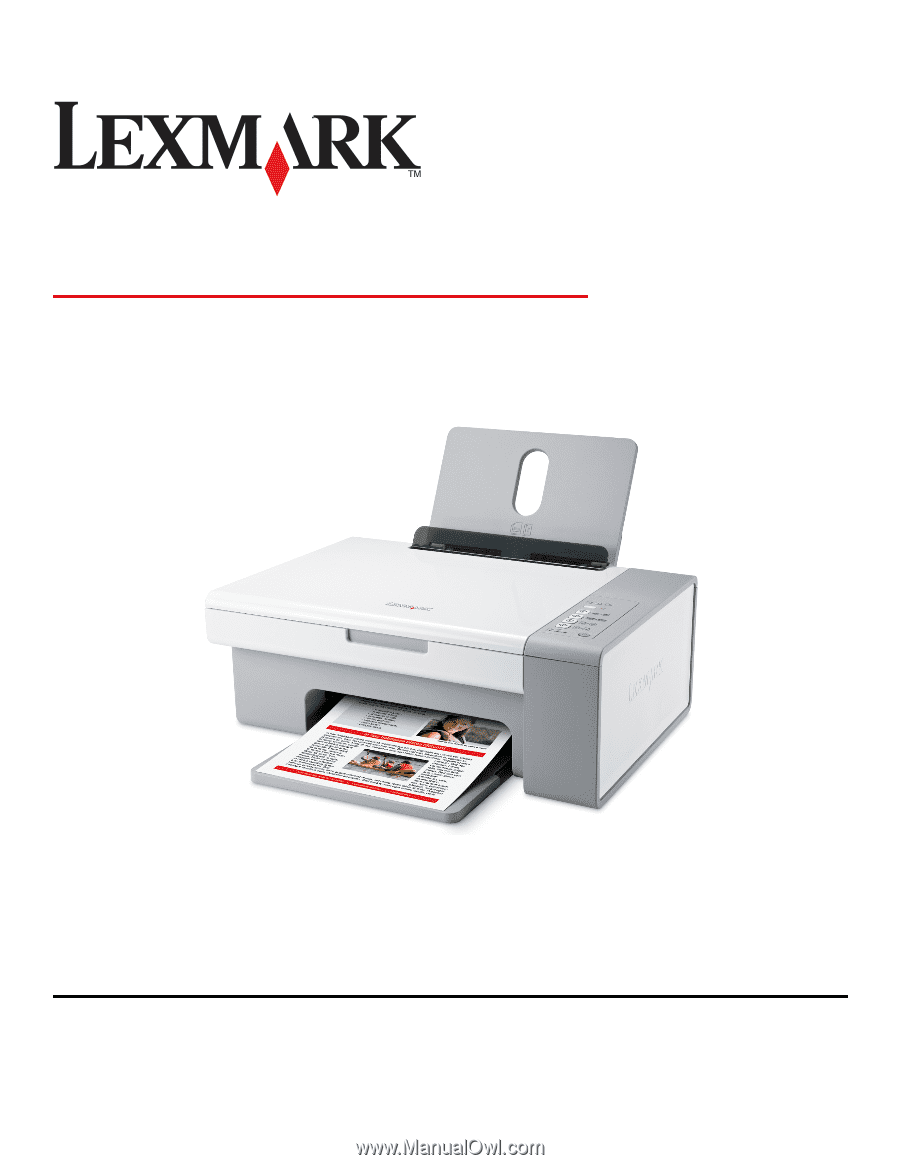
Learning about the printer Understanding the parts of the printer 5 6 4 1 7 3 2 Use the To 1 Paper support Load paper. 2 Control panel Operate the printer. For more information, see "Using the control panel buttons" on page 14. 3 Paper exit tray Hold paper as it exits. 4 Top cover - Lexmark X2570 | User's Guide - Page 13
To 1 Scanner unit Access the print cartridges. 2 Scanner support Hold up the scanner unit. 3 Print cartridge carrier Install, replace, or remove a print cartridge. 4 Power supply with port Connect the printer to a power source. 5 USB port Connect the printer to a computer using a USB cable - Lexmark X2570 | User's Guide - Page 14
color copy of a document or photo. 6 Start a black-and-white copy of a document or photo. 7 • Turn the printer on or off. • Cancel a print, copy, or scan job in progress. • Reset the printer. Check The light The light To Determine if the color print cartridge needs to be replaced. For more - Lexmark X2570 | User's Guide - Page 15
. 2 Double-click the printer Help icon. Using the printer software Use this software The Lexmark Imaging Studio The Solution Center Print Properties The Toolbar To Preview, scan, copy, print, or fax documents or photos. Find troubleshooting, maintenance, and cartridge ordering information. Select - Lexmark X2570 | User's Guide - Page 16
To Setup and diagnose printer • Check ink levels. • Order print cartridges. • Find maintenance information. • Select other Solution Center tabs for more information, including how to change printer settings and troubleshooting. Setup and manage faxes Set printer fax settings for: • Dialing - Lexmark X2570 | User's Guide - Page 17
the current status. • Solve printer problems. Maintenance Contact Information • Install a new print cartridge. • View shopping options for new cartridges. • Print a test page. • Clean to fix horizontal streaks. • Align to fix blurry edges. • Troubleshoot other ink problems. Learn how to contact us - Lexmark X2570 | User's Guide - Page 18
You can • Change the appearance of the Printing Status window. • Download the newest software files. • Turn printing voice notification on or off. • Change network printing settings. • Share information with us regarding how you use the printer. • Obtain software version information. Note: For more - Lexmark X2570 | User's Guide - Page 19
three main tabs of the Print Properties software: Quality/Copies, Paper Setup, and Print Layout. Tab Quality/Copies Paper Setup Print Layout Options • Select a Quality/Speed setting. • Select a Paper Type. • Customize how the printer prints several copies of a single print job: collated or normal - Lexmark X2570 | User's Guide - Page 20
: The number of photos or images valid for printing appears next to Photos. Preview a Web page before printing. Resetting printer software settings to defaults Windows 2000, Windows XP, or Windows Vista users: 1 Click Start ΠSettings ΠPrinters or Printers and Faxes. 2 Right-click the Lexmark 2500 - Lexmark X2570 | User's Guide - Page 21
paper types Load up to Make sure 100 sheets of plain paper • The paper is designed for use with inkjet printers. • The paper is loaded in the center of the paper support. • The paper guides rest against the edges of the paper. 25 sheets of heavyweight matte paper 25 sheets of photo paper 25 - Lexmark X2570 | User's Guide - Page 22
Load up to 10 envelopes Make sure • The print side of the envelopes faces you. • The stamp location is in the upper left corner. • The envelopes are designed for use with inkjet printers. • The envelopes are loaded in the center of the paper support. • The paper guides rest against the edges of the - Lexmark X2570 | User's Guide - Page 23
loading instructions that came with the iron-on transfers. • The print side of the transfers faces you. • The transfers are loaded in the center of the paper support. • The paper guides rest against the edges of the transfers. Note: For best results, load transfers one at a time. • The print side - Lexmark X2570 | User's Guide - Page 24
only the number of pages needed to print the banner. • You place the required stack of banner paper behind the printer, and feed in the first sheet. • The leading edge of the banner paper feeds into the printer first. • The paper is loaded in the center of the paper support. • The paper guides rest - Lexmark X2570 | User's Guide - Page 25
2 Place the original document or item facedown on the scanner glass in the lower right corner. Note: Photos should be loaded as shown. 3 Close the top cover to avoid dark edges on the scanned image. Loading paper and original documents 25 - Lexmark X2570 | User's Guide - Page 26
the Toolbar to create a printer-friendly version of any Web page. 1 Load paper. 2 Open a Web page using Microsoft Internet Explorer 5.5 or later. 3 If you want to check or change your print settings: a From the toolbar area, click Lexmark ΠPage Setup. b Adjust the print settings. c Click OK. Note - Lexmark X2570 | User's Guide - Page 27
printer. 7 Click OK. 8 Click OK or Print. Printing photos instructions that came with the paper.) 2 Open a Web page with Microsoft Internet Explorer 5.5 or later. On the Toolbar, the number of photos valid for printing appears next to Photos. 3 If no number appears next to Photos: a From the Lexmark - Lexmark X2570 | User's Guide - Page 28
the printer, and the number of copies. 6 If you want to print one photo or image at a time: a Click the photos or images you do not want to print to deselect them. b To make common editing changes: 1 Right click the photo or image. 2 Click Edit. 3 Make your selections. 4 Follow the instructions on - Lexmark X2570 | User's Guide - Page 29
of Side Flip or Top Flip. 6 Make sure Print Instruction Page to Assist in Reloading is selected. 7 Click OK to close any printer software dialogs that are open. 8 Print the document. Notes: • The instruction sheet for two-sided printing will not print completely on paper smaller than A4 or letter - Lexmark X2570 | User's Guide - Page 30
iron-on transfers 1 Load iron-on transfers. 2 With your image open, click File ΠPrint. 3 Click Properties, Preferences, Options, or Setup. 4 From the Print Layout tab, select Mirror if you want the printer software to flip the image. Select Normal if you have a program that automatically flips the - Lexmark X2570 | User's Guide - Page 31
pages on one sheet 1 Load paper. 2 With a document open, click File ΠPrint. 3 Click Properties, Preferences, Options, or Setup. 4 From the Print Layout tab, select N-up. 5 Select the number of pages to print on each page. 6 If you want each page image to be surrounded by a border, select Print Page - Lexmark X2570 | User's Guide - Page 32
CD or any photo storage device into the computer. 2 If you are using Windows XP or Windows Vista, a "What do you want Windows to do?" screen will appear. Click Transfer Photos to your computer using the Lexmark Imaging Studio. 3 Click Automatically save all photos to "My Pictures". 4 Remove the CD - Lexmark X2570 | User's Guide - Page 33
using Windows XP or Windows Vista, a "What do you want Windows to do?" screen appears. Click Transfer Photos to your computer using the Lexmark Imaging Studio. 4 Click Select photos to print. 5 Click Print. 6 From the Quality drop-down list, select a copy quality. 7 From the Paper Size in Printer - Lexmark X2570 | User's Guide - Page 34
If you are using Windows XP or Windows Vista, a "What do you want Windows to do?" screen appears. Click Transfer Photos to your computer using the Lexmark Imaging Studio. 4 Click Select photos to print. 5 Click Deselect All. 6 Click to select the photo(s) you want to print. 7 Click Print. 8 From the - Lexmark X2570 | User's Guide - Page 35
Printer drop-down list. Paper sizes supported Dimensions A4 210 x 297 millimeters Letter 8.5 x 11 inches Greeting cards 4 x 8 inches (10.16 x 20.32 centimeters) 12 Click Print viewing a slideshow 1 From the desktop, double-click the Lexmark Imaging Studio icon. 2 Click Slideshow. 3 Click and - Lexmark X2570 | User's Guide - Page 36
10 From the Poster Size drop-down list, select the poster size. 11 If you want to rotate the poster so that it fits better on the printed pages, click Rotate 90 degrees. 12 Click Print Now in the bottom right corner of the screen. Working with photos 36 - Lexmark X2570 | User's Guide - Page 37
Press to start a color copy or to start a black-and-white copy. Copying 4 x 6 photos 1 Load a 4 x 6 (10 x 15 cm) photo card with the glossy or printable side facing you. (If you are not sure which side is the printable side, see the instructions that came with the paper.) 2 Place a photo facedown - Lexmark X2570 | User's Guide - Page 38
Size in Printer drop-down list, select the paper size. 9 Select whether you want your document printed in Color, Grayscale, or Black and White by clicking the appropriate option. 10 To adjust the Brightness value, use the Brightness slider. 11 To select a custom print size, enter a number from 25 - Lexmark X2570 | User's Guide - Page 39
facedown on the scanner glass. 2 From the desktop, double-click the Lexmark Imaging Studio icon. 3 From the left pane of the Welcome screen, Paper Size in Printer drop-down list, select the paper size. 8 To select multiple prints of a photo, or to select photo sizes other than 4 x 6 in. (10 x 15 cm), - Lexmark X2570 | User's Guide - Page 40
is connected to a computer, and both the printer and computer are on. Scanning using the control panel 1 Load an original document facedown on the scanner glass. 2 Press to begin scanning. The Save Photo - Lexmark X2570 | User's Guide - Page 41
-processing application. You can edit your scanned document. Scanning a photo to the Photo Library 1 From the desktop, double-click the Lexmark Imaging Studio icon. 2 Click View / Print Photo Library. 3 From the Photo Library Add tab, click Add New Scan. 4 Select the Photo option. 5 Click Start. The - Lexmark X2570 | User's Guide - Page 42
Scanning multiple photos at one time using the computer 1 From the desktop, double-click the Lexmark Imaging Studio icon. 2 Place the photos facedown on the scanner glass. Note: For best and the edges of the scan area. 2 From the desktop, double-click the Lexmark Imaging Studio icon. Scanning 42 - Lexmark X2570 | User's Guide - Page 43
You can e-mail attached images using your default e-mail application. 1 Load an original document facedown on the scanner glass. 2 From the desktop, double-click the Lexmark Imaging Studio icon. 3 Click E-mail. 4 Select the Photo, Several Photos, or Document option. 5 Click Start. Scanning 43 - Lexmark X2570 | User's Guide - Page 44
scanner glass. 2 Close the top cover. 3 From the desktop, double-click the Lexmark Imaging Studio icon. 4 Click Scan. 5 Select the Photo, Several Photos, or your photos, select the "Start all photos with File Name" check box. 10 To save the photo as another file type, select the file type from the - Lexmark X2570 | User's Guide - Page 45
size from the drop-down list. Convert the image to text with OCR Select this to convert your image to text. Always use these settings when click the Lexmark Imaging Studio icon. 2 Click View / Print Photo Library. 3 From the program taskbar at the bottom of the screen, click Other Software. 4 - Lexmark X2570 | User's Guide - Page 46
line. • Both the printer and the computer are turned on. Sending a fax using the software You can scan a document to the computer and then fax it to someone using the software. 1 Load an original document facedown on the scanner glass. 2 From the desktop, double-click the Lexmark Imaging Studio icon - Lexmark X2570 | User's Guide - Page 47
number as part of the fax number. • A fax number can include up to 64 numbers, commas, periods, and/or these symbols Printing fax activity reports 1 From the desktop, double-click the Lexmark Imaging Studio icon. 2 From the left pane of the Welcome screen, click Fax. The Fax Solution Software - Lexmark X2570 | User's Guide - Page 48
calling card number as part of the fax number. • A fax number can include up to 64 numbers, commas, periods, and/or these symbols You can block faxes from up to 50 phone numbers. 7 Click OK to save the setting. Customizing fax settings Customizing settings using the Fax Solution Software You can - Lexmark X2570 | User's Guide - Page 49
phone book. 5 Click OK after you finish customizing the settings. 6 Close the Fax Solution Software. Setting the number of rings before receiving a fax automatically 1 From the desktop, double-click the Lexmark Imaging Studio icon. 2 From the left pane of the Welcome screen, click Fax. The Fax - Lexmark X2570 | User's Guide - Page 50
printer is busy. 3 Press down on the cartridge carrier lever to raise the cartridge carrier lid. 4 Remove the used print cartridge. Note: If you are removing both cartridges, repeat step 3 and step 4 for the second cartridge. Installing print cartridges 1 If you are installing new print cartridges - Lexmark X2570 | User's Guide - Page 51
carrier levers to raise the cartridge carrier lids. 3 Insert the black cartridge or the photo cartridge in the left carrier. Insert the color cartridge in the right carrier. 4 Close the lids. 5 Lift the scanner unit, gently push the scanner support towards the cartridge carriers, and carefully lower - Lexmark X2570 | User's Guide - Page 52
quality is still not satisfactory, replace the cartridge. For more information, see "Ordering paper and other supplies" on page 56. Aligning the print cartridges 1 Load plain paper. 2 Open the Solution Center. 3 From the Maintenance tab, click Align to fix blurry edges. Maintaining the printer 52 - Lexmark X2570 | User's Guide - Page 53
the Maintenance tab, click Clean to fix horizontal streaks. 4 Click Print. A page prints, forcing ink through the print cartridge nozzles to clean them. 5 Print the document again to verify that the print quality has improved. 6 If print quality has not improved, try cleaning the nozzles up to two - Lexmark X2570 | User's Guide - Page 54
again. 9 If the print quality does not improve, clean the print nozzles. For more information, see "Cleaning the print cartridge nozzles" on page 53. 10 Repeat step 9 up to two more times. 11 If print quality is still not satisfactory, replace the print cartridges. Maintaining the printer 54 - Lexmark X2570 | User's Guide - Page 55
Make sure all ink or corrective fluid on a document is dry before placing the document on the scanner glass. Ordering print cartridges Lexmark 2500 series models (except 2580) Item Black cartridge Black cartridge2 High yield black cartridge Color cartridge Color cartridge2 Part number 28A 28 34 - Lexmark X2570 | User's Guide - Page 56
Photo cartridge Part number 31 Ordering paper and other supplies To order supplies or to locate a dealer near you, visit our Web site at www.lexmark.com. Notes: • For best results, use only Lexmark print cartridges. • For best results when printing photos or other high-quality images, use Lexmark - Lexmark X2570 | User's Guide - Page 57
cartridge. Refilling a cartridge can affect print quality and may cause damage to the printer. For best results, use Lexmark supplies. Recycling Lexmark products To return Lexmark products to Lexmark for recycling: 1 Visit our Web site at www.lexmark.com/recycle. 2 Follow the instructions on - Lexmark X2570 | User's Guide - Page 58
power supply on the printer. 2 1 3 Plug the cord into an electrical outlet that other electrical devices have been using. 4 If the light is not on, press . Software does not install Check your operating system Check your system requirements The following operating systems are supported: Windows - Lexmark X2570 | User's Guide - Page 59
remove the power supply from the printer. 4 Reconnect the power supply to the printer. 5 Plug the power cord into the wall outlet. 6 Press to turn the printer on. 1 Close all open software applications. 2 Disable any anti-virus programs. 3 Double-click the My Computer icon. In Windows XP, click - Lexmark X2570 | User's Guide - Page 60
reconnect power supply Software may not be installed correctly 3 Reinsert the cartridges. 1 Click: • In Windows XP Pro: Start Œ Settings Œ Printers and Faxes. • In Windows XP Home: Start Œ Control Panel Œ Printers and Faxes. • In Windows 2000 or Windows Vista: Start Œ Settings Œ Printers. 2 Double - Lexmark X2570 | User's Guide - Page 61
Faded print • Incorrect colors • Light and dark bands in print • Skewed lines • Smudges • Streaks • White lines in print Check ink Review steps to improve print quality Check the ink levels, and install new print cartridges if necessary. See "Improving print quality" on page 52. Troubleshooting - Lexmark X2570 | User's Guide - Page 62
may not be For more information, see "Software may not be installed correctly" on page 59. installed correctly Poor quality at the edges of the page Check minimum print settings Select the Borderless print feature Be sure paper size matches the printer setting Unless you are using the borderless - Lexmark X2570 | User's Guide - Page 63
Copy troubleshooting • "Copier does not respond" on page 63 • "Scanner unit does not close" on page 63 • "Poor copy quality" on page 64 • "Partial document or photo copies" on page 64 Copier does not respond Check the control panel for any blinking lights Check power Software may not be installed - Lexmark X2570 | User's Guide - Page 64
print Check the control If one of the lights is blinking, see "Blinking lights on the control panel" on page 70. panel for any blinking lights Check ink Check the ink levels, and install a new print cartridge matches the size you selected. Scan troubleshooting • "Scanner does not respond" on - Lexmark X2570 | User's Guide - Page 65
Panel Œ Printers and Faxes. • In Windows 2000: Start Œ Settings Œ Printers. 2 Double-click the name of your printer. 3 Click Printer. • Make sure no check mark appears next to Pause Printing. • Make sure a check mark does appear next to Set As Default. Software may not be installed correctly For - Lexmark X2570 | User's Guide - Page 66
Lexmark print quality" on page 68 Cannot send or receive a fax Check the control If one of the lights is blinking, see "Blinking lights on the control panel" on page 70. panel for any blinking lights Check power If the light is not on, see "Power button is not lit" on page 58. Troubleshooting - Lexmark X2570 | User's Guide - Page 67
original document was loaded correctly. Check ink Check the ink levels, and install a new print cartridge if necessary. Cartridges may have tape on them 1 Remove the print cartridges. 2 Make sure the sticker and tape have been removed. 1 2 3 Reinsert the print cartridges. Troubleshooting 67 - Lexmark X2570 | User's Guide - Page 68
been a problem with the quality of the telephone line connection. • Increase the fax scan resolution. Check the ink levels, and install a new print cartridge if necessary. Jams and misfeeds troubleshooting • "Paper jams" on page 68 • "Paper or specialty media misfeeds" on page 68 • "Printer does - Lexmark X2570 | User's Guide - Page 69
• For Windows XP Pro: Start Œ Settings Œ Printers and Faxes. • For Windows XP Home: Start Œ Control Panel Œ Printers and Faxes. • For Windows 2000: Start Œ Settings Œ Printers. 2 Double-click the name of your printer. 3 Click Printer. • Make sure no check mark appears next to Pause Printing. • Make - Lexmark X2570 | User's Guide - Page 70
blinking slowly: 1 Raise the scanner unit again. 2 Reinstall the print cartridges. For more information, see "Installing print cartridges" on page 50. The color print cartridge needs to be replaced soon. To order supplies, see "Ordering paper and other supplies" on page 56. Troubleshooting 70 - Lexmark X2570 | User's Guide - Page 71
cartridge. For more information, see "Removing a used print cartridge" on page 50 and "Installing print cartridges" on page 50. 3 Print again. To order supplies, click Order Ink on your computer screen. You can also see "Ordering paper and other supplies" on page 56 in this guide. Troubleshooting - Lexmark X2570 | User's Guide - Page 72
a used print cartridge" on page 50 and "Installing print cartridges" on page 50. 2 Print again. To order supplies, click Order Ink on your computer screen. You can also see "Ordering paper and other supplies" on page 56 in this guide. Removing and reinstalling the software If the printer is not - Lexmark X2570 | User's Guide - Page 73
in conjunction with other products, programs, or services, except those expressly designated by the manufacturer, are the user's responsibility. For Lexmark technical support, visit support.lexmark.com. For information on supplies and downloads, visit www.lexmark.com. If you don't have access to - Lexmark X2570 | User's Guide - Page 74
installation. This equipment generates, uses, and can radiate radio frequency energy and, if not installed and used in accordance with the instructions computing device, use a properly shielded and grounded cable such as Lexmark part number 1021294 for USB attach. Use of a substitute cable not - Lexmark X2570 | User's Guide - Page 75
directed to: Director of Lexmark Technology & Services Lexmark International, Inc. 740 the Member States relating to electromagnetic compatibility and safety of electrical equipment designed by the Director of Manufacturing and Technical Support, Lexmark International, Inc., S.A., Boigny, France. - Lexmark X2570 | User's Guide - Page 76
, the telephone company may request that you disconnect the equipment until the problem is resolved. This equipment contains no user serviceable parts. For repair and warranty information, contact Lexmark International, Inc. See the previous paragraph for contact information. Connection to party - Lexmark X2570 | User's Guide - Page 77
to AC power sources. This has been identified as a major nationwide problem. It is recommended that the customer install an appropriate spécifications techniques d'Industrie Canada. Le numéro REN (ringer equivalence number : numéro d'équivalence de sonnerie) fournit une indication du nombre maximum - Lexmark X2570 | User's Guide - Page 78
Facsimile User Instructions. The compatible with all of Telecom's network services. This 10 call attempts to the same number within any 30 minute period for any single manual Lexmark part number 14B5109) to be installed on any line which receives metering pulses in Switzerland. The Lexmark - Lexmark X2570 | User's Guide - Page 79
filtro Lexmark poiché gli impulsi remoti sono presenti su tutte le linee analogiche in Svizzera. Power consumption Product power consumption The following table documents the power consumption characteristics of the product. Note: Some modes may not apply to your product. Mode Printing Copying - Lexmark X2570 | User's Guide - Page 80
End-user license agreement Opening this package, installing the printing device software, or using the print cartridges inside, confirms your acceptance of the following license/agreement: The patented print cartridges contained inside are licensed for a single use only and is/are designed to stop - Lexmark X2570 | User's Guide - Page 81
the software 46 loading on the scanner glass 24 printing 26 duplexing 29 E emission notices 74, 75 envelopes loading 22 printing 29 error messages troubleshooting Black and Color cartridge replacement required 71 Black cartridge replacement required 71 Cartridge Alert 71 Color cartridge replacement - Lexmark X2570 | User's Guide - Page 82
30 information, finding 7 ink levels, checking 17 ink, ordering 17 installing print cartridges 50 printer software 72 iron-on transfers, loading 23 iron-on transfers, printing 30 J jams and misfeeds troubleshooting banner paper jams 69 paper jam in paper support 68 paper jam in printer 68 paper or - Lexmark X2570 | User's Guide - Page 83
exit tray 12 paper guide 12 paper support 12 power supply port 13 print cartridge carrier 13 scanner glass 12 scanner support 13 scanner unit 13 top cover 12 USB port 13 Phone Book (computer), using 47 photo cards, loading 23 Photo Greeting Cards button 15 Photo Library printing photos 33 scanning - Lexmark X2570 | User's Guide - Page 84
takes too long or freezes the computer 65 troubleshooting, setup page does not print 59 power button is not lit 58 software does not install 58 U unwanted faxes, blocking 48 USB port 13 V View / Print Photo Library button 15 W Web page printing 26 printing only the photos 27 Web site finding 7
-
 1
1 -
 2
2 -
 3
3 -
 4
4 -
 5
5 -
 6
6 -
 7
7 -
8
-
9
-
10
-
11
-
12
-
13
-
14
-
15
-
16
-
17
-
18
-
19
-
20
-
21
-
22
-
23
-
24
-
25
-
26
-
27
-
28
-
29
-
30
-
31
-
32
-
33
-
34
-
35
-
36
-
37
-
38
-
39
-
40
-
41
-
42
-
43
-
44
-
45
-
46
-
47
-
48
-
49
-
50
-
51
-
52
-
53
-
54
-
55
-
56
-
57
-
58
-
59
-
60
-
61
-
62
-
63
-
64
-
65
-
66
-
67
-
68
-
69
-
70
-
71
-
72
-
73
-
74
-
75
-
76
-
77
-
78
-
79
-
80
-
81
-
82
-
83
-
84
 |
 |
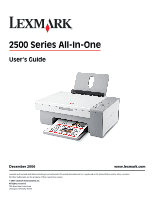
2500 Series All-In-One
User's Guide
December 2006
www.lexmark.com
Lexmark and Lexmark with diamond design are trademarks of Lexmark International, Inc., registered in the United States and/or other countries.
All other trademarks are the property of their respective owners.
© 2007 Lexmark International, Inc.
All rights reserved.
740 West New Circle Road
Lexington, Kentucky 40550