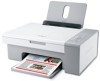
Lexmark X2580 Getting Started
Lexmark X2580 Manual
 |
View all Lexmark X2580 manuals
Add to My Manuals
Save this manual to your list of manuals |
Lexmark X2580 manual content summary:
- Lexmark X2580 | Getting Started - Page 1
Started December 2006 www.lexmark.com Lexmark and Lexmark with diamond design are trademarks of Lexmark International, Inc., registered in the United States and/or other countries. All other trademarks are the property of their respective owners. © 2007 Lexmark International, Inc. All rights - Lexmark X2580 | Getting Started - Page 2
service person. This product is designed, tested, and approved to meet strict global safety standards with the use of specific Lexmark components. The safety features of some parts may not always be obvious. Lexmark : When closing the scanner unit, make sure to keep your hands out from underneath the - Lexmark X2580 | Getting Started - Page 3
9 Checking the box contents...9 Learning about the printer 10 Understanding the parts of the printer...10 Using the control panel buttons...12 Learning about the software 13 Using the printer software...13 Using the Lexmark Imaging Studio...13 Using the Solution Center...15 Using Print Properties - Lexmark X2580 | Getting Started - Page 4
33 Maintaining the printer 35 Changing print cartridges...35 Achieving better print quality...37 Ordering print cartridges...40 Ordering paper and other supplies...40 Troubleshooting 42 Setup troubleshooting...42 Print troubleshooting...44 Copy troubleshooting...47 Scan troubleshooting...48 Fax - Lexmark X2580 | Getting Started - Page 5
setting up hardware and software (on Windows operating systems) and some basic instructions for using the printer. You can find this document in the printer box or on the Lexmark Web site at www.lexmark.com. Note: If your printer supports Macintosh operating systems, see the Mac Help: 1 From the - Lexmark X2580 | Getting Started - Page 6
a network (if supported by your printer) 2 Click View User's Guide (including Setup Troubleshooting). • Troubleshooting problems with printing, copying, scanning, faxing, paper jams, and misfeeds 3 Click Yes. Note: If your printer supports Macintosh operating systems, see the Mac Help: An icon - Lexmark X2580 | Getting Started - Page 7
notice. For the most recent phone numbers available, see the printed warranty statement that shipped with your printer. E-mail support For e-mail support, visit our Web site: www.lexmark.com. E-mail support varies by country or region, and may not be available in some instances. 1 Click CUSTOMER - Lexmark X2580 | Getting Started - Page 8
Record the following information (located on the store receipt and the back of the printer), and have it ready when you contact us so that we may serve you faster: • Machine Type number • Serial number • Date purchased • Store where purchased Finding information about the printer 8 - Lexmark X2580 | Getting Started - Page 9
look different from the one shown. 4 Installation software CD • Installation software for the printer • Help • User's Guide in electronic format 5 Setup sheet Instructions on setting up printer hardware and software, and information on setup troubleshooting. 6 Getting Started or Setup Solutions - Lexmark X2580 | Getting Started - Page 10
buttons" on page 12. 3 Paper exit tray Hold paper as it exits. 4 Top cover Access the scanner glass. 5 Paper feed guard Prevent small objects from falling inside. 6 Paper guide Keep paper straight when feeding. 7 Scanner glass Copy, scan, fax, or remove an item. Learning about the printer 10 - Lexmark X2580 | Getting Started - Page 11
5 4 Use the To 1 Scanner unit Access the print cartridges. 2 Scanner support Hold up the scanner unit. 3 Print cartridge carrier Install, replace, or remove a print cartridge. 4 Power supply with port Connect the printer to a power source. 5 USB port Connect the printer to a computer using - Lexmark X2580 | Getting Started - Page 12
Start a black-and-white copy of a document or photo. 7 • Turn the printer on or off. • Cancel a print, copy, or scan job in progress. • Reset the printer. Check The light The light To Determine if the color print cartridge needs to be replaced. For more information, see "Blinking lights on - Lexmark X2580 | Getting Started - Page 13
. 2 Double-click the printer Help icon. Using the printer software Use this software The Lexmark Imaging Studio The Solution Center Print Properties The Toolbar To Preview, scan, copy, print, or fax documents or photos. Find troubleshooting, maintenance, and cartridge ordering information. Select - Lexmark X2580 | Getting Started - Page 14
or share your photos. Download photos from a memory card printer • Check ink levels. • Order print cartridges. • Find maintenance information. • Select other Solution Center tabs for more information, including how to change printer settings and troubleshooting. Setup and manage faxes Set printer - Lexmark X2580 | Getting Started - Page 15
the electronic User's Guide for more information. • View ink levels and order new print cartridges. • Learn tips about the current status. • Solve printer problems. • View ink levels and order new print cartridges. Maintenance • Install a new print cartridge. Note: Wait until scanning is complete - Lexmark X2580 | Getting Started - Page 16
of the Printing Status window. • Turn printing voice notification on or off. • Change network printing settings. • Share information with us regarding how you use the printer. • Obtain software version information. • View ink levels and order new print cartridges. Note: For more information - Lexmark X2580 | Getting Started - Page 17
customize the toolbar appearance or select a different setting for printing photos. • Access links to the Lexmark Web site. • Access Help for additional information. • Uninstall the Toolbar. Print an entire Web next to Photos. Preview a Web page before printing. Learning about the software 17 - Lexmark X2580 | Getting Started - Page 18
Resetting printer software settings to defaults Windows 2000, Windows XP, or Windows Vista users: 1 Click Start ΠSettings ΠPrinters or Printers and Faxes. 2 Right-click the Lexmark 2500 Series icon. 3 Click Printing Preferences. 4 Click the Save Settings menu. 5 From the Restore section, select - Lexmark X2580 | Getting Started - Page 19
or damaged. • If you are using specialty paper, you follow the instructions that came with it. • You do not force paper into the printer. 2 Before loading paper the first time, slide the paper guides out toward the edges of the paper support. 3 Load the paper vertically in the center of the paper - Lexmark X2580 | Getting Started - Page 20
2 Place the original document or item facedown on the scanner glass in the lower right corner. Note: Photos should be loaded as shown. 3 Close the top cover to avoid dark edges on the scanned image. Loading paper and original documents 20 - Lexmark X2580 | Getting Started - Page 21
Click OK or Print. Printing a Web page You can use the Toolbar to create a printer-friendly version of any Web page. 1 Load paper. 2 Open a Web page using want to check or change your print settings: a From the toolbar area, click Lexmark ΠPage Setup. b Adjust the print settings. c Click OK. Note: - Lexmark X2580 | Getting Started - Page 22
which side is the printable side, see the instructions that came with the paper.) 2 Open a Web If no number appears next to Photos: a From the Lexmark logo drop-down menu, select Options. b Select the Advanced size you want, the blank paper size in the printer, and the number of copies. 6 If you want - Lexmark X2580 | Getting Started - Page 23
you are using Windows XP or Windows Vista, a "What do you want Windows to do?" screen will appear. Click Transfer Photos to your computer using the Lexmark Imaging Studio. 3 and enter a name. 9 Click Next. 10 Remove your CD to view your transferred photos in the Photo Library. Working with photos 23 - Lexmark X2580 | Getting Started - Page 24
using Windows XP or Windows Vista, a "What do you want Windows to do?" screen appears. Click Transfer Photos to your computer using the Lexmark Imaging Studio. 4 Click Select photos to print. 5 Click Print. 6 From the Quality drop-down list, select a copy quality. 7 From the Paper Size in Printer - Lexmark X2580 | Getting Started - Page 25
using Windows XP or Windows Vista, a "What do you want Windows to do?" screen appears. Click Transfer Photos to your computer using the Lexmark Imaging in Printer drop-down list, select the paper size. 10 To select multiple prints of a photo, or to select photo sizes other than 4 x 6 in. (10 x 15 - Lexmark X2580 | Getting Started - Page 26
from the Quality drop-down list. 11 Select the paper size from the Paper Size in Printer drop-down list. Paper sizes supported Dimensions A4 210 x 297 millimeters Letter 8.5 x 11 inches Greeting cards 4 x 8 inches (10.16 x 20.32 centimeters) 12 Click Print Now. 13 If you want to e-mail your - Lexmark X2580 | Getting Started - Page 27
10 From the Poster Size drop-down list, select the poster size. 11 If you want to rotate the poster so that it fits better on the printed pages, click Rotate 90 degrees. 12 Click Print Now in the bottom right corner of the screen. Working with photos 27 - Lexmark X2580 | Getting Started - Page 28
-and-white copy. Copying 4 x 6 photos 1 Load a 4 x 6 (10 x 15 cm) photo card with the glossy or printable side facing you. (If you are not sure which side is the printable side, see the instructions that came with the paper.) 2 Place a photo facedown on the scanner glass in the lower right corner - Lexmark X2580 | Getting Started - Page 29
an original document facedown on the scanner glass. 2 From the desktop, double-click the Lexmark Imaging Studio icon. 3 From Printer drop-down list, select the paper size. 9 Select whether you want your document printed in Color, Grayscale, or Black and White by clicking the appropriate option. 10 - Lexmark X2580 | Getting Started - Page 30
the computer 1 Place the photo facedown on the scanner glass. 2 From the desktop, double-click the Lexmark Imaging Studio icon. 3 From the left pane Size in Printer drop-down list, select the paper size. 8 To select multiple prints of a photo, or to select photo sizes other than 4 x 6 in. (10 x 15 - Lexmark X2580 | Getting Started - Page 31
to a computer, and both the printer and computer are on. Scanning using the control panel 1 Load an original document facedown on the scanner glass. 2 Press to begin scanning. The Save Photo dialog appears on your computer screen. 3 If you want to save the scan, click Browse, then select where - Lexmark X2580 | Getting Started - Page 32
Setting Options Select area to be scanned You can select the area to be scanned by choosing a paper size from the drop-down list. Convert the image to text with OCR Select this to convert your image to text. Always - Lexmark X2580 | Getting Started - Page 33
printer and the computer are turned on. Sending a fax using the software You can scan a document to the computer and then fax it to someone using the software. 1 Load an original document facedown on the scanner glass. 2 From the desktop, double-click the Lexmark . 10 If you want a paper copy of your - Lexmark X2580 | Getting Started - Page 34
1 From the desktop, double-click the Lexmark Imaging Studio icon. 2 From the left pane of the Welcome screen, click Fax. The Fax Solution Software appears. 3 Click Tools ΠPreferences and Settings. 4 Click the Receiving Faxes tab. 5 From the "Incoming Calls" area, select Automatically. 6 To set - Lexmark X2580 | Getting Started - Page 35
unless the printer is busy. 3 Press down on the cartridge carrier lever to raise the cartridge carrier lid. 4 Remove the used print cartridge. Note: If you are removing both cartridges, repeat step 3 and step 4 for the second cartridge. Installing print cartridges 1 If you are installing new print - Lexmark X2580 | Getting Started - Page 36
photo cartridge in the left carrier. Insert the color cartridge in the right carrier. 4 Close the lids. 5 Lift the scanner unit, gently push the scanner support towards the cartridge carriers, and carefully lower the scanner unit until it is completely closed. 6 Load paper. Maintaining the printer - Lexmark X2580 | Getting Started - Page 37
align the cartridge(s). Note: The scanner unit must be closed to start a new scan, print, images, for best results use Lexmark Premium Photo Paper or Lexmark Photo Paper. • Use a paper cartridges. For more information, see "Removing a used print cartridge" on page 35 and "Installing print cartridges - Lexmark X2580 | Getting Started - Page 38
the printer. 6 Place the printed alignment page facedown on the scanner glass in the lower right corner, and then close the top cover. 1 2 7 Press . After a few seconds, an Alignment Success dialog appears on your computer screen. 8 Click Close. 9 Click Exit. If you aligned the cartridges - Lexmark X2580 | Getting Started - Page 39
again. 9 If the print quality does not improve, clean the print nozzles. For more information, see "Cleaning the print cartridge nozzles" on page 38. 10 Repeat step 9 up to two more times. 11 If print quality is still not satisfactory, replace the print cartridges. Maintaining the printer 39 - Lexmark X2580 | Getting Started - Page 40
best results, use only Lexmark print cartridges. • For best results when printing photos or other high-quality images, use Lexmark photo papers. To order a USB cable (part number 1021294) go to www.lexmark.com. Paper Paper size Lexmark Premium Photo Paper • Letter • A4 • 4 x 6 in. • 10 x 15 cm - Lexmark X2580 | Getting Started - Page 41
15 cm • Letter • A4 • 4 x 6 in. • 10 x 15 cm •L Note: Availability may vary by country or region. For information on how to purchase Lexmark Premium Photo Paper, Lexmark Photo Paper, or Lexmark PerfectFinish Photo Paper in your country or region, go to www.lexmark.com. Maintaining the printer 41 - Lexmark X2580 | Getting Started - Page 42
light is not on, press . Software does not install Check your operating system Check your system requirements The following operating systems are supported: Windows 2000, Windows XP, Windows Vista, and Mac OS X. Note: For Windows 2000 users, make sure you are using Service Pack 3 or later. Check - Lexmark X2580 | Getting Started - Page 43
click the My Computer icon. In Windows XP, click Start to access the My Computer icon. 4 Double-click the CD-ROM drive icon. 5 If necessary, double-click setup.exe. 6 Follow the instructions on the computer screen to install the software. 1 Uninstall the printer software, and then reinstall it. For - Lexmark X2580 | Getting Started - Page 44
power supply Software may not be installed correctly 3 Reinsert the cartridges. 1 Click: • In Windows XP Pro: Start Œ Settings Œ Printers and Faxes. • In Windows XP Home: Start Œ Control Panel Œ Printers and Faxes. • In Windows 2000 or Windows Vista: Start Œ Settings Œ Printers. 2 Double-click - Lexmark X2580 | Getting Started - Page 45
print • Incorrect colors • Light and dark bands in print • Skewed lines • Smudges • Streaks • White lines in print Check ink Review steps to improve print quality Check the ink levels, and install new print cartridges if necessary. See "Improving print quality" on page 37. Troubleshooting 45 - Lexmark X2580 | Getting Started - Page 46
high-quality images, for best results use Lexmark Premium Photo Paper or Lexmark Photo Paper. Check paper condition Use only new, unwrinkled paper. Software may not be For more information, see "Software may not be installed correctly" on page 43. installed correctly Poor quality at the edges of - Lexmark X2580 | Getting Started - Page 47
"Power button is not lit" on page 42. For more information, see "Software may not be installed correctly" on page 44. Scanner unit does not close Check for obstructions 1 Lift the scanner unit. 2 Remove any obstruction keeping the scanner unit open. 3 Lower the scanner unit. Troubleshooting 47 - Lexmark X2580 | Getting Started - Page 48
page 53. panel for any blinking lights Check ink Check the ink levels, and install a new print cartridge if necessary. Clean the scanner glass If the scanner glass is dirty, gently wipe it with a clean, lint-free cloth dampened with water. Review steps to See "Improving print quality" on page - Lexmark X2580 | Getting Started - Page 49
installed correctly" on page 44. Scanning takes too long or freezes the computer Other software may be running Change the scanning resolution to a lower value Close all programs not being used. 1 Load an original document facedown on the scanner glass. 2 From the desktop, double-click the Lexmark - Lexmark X2580 | Getting Started - Page 50
or photo scans Check document placement Check paper size Make sure the document or photo is loaded facedown on the scanner glass in the lower right corner. Make sure the paper size being used matches the size you selected. Fax troubleshooting Review the fax checklist Make sure: • The printer is - Lexmark X2580 | Getting Started - Page 51
For information about maximum loading amounts per paper type and specific loading instructions for supported paper and specialty media, see "Loading various paper types" in the "Loading paper and original documents" chapter of the User's Guide on the CD. Remove each page as Remove each page as it - Lexmark X2580 | Getting Started - Page 52
of the User's Guide on the CD. • Try loading one page, envelope, or sheet of specialty media at a time. Make sure the printer is set as the default printer and is not on hold or paused 1 Click: • For Windows XP Pro: Start Œ Settings Œ Printers and Faxes. • For Windows XP Home: Start Œ Control - Lexmark X2580 | Getting Started - Page 53
push the scanner support towards the cartridge carriers, and carefully lower the scanner unit until it is completely closed. 5 Press . If is still blinking slowly: 1 Raise the scanner unit again. 2 Reinstall the print cartridges. For more information, see "Installing print cartridges" on page - Lexmark X2580 | Getting Started - Page 54
cartridge. For more information, see "Removing a used print cartridge" on page 35 and "Installing print cartridges" on page 35. 3 Print again. To order supplies, click Order Ink on your computer screen. You can also see "Ordering paper and other supplies" on page 40 in this guide. Troubleshooting - Lexmark X2580 | Getting Started - Page 55
on page 35 and "Installing print cartridges" on page 35. 2 Print again. To order supplies, click Order Ink on your computer screen. You can also see "Ordering paper and other supplies" on page 40 in this guide. Removing and reinstalling the software If the printer is not functioning properly, or - Lexmark X2580 | Getting Started - Page 56
viewing slideshow 26 improving print quality 37 information, finding about printer 5 ink levels, checking 15 ink, ordering 15 installing print cartridges 35 printer software 55 J jams and misfeeds troubleshooting banner paper jams 52 paper jam in paper support 51 paper jam in printer 51 Index 56 - Lexmark X2580 | Getting Started - Page 57
document or photo prints 47 partial document or photo scans 50 parts control panel 10 paper exit tray 10 paper guide 10 paper support 10 power supply port 11 print cartridge carrier 11 scanner glass 10 scanner support 11 scanner unit 11 top cover 10 USB port 11 Photo Greeting Cards button 13 Photo - Lexmark X2580 | Getting Started - Page 58
10 loading documents 19 scanner support 11 scanner unit 11 scanner unit does not close 47 scanning saving scanned image 31 using the control panel 31 scanning takes too long or freezes the computer 49 setup troubleshooting page does not print 43 power button is not lit 42 software does not install
-
 1
1 -
 2
2 -
 3
3 -
 4
4 -
 5
5 -
 6
6 -
 7
7 -
8
-
9
-
10
-
11
-
12
-
13
-
14
-
15
-
16
-
17
-
18
-
19
-
20
-
21
-
22
-
23
-
24
-
25
-
26
-
27
-
28
-
29
-
30
-
31
-
32
-
33
-
34
-
35
-
36
-
37
-
38
-
39
-
40
-
41
-
42
-
43
-
44
-
45
-
46
-
47
-
48
-
49
-
50
-
51
-
52
-
53
-
54
-
55
-
56
-
57
-
58
 |
 |
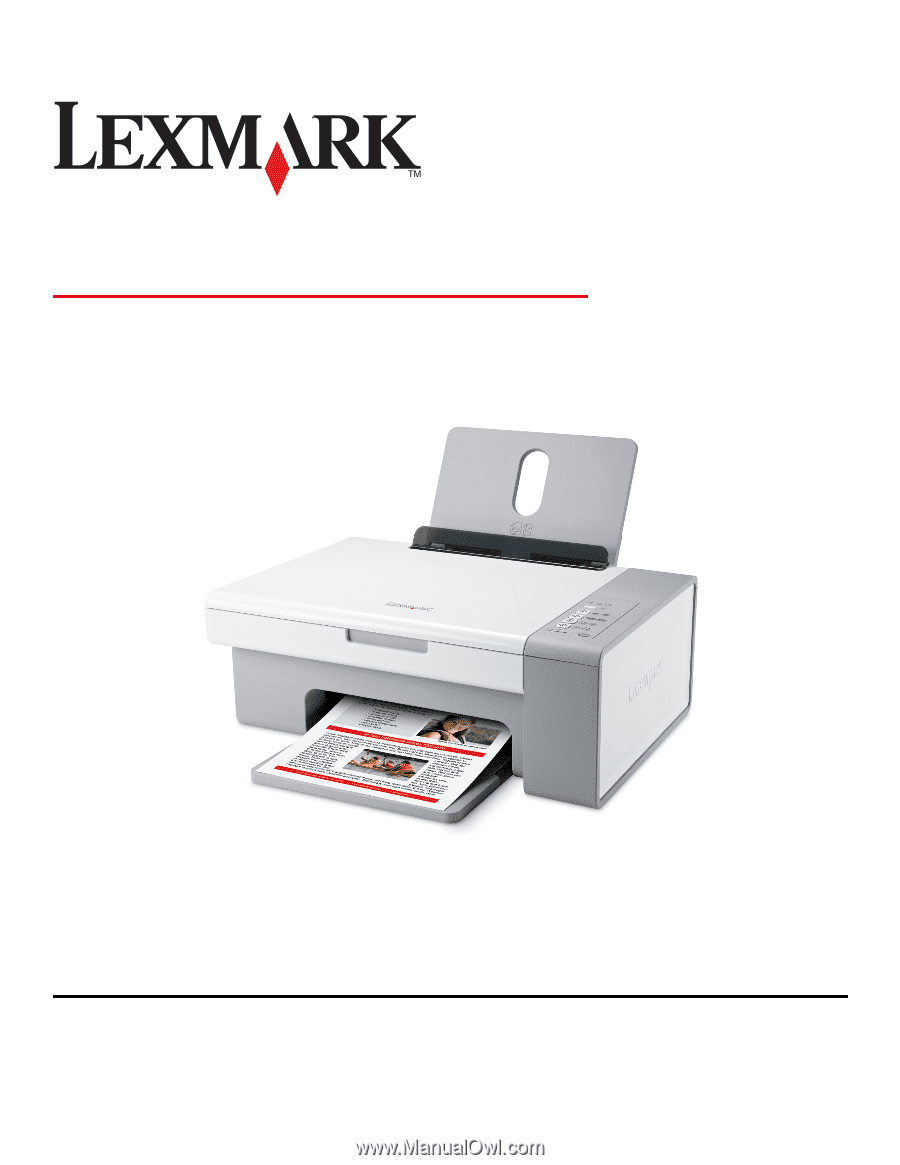
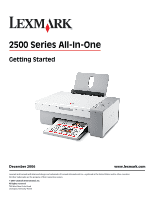
2500 Series All-In-One
Getting Started
December 2006
www.lexmark.com
Lexmark and Lexmark with diamond design are trademarks of Lexmark International, Inc., registered in the United States and/or other countries.
All other trademarks are the property of their respective owners.
© 2007 Lexmark International, Inc.
All rights reserved.
740 West New Circle Road
Lexington, Kentucky 40550