Lexmark X2650 User's Guide - Page 42
Faxing, Sending a fax, Receiving a fax automatically - installer
 |
UPC - 734646057394
View all Lexmark X2650 manuals
Add to My Manuals
Save this manual to your list of manuals |
Page 42 highlights
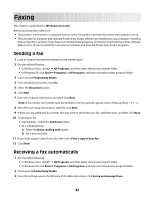
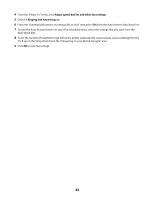
Faxing This chapter is applicable for Windows users only. Before you send a fax, make sure: • The printer is connected to a computer with an active fax modem, and both the printer and computer are on. • The Lexmark Fax Solutions and Lexmark Productivity Studio software are installed on your computer. Installing these programs is optional. If you have not installed these programs, uninstall and reinstall the printer software. Make sure to choose to install the Lexmark Fax Solutions and Lexmark Productivity Studio programs. Sending a fax 1 Load an original document facedown on the scanner glass. 2 Do one of the following: • In Windows Vista, click Œ All Programs, and then select the printer program folder. • In Windows XP, click Start Œ Programs or All Programs, and then select the printer program folder. 3 Click Lexmark Productivity Studio. 4 From the Welcome Screen, click Fax. 5 Select the Document option. 6 Click Start. 7 Enter the recipient information, and then click Next. Note: A fax number can include up to 64 numbers, commas, periods, spaces, and/or these symbols 8 Enter the cover page information, and then click Next. 9 If there are any additional documents that you want to send with your fax, add these now, and then click Next. 10 To send your fax: • Immediately-Select the Send now option. • At a scheduled time: a Select the Delay sending until option. b Set a time and date. 11 If you want a paper copy of your fax, then select Print a copy of your fax. 12 Click Send. Receiving a fax automatically 1 Do one of the following: • In Windows Vista, click Œ All Programs, and then select the printer program folder. • In Windows XP, click Start Œ Programs or All Programs, and then select the printer program folder. 2 Click Lexmark Productivity Studio. 3 From the Settings area in the left pane of the Welcome screen, click Set up and manage faxes. 42
-
 1
1 -
2
-
3
-
4
-
5
-
6
-
7
-
8
-
9
-
10
-
11
-
12
-
13
-
14
-
15
-
16
-
17
-
18
-
19
-
20
-
21
-
22
-
23
-
24
-
25
-
26
-
27
-
28
-
29
-
30
-
31
-
32
-
33
-
34
-
35
-
36
-
 37
37 -
 38
38 -
 39
39 -
 40
40 -
 41
41 -
 42
42 -
 43
43 -
 44
44 -
 45
45 -
 46
46 -
 47
47 -
48
-
49
-
50
-
51
-
52
-
53
-
54
-
55
-
56
-
57
-
58
-
59
-
60
-
61
-
62
-
63
-
64
-
65
-
66
-
67
-
68
-
69
 |
 |