Lexmark X342N Service Manual - Page 114
Scanner ADF assembly removal, Scanner ADF paper tray removal
 |
UPC - 734646256292
View all Lexmark X342N manuals
Add to My Manuals
Save this manual to your list of manuals |
Page 114 highlights
7003-XXX Scanner ADF assembly removal 1. Remove the two screws (A) that secures the ADF assembly to the flatbed cover. 2. Open the ADF top cover. 3. Remove the ADF paper tray assembly. Go to "Scanner ADF paper tray removal" on page 4-35. 4. Remove two screws (B) that secure the top of the ADF assembly. 4-42 Service Manual manuals4you.com
-
 1
1 -
2
-
3
-
4
-
5
-
6
-
7
-
8
-
9
-
10
-
11
-
12
-
13
-
14
-
15
-
16
-
17
-
18
-
19
-
20
-
21
-
22
-
23
-
24
-
25
-
26
-
27
-
28
-
29
-
30
-
31
-
32
-
33
-
34
-
35
-
36
-
37
-
38
-
39
-
40
-
41
-
42
-
43
-
44
-
45
-
46
-
47
-
48
-
49
-
50
-
51
-
52
-
53
-
54
-
55
-
56
-
57
-
58
-
59
-
60
-
61
-
62
-
63
-
64
-
65
-
66
-
67
-
68
-
69
-
70
-
71
-
72
-
73
-
74
-
75
-
76
-
77
-
78
-
79
-
80
-
81
-
82
-
83
-
84
-
85
-
86
-
87
-
88
-
89
-
90
-
91
-
92
-
93
-
94
-
95
-
96
-
97
-
98
-
99
-
100
-
101
-
102
-
103
-
104
-
105
-
106
-
107
-
108
-
 109
109 -
 110
110 -
 111
111 -
 112
112 -
 113
113 -
 114
114 -
 115
115 -
 116
116 -
 117
117 -
 118
118 -
 119
119 -
120
-
121
-
122
-
123
-
124
-
125
-
126
-
127
-
128
-
129
-
130
-
131
-
132
-
133
-
134
-
135
-
136
-
137
-
138
-
139
-
140
-
141
-
142
-
143
-
144
-
145
-
146
-
147
-
148
-
149
-
150
-
151
-
152
-
153
-
154
-
155
-
156
-
157
-
158
-
159
-
160
-
161
-
162
-
163
 |
 |
4-42
Service Manual
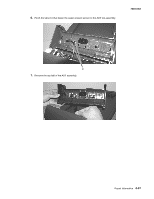
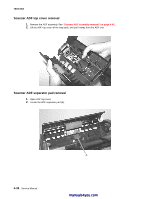
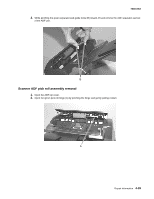
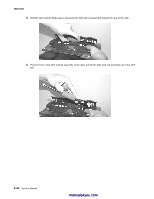
7003-XXX
Scanner ADF assembly removal
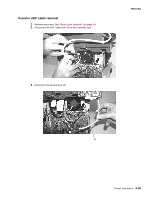
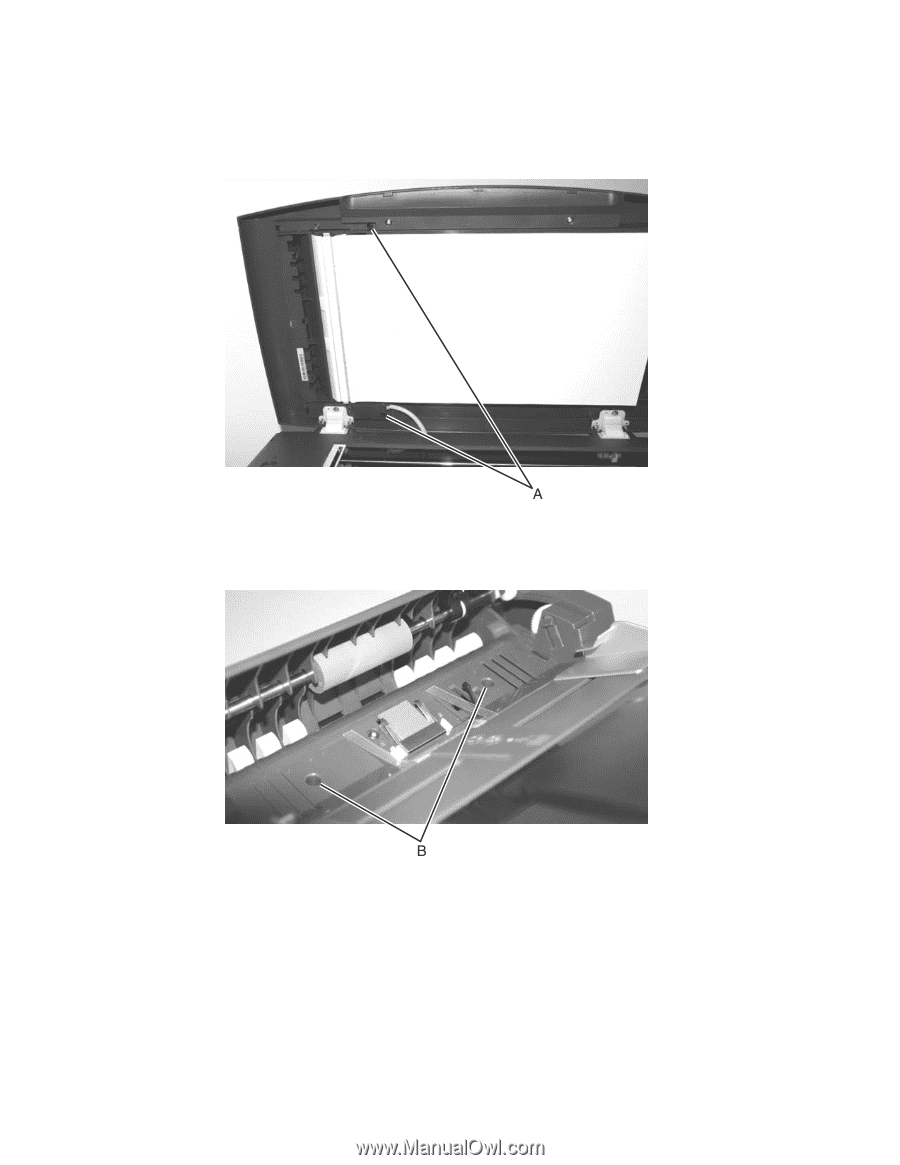
1.
Remove the two screws (A) that secures the ADF assembly to the flatbed cover.
2.
Open the ADF top cover.
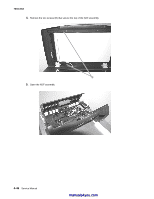
3.
Remove the ADF paper tray assembly. Go to
“Scanner ADF paper tray removal” on page 4-35
.
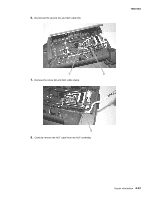
4.
Remove two screws (B) that secure the top of the ADF assembly.
manuals4you.com
manuals4you.com