Lexmark X342N Service Manual - Page 45
Fax quality service check, Diagnosing fax problems, Fuser service check - firmware update
 |
UPC - 734646256292
View all Lexmark X342N manuals
Add to My Manuals
Save this manual to your list of manuals |
Page 45 highlights
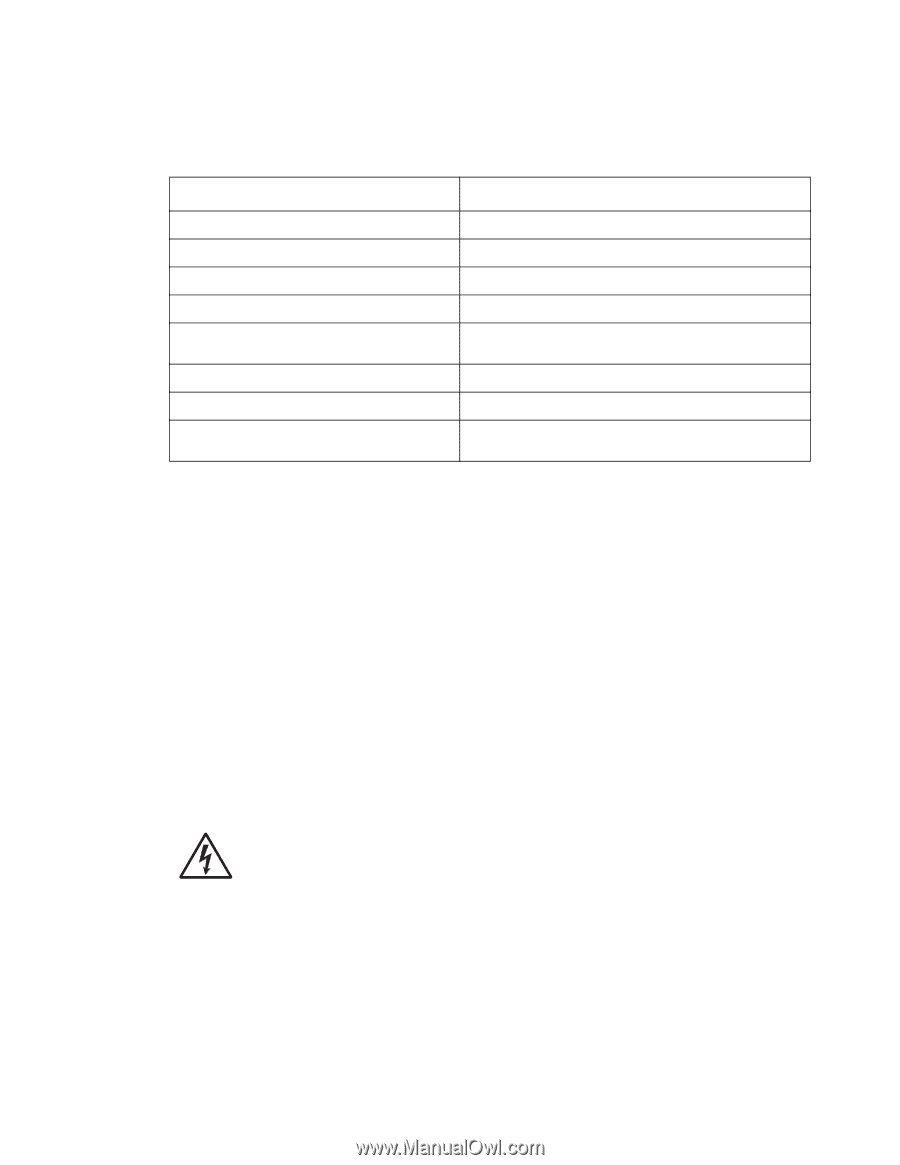
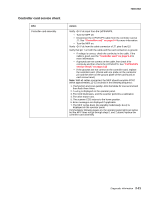
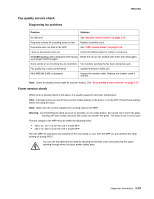
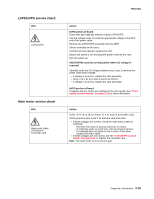
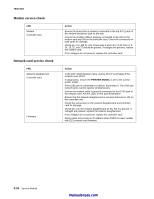
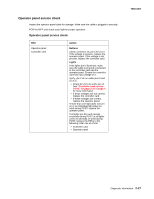
7003-XXX Fax quality service check Diagnosing fax problems Problem Solution No dial tone See "Modem service check" on page 2-26. Ring tone volume for incoming faxes too low Replace controller card. Document does not feed in the ADF. See "ADF service check" on page 2-19. Lines on documents sent out. Check the flatbed glass for marks or scratches. SCVERR:facdata.c725 is displayed when faxing Break the job up into multiple jobs leess than 254 pages. a job larger than254 pages. Some words on an incoming fax are stretched. Fax machine sending the fax had a temporary jam. Fax quality low, erratic performance Update firmware to build 115. FAX INITIAL FAIL is displayed Inspect the modem cable. Replace the modem cable if needed. Note: Some fax-quality issues might be scanner-related. See "Scan quality service checks" on page 2-37. Fuser service check When toner is partially fused to the paper, it is usually caused by low fuser temperature. Note: Improper fusing can result from incorrect media settings in the driver, or on the MFP. Check those settings before servicing the fuser. Note: Make sure the correct voltage fuser is being used on the MFP. Warning: Avoid handling the lamp as much as possible, as it is easily broken. Be careful not to touch the glass housing with bare hands, because skin acids can weaken the glass. The lamp is not a service part. The line voltage to the MFP must be within the following limits: • 100 V ac-127 V ac for the 110 V model MFP • 200 V ac-240 V ac for the 220 V model MFP Turn the MFP off, and wait a few minutes for the fuser lamp to cool. Turn the MFP on, and observe the lamp turning on during POST. You can see the light from the lamp by opening the left side cover and observing the upper opening through which the fuser power cables pass. Diagnostic information 2-23
-
 1
1 -
2
-
3
-
4
-
5
-
6
-
7
-
8
-
9
-
10
-
11
-
12
-
13
-
14
-
15
-
16
-
17
-
18
-
19
-
20
-
21
-
22
-
23
-
24
-
25
-
26
-
27
-
28
-
29
-
30
-
31
-
32
-
33
-
34
-
35
-
36
-
37
-
38
-
39
-
 40
40 -
 41
41 -
 42
42 -
 43
43 -
 44
44 -
 45
45 -
 46
46 -
 47
47 -
 48
48 -
 49
49 -
 50
50 -
51
-
52
-
53
-
54
-
55
-
56
-
57
-
58
-
59
-
60
-
61
-
62
-
63
-
64
-
65
-
66
-
67
-
68
-
69
-
70
-
71
-
72
-
73
-
74
-
75
-
76
-
77
-
78
-
79
-
80
-
81
-
82
-
83
-
84
-
85
-
86
-
87
-
88
-
89
-
90
-
91
-
92
-
93
-
94
-
95
-
96
-
97
-
98
-
99
-
100
-
101
-
102
-
103
-
104
-
105
-
106
-
107
-
108
-
109
-
110
-
111
-
112
-
113
-
114
-
115
-
116
-
117
-
118
-
119
-
120
-
121
-
122
-
123
-
124
-
125
-
126
-
127
-
128
-
129
-
130
-
131
-
132
-
133
-
134
-
135
-
136
-
137
-
138
-
139
-
140
-
141
-
142
-
143
-
144
-
145
-
146
-
147
-
148
-
149
-
150
-
151
-
152
-
153
-
154
-
155
-
156
-
157
-
158
-
159
-
160
-
161
-
162
-
163
 |
 |