Lexmark X342N Service Manual - Page 54
Heavy background, Partial blank image/white spots (no periodic pattern) - drum
 |
UPC - 734646256292
View all Lexmark X342N manuals
Add to My Manuals
Save this manual to your list of manuals |
Page 54 highlights
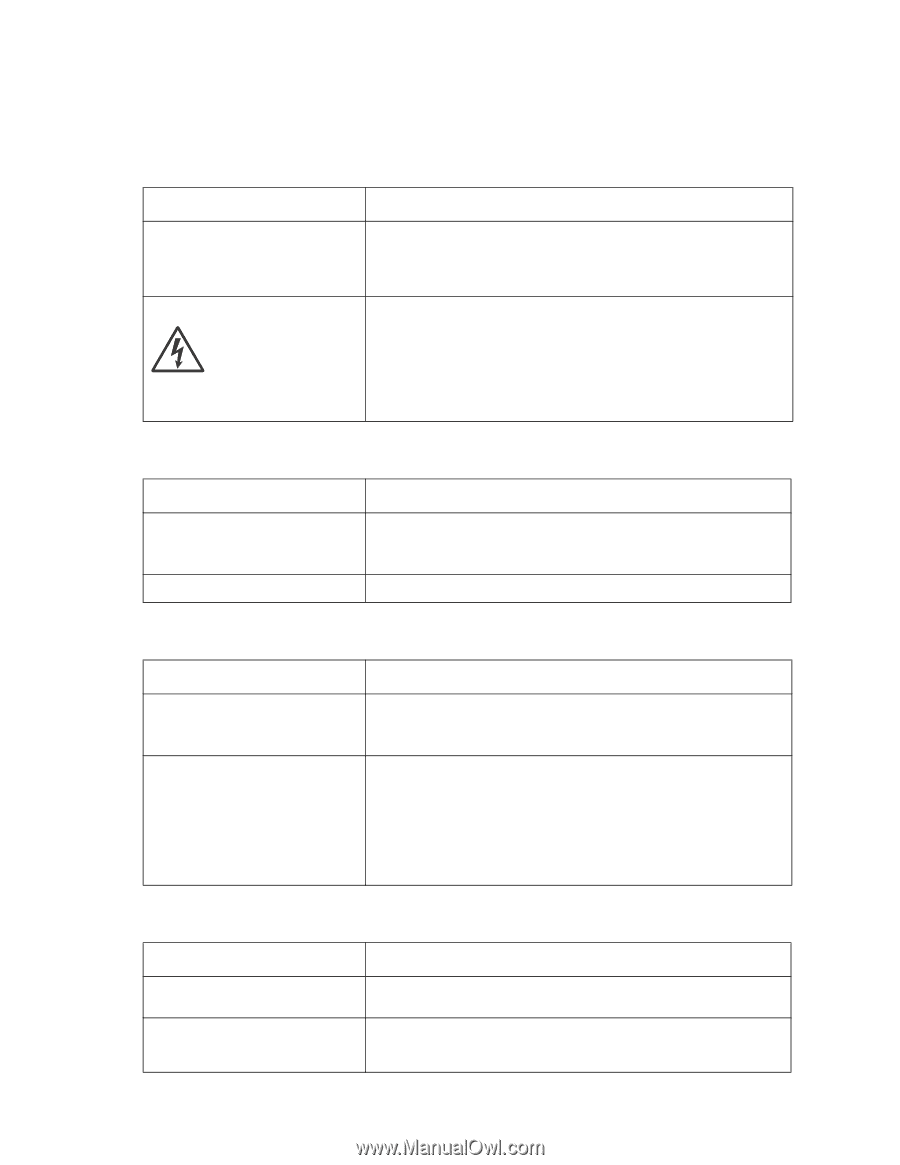
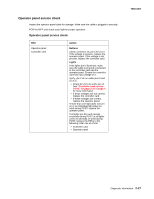
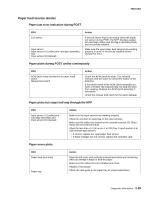
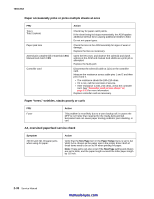
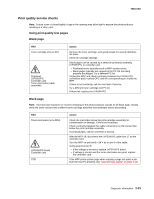
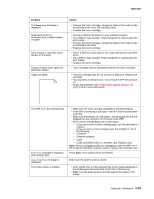
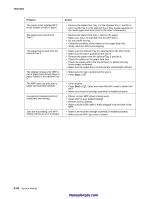
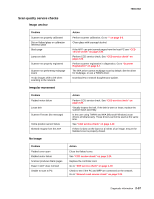
7003-XXX Heavy background Poor development or poorly charged toner particles cause excessive background. This is more noticeable as the toner cartridge nears end-of-life. FRU Toner cartridge (not a FRU) PC Kit (not a FRU) LVPS/HVPS Controller card Action Make sure the toner cartridge and PC Kit are correctly installed and the high voltage contacts are clean. If the toner cartridge and PC Kit are installed correctly, try a new PC Kit first, and then try a new toner cartridge. Check the contacts for correct installation and contamination where contact is made between the print cartridge assembly and LVPS/ HVPS board. Clean as necessary. If this does not correct the problem, replace the following FRUs one at a time in the order shown: • LVPS/HVPS board • Controller card Partial blank image/white spots (no periodic pattern) FRU Toner cartridge (not a FRU) Paper (not a FRU) Action Remove the toner cartridge assembly, and gently shake the assembly to evenly distribute the toner. If toner cartridge is low, try a new toner cartridge. Make sure recommended paper is being used. Variation in image density horizontally across page FRU PC Kit (not a FRU) Transfer roll Action The charge roll may have an unbalanced pressure against the photoconductor (PC) drum. Try a new PC Kit. Check the springs in the left and right transfer roll bearings. The bearing assemblies should support the transfer roll, applying even pressure to the PC drum. Replace the transfer roll assembly if the springs or bearing show signs of damage or fatigue. Inspect the transfer roll for signs of wear, damage, or contamination. Replace as necessary. Poor fusing of image FRU Paper (not a FRU) Fuser Action Make sure recommended paper is being used. Check the media type and texture settings on the MFP and in the driver. The fuser may not be operating at the proper temperature to fuse the toner to the paper. See "Fuser service check" on page 2-23 for more information. 2-32 Service Manual manuals4you.com
-
 1
1 -
2
-
3
-
4
-
5
-
6
-
7
-
8
-
9
-
10
-
11
-
12
-
13
-
14
-
15
-
16
-
17
-
18
-
19
-
20
-
21
-
22
-
23
-
24
-
25
-
26
-
27
-
28
-
29
-
30
-
31
-
32
-
33
-
34
-
35
-
36
-
37
-
38
-
39
-
40
-
41
-
42
-
43
-
44
-
45
-
46
-
47
-
48
-
 49
49 -
 50
50 -
 51
51 -
 52
52 -
 53
53 -
 54
54 -
 55
55 -
 56
56 -
 57
57 -
 58
58 -
 59
59 -
60
-
61
-
62
-
63
-
64
-
65
-
66
-
67
-
68
-
69
-
70
-
71
-
72
-
73
-
74
-
75
-
76
-
77
-
78
-
79
-
80
-
81
-
82
-
83
-
84
-
85
-
86
-
87
-
88
-
89
-
90
-
91
-
92
-
93
-
94
-
95
-
96
-
97
-
98
-
99
-
100
-
101
-
102
-
103
-
104
-
105
-
106
-
107
-
108
-
109
-
110
-
111
-
112
-
113
-
114
-
115
-
116
-
117
-
118
-
119
-
120
-
121
-
122
-
123
-
124
-
125
-
126
-
127
-
128
-
129
-
130
-
131
-
132
-
133
-
134
-
135
-
136
-
137
-
138
-
139
-
140
-
141
-
142
-
143
-
144
-
145
-
146
-
147
-
148
-
149
-
150
-
151
-
152
-
153
-
154
-
155
-
156
-
157
-
158
-
159
-
160
-
161
-
162
-
163
 |
 |