Lexmark X342N Service Manual - Page 85
Controller card removal, Upper right side cover removal on Card cage removal
 |
UPC - 734646256292
View all Lexmark X342N manuals
Add to My Manuals
Save this manual to your list of manuals |
Page 85 highlights
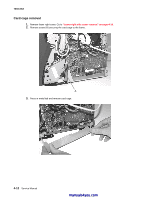
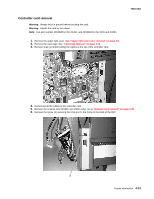
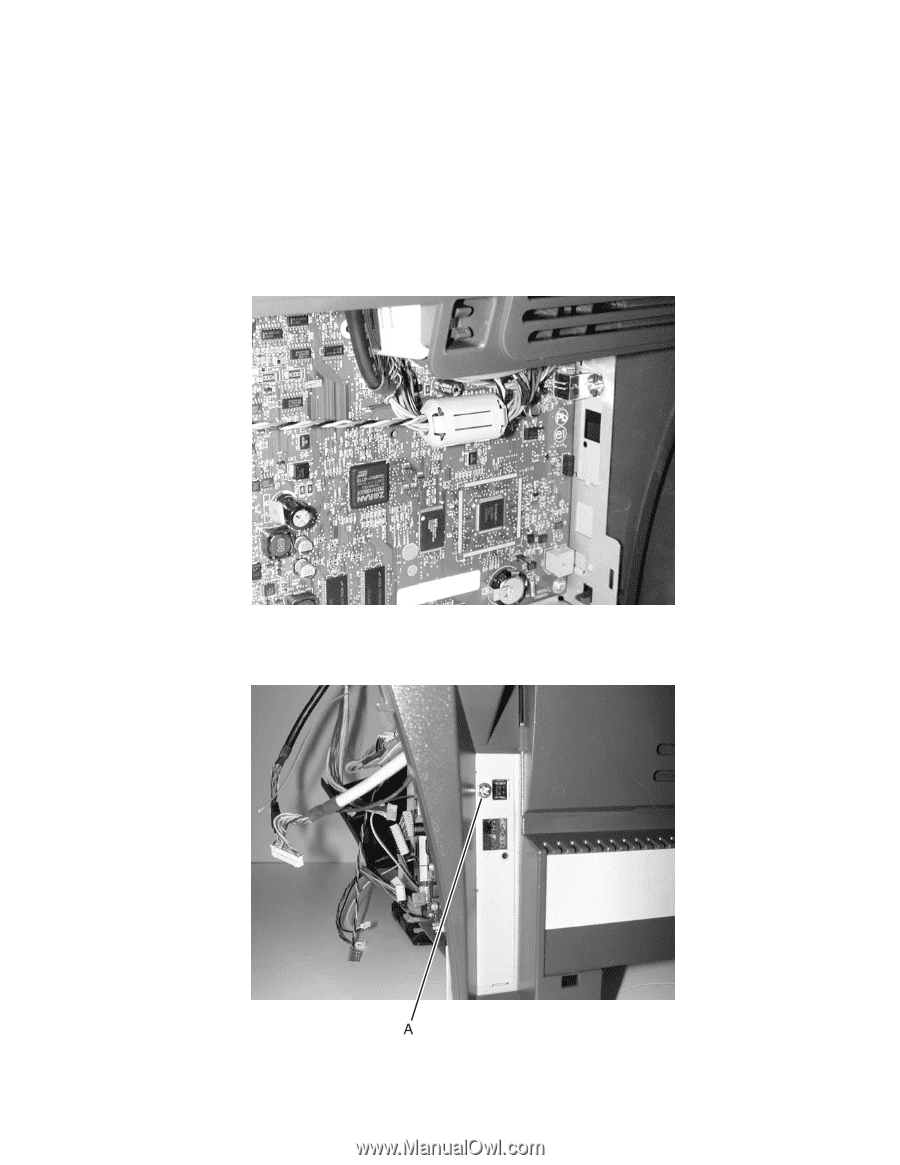
Controller card removal Warning: Always touch a ground before touching the card. Warning: Handle the card by the edges. Note: Use part number 40X4828 for the X342n, and 40X2632 for the X340 and X340n. 1. Remove the upper right cover. See "Upper right side cover removal" on page 4-8. 2. Remove the card cage. See "Card cage removal" on page 4-12. 3. Remove snap on toroid holding the cables at the top of the controller card. 7003-XXX 4. Disconnect all the cables to the controller card. 5. Remove the network card (X340n, and X342n only). Go to "Network card removal" on page 4-29. 6. Remove the screw (A) securing the USB port to the frame at the back of the MFP. Repair information 4-13
-
 1
1 -
2
-
3
-
4
-
5
-
6
-
7
-
8
-
9
-
10
-
11
-
12
-
13
-
14
-
15
-
16
-
17
-
18
-
19
-
20
-
21
-
22
-
23
-
24
-
25
-
26
-
27
-
28
-
29
-
30
-
31
-
32
-
33
-
34
-
35
-
36
-
37
-
38
-
39
-
40
-
41
-
42
-
43
-
44
-
45
-
46
-
47
-
48
-
49
-
50
-
51
-
52
-
53
-
54
-
55
-
56
-
57
-
58
-
59
-
60
-
61
-
62
-
63
-
64
-
65
-
66
-
67
-
68
-
69
-
70
-
71
-
72
-
73
-
74
-
75
-
76
-
77
-
78
-
79
-
 80
80 -
 81
81 -
 82
82 -
 83
83 -
 84
84 -
 85
85 -
 86
86 -
 87
87 -
 88
88 -
 89
89 -
 90
90 -
91
-
92
-
93
-
94
-
95
-
96
-
97
-
98
-
99
-
100
-
101
-
102
-
103
-
104
-
105
-
106
-
107
-
108
-
109
-
110
-
111
-
112
-
113
-
114
-
115
-
116
-
117
-
118
-
119
-
120
-
121
-
122
-
123
-
124
-
125
-
126
-
127
-
128
-
129
-
130
-
131
-
132
-
133
-
134
-
135
-
136
-
137
-
138
-
139
-
140
-
141
-
142
-
143
-
144
-
145
-
146
-
147
-
148
-
149
-
150
-
151
-
152
-
153
-
154
-
155
-
156
-
157
-
158
-
159
-
160
-
161
-
162
-
163
 |
 |
Repair information
4-13
7003-XXX
Controller card removal
Warning:
Always touch a ground before touching the card.
Warning:
Handle the card by the edges.
Note:
Use part number 40X4828 for the X342n, and 40X2632 for the X340 and X340n.
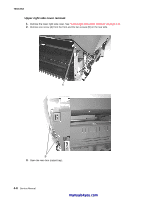
1.
Remove the upper right cover. See
“Upper right side cover removal” on page 4-8
.
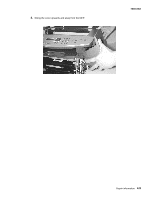
2.
Remove the card cage. See
“Card cage removal” on page 4-12
.
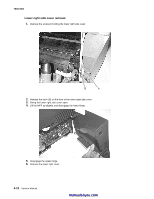
3.
Remove snap on toroid holding the cables at the top of the controller card.
4.
Disconnect all the cables to the controller card.
5.
Remove the network card (X340n, and X342n only). Go to
“Network card removal” on page 4-29
.
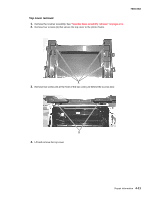
6.
Remove the screw (A) securing the USB port to the frame at the back of the MFP.