Lexmark X4550 Getting Started - Page 34
Reset Network Adapter to Factory Defaults, Print Test - ink cartridges
 |
UPC - 734646040556
View all Lexmark X4550 manuals
Add to My Manuals
Save this manual to your list of manuals |
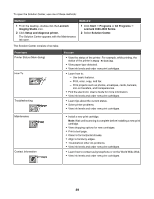
Page 34 highlights
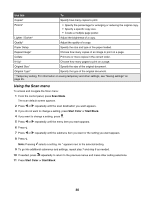
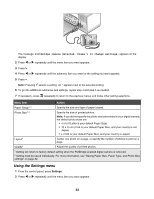
3 Press . 4 Press or repeatedly until the submenu item you want or the setting you want appears. 5 Press . Note: When you choose a value selection, an * appears next to the selected setting. 6 To go into additional submenus and settings, repeat step 4 and step 5 as needed. 7 If necessary, press repeatedly to return to the previous menus and make other selections. From here Maintenance Paper Setup Device Setup Defaults Network Setup You can Select: • Ink Level to view the ink level of the color cartridge. Press or to view the ink level of the black (or photo) cartridge. • Clean Cartridges to clean the print cartridge nozzles. For more information, see "Cleaning the print cartridge nozzles" in the "Maintaining the printer" chapter of the User's Guide on the CD. • Align Cartridges to align the cartridge. For more information, see "Aligning print cartridges" in the "Maintaining the printer" chapter of the User's Guide on the CD. • Print Test Page to print a test page. Select the size and type of paper loaded. Select: • Language to change the language setting. • Country to set the default blank paper size and date format being used in your location. • Clear Settings Timeout to change the timeout feature before the printer, if left unused, resets to the factory default settings. For more information, see "Saving settings" on page 35. • Power Saver to set the number of minutes before the printer, if left unused, enters the Power Saver mode. Select: • Photo Print Size to choose the size of photo(s) to print. • Set Defaults to change default settings. For more information, see "Saving settings" on page 35. Select: • Print Setup Page to print a page that lists the network settings. • Wireless Setup to view: - Network Name, which shows the six characters unique to your specific printer. - Wireless Signal Quality, which shows the signal strength. - Reset Network Adapter to Factory Defaults, which lets you reset the wireless network settings. • TCP/IP to reset the IP address. 34
-
 1
1 -
2
-
3
-
4
-
5
-
6
-
7
-
8
-
9
-
10
-
11
-
12
-
13
-
14
-
15
-
16
-
17
-
18
-
19
-
20
-
21
-
22
-
23
-
24
-
25
-
26
-
27
-
28
-
 29
29 -
 30
30 -
 31
31 -
 32
32 -
 33
33 -
 34
34 -
 35
35 -
 36
36 -
 37
37 -
 38
38 -
 39
39 -
40
-
41
-
42
-
43
-
44
-
45
-
46
-
47
-
48
-
49
-
50
-
51
-
52
-
53
-
54
-
55
-
56
-
57
-
58
-
59
-
60
-
61
-
62
-
63
-
64
-
65
-
66
-
67
-
68
-
69
-
70
-
71
-
72
-
73
-
74
 |
 |