Lexmark X4550 User's Guide - Page 53
Printing photos using the computer, Viewing / Printing photos from the Photo Library
 |
UPC - 734646040556
View all Lexmark X4550 manuals
Add to My Manuals
Save this manual to your list of manuals |
Page 53 highlights
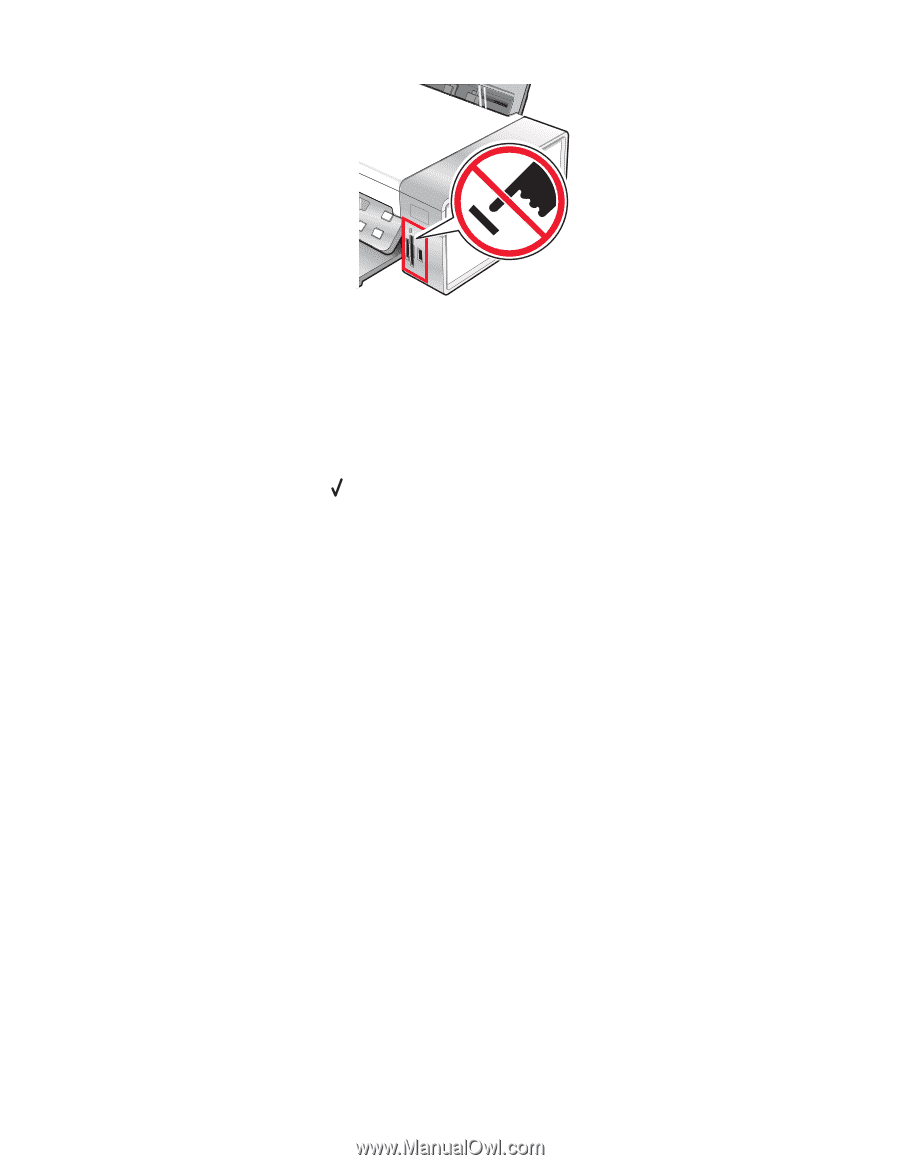
Notes: • Make sure the PictBridge-enabled digital camera is set to the correct USB mode. For more information, see the camera documentation. • The printer recognizes one active media device at a time. If you insert more than one media device, a message appears on the display prompting you to designate the device you want the printer to recognize. • If you have a memory card inserted when you connect a PictBridge-enabled camera, an error message will be displayed telling the you to remove one of the devices. • If the PictBridge connection is successful, the following appears on the printer display: PictBridge camera detected. Press to change settings. If any other message appears, see "Error messages" on page 94. • Values selected within the menu items are the settings used for Pictbridge printing if no explicit selection is made from the camera. 3 Follow the instructions in the camera documentation to select and print photos. Note: If the printer is turned off while the camera is connected, you must disconnect and then reconnect the camera. Printing photos using the computer Note: To print photos or images from a Web page, see "Printing photos or images from a Web page" on page 40. Viewing / Printing photos from the Photo Library 1 From the desktop, double-click the Lexmark Imaging Studio icon. 2 Click View / Print Photo Library. 3 Click to select the photo(s) you want to print. 4 From the Imaging Studio taskbar located at the bottom of the screen, click Photo Prints. 5 From the Quality drop-down list, select a copy quality. 6 From the Paper Size in Printer drop-down list, select the paper size. 7 To select multiple prints of a photo, or to select photo sizes other than 4 x 6 in. (10 x 15 cm), select the options you want in the table. Use the drop-down list in the last column to view and select other sizes. 8 Click Print Now in the bottom right corner of the screen. 53
-
 1
1 -
2
-
3
-
4
-
5
-
6
-
7
-
8
-
9
-
10
-
11
-
12
-
13
-
14
-
15
-
16
-
17
-
18
-
19
-
20
-
21
-
22
-
23
-
24
-
25
-
26
-
27
-
28
-
29
-
30
-
31
-
32
-
33
-
34
-
35
-
36
-
37
-
38
-
39
-
40
-
41
-
42
-
43
-
44
-
45
-
46
-
47
-
 48
48 -
 49
49 -
 50
50 -
 51
51 -
 52
52 -
 53
53 -
 54
54 -
 55
55 -
 56
56 -
 57
57 -
 58
58 -
59
-
60
-
61
-
62
-
63
-
64
-
65
-
66
-
67
-
68
-
69
-
70
-
71
-
72
-
73
-
74
-
75
-
76
-
77
-
78
-
79
-
80
-
81
-
82
-
83
-
84
-
85
-
86
-
87
-
88
-
89
-
90
-
91
-
92
-
93
-
94
-
95
-
96
-
97
-
98
-
99
-
100
-
101
-
102
-
103
-
104
-
105
-
106
-
107
-
108
-
109
 |
 |