Lexmark X4550 User's Guide - Page 55
Creating a Photo Slideshow, E-mail your Photo Greeting Card
 |
UPC - 734646040556
View all Lexmark X4550 manuals
Add to My Manuals
Save this manual to your list of manuals |
Page 55 highlights
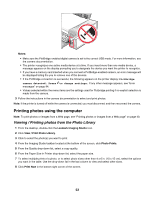
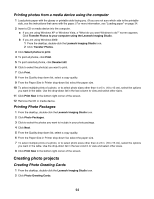
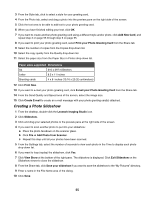
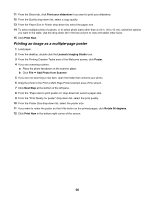
3 From the Style tab, click to select a style for your greeting card. 4 From the Photo tab, select and drag a photo into the preview pane on the right side of the screen. 5 Click the text area to be able to add text to your photo greeting card. 6 When you have finished editing your text, click OK. 7 If you want to create another photo greeting card using a different style and/or photo, click Add New Card, and repeat step 3 on page 55 through step 6 on page 55. 8 If you want to print your photo greeting card, select Print your Photo Greeting Card from the Share tab. 9 Select the number of copies from the Copies drop-down list. 10 Select the copy quality from the Quality drop-down list. 11 Select the paper size from the Paper Size in Printer drop-down list. Paper sizes supported Dimensions A4 210 x 297 millimeters Letter 8.5 x 11 inches Greeting cards 4 x 8 inches (10.16 x 20.32 centimeters) 12 Click Print Now. 13 If you want to e-mail your photo greeting card, click E-mail your Photo Greeting Card from the Share tab. 14 From the Send Quality and Speed area of the screen, select the image size. 15 Click Create E-mail to create an e-mail message with your photo greeting card(s) attached. Creating a Photo Slideshow 1 From the desktop, double-click the Lexmark Imaging Studio icon. 2 Click Slideshow. 3 Click and drag your selected photos to the preview pane at the right side of the screen. 4 If you want to scan another photo to put into your slideshow: a Place the photo facedown on the scanner glass. b Click File ΠAdd Photo from Scanner. c Repeat this step until all your photos have been scanned. 5 From the Settings tab, select the number of seconds to view each photo in the Time to display each photo drop-down list. 6 If you want to loop (replay) the slideshow, click Yes. 7 Click View Show at the bottom of the right pane. The slideshow is displayed. Click Exit Slideshow on the Slideshow viewer to close the slideshow. 8 From the Share tab, click Save your slideshow if you want to save the slideshow to the "My Pictures" directory. 9 Enter a name in the File Name area of the dialog. 10 Click Save. 55
-
 1
1 -
2
-
3
-
4
-
5
-
6
-
7
-
8
-
9
-
10
-
11
-
12
-
13
-
14
-
15
-
16
-
17
-
18
-
19
-
20
-
21
-
22
-
23
-
24
-
25
-
26
-
27
-
28
-
29
-
30
-
31
-
32
-
33
-
34
-
35
-
36
-
37
-
38
-
39
-
40
-
41
-
42
-
43
-
44
-
45
-
46
-
47
-
48
-
49
-
 50
50 -
 51
51 -
 52
52 -
 53
53 -
 54
54 -
 55
55 -
 56
56 -
 57
57 -
 58
58 -
 59
59 -
 60
60 -
61
-
62
-
63
-
64
-
65
-
66
-
67
-
68
-
69
-
70
-
71
-
72
-
73
-
74
-
75
-
76
-
77
-
78
-
79
-
80
-
81
-
82
-
83
-
84
-
85
-
86
-
87
-
88
-
89
-
90
-
91
-
92
-
93
-
94
-
95
-
96
-
97
-
98
-
99
-
100
-
101
-
102
-
103
-
104
-
105
-
106
-
107
-
108
-
109
 |
 |