Lexmark X4550 User's Guide - Page 94
Error messages, Alignment Error, Black Ink Low / Color Ink Low / Photo Ink Low, Cartridge Error (1102 - problems
 |
UPC - 734646040556
View all Lexmark X4550 manuals
Add to My Manuals
Save this manual to your list of manuals |
Page 94 highlights
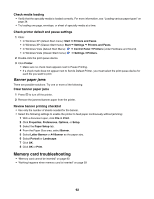
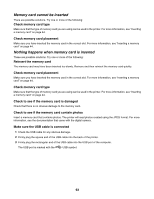
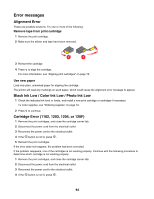
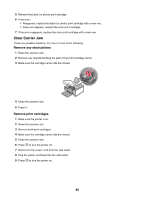
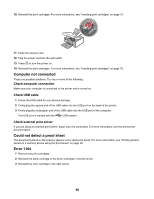
Error messages Alignment Error These are possible solutions. Try one or more of the following: Remove tape from print cartridge 1 Remove the print cartridge. 2 Make sure the sticker and tape have been removed. 1 2 3 Reinsert the cartridge. 4 Press to align the cartridge. For more information, see "Aligning print cartridges" on page 72. Use new paper Load only plain, unmarked paper for aligning the cartridge. The printer will read any markings on used paper, which could cause the alignment error message to appear. Black Ink Low / Color Ink Low / Photo Ink Low 1 Check the indicated ink level or levels, and install a new print cartridge or cartridges if necessary. To order supplies, see "Ordering supplies" on page 74. 2 Press to continue. Cartridge Error (1102, 1203, 1204, or 120F) 1 Remove the print cartridges, and close the cartridge carrier lids. 2 Disconnect the power cord from the electrical outlet. 3 Reconnect the power cord to the electrical outlet. 4 If the button is not lit, press . 5 Reinsert the print cartridges. If the error does not reappear, the problem has been corrected. If the problem reappears, one of the cartridges is not working properly. Continue with the following procedure to determine which cartridge is not working properly. 1 Remove the print cartridges, and close the cartridge carrier lids. 2 Disconnect the power cord from the electrical outlet. 3 Reconnect the power cord to the electrical outlet. 4 If the button is not lit, press . 94
-
 1
1 -
2
-
3
-
4
-
5
-
6
-
7
-
8
-
9
-
10
-
11
-
12
-
13
-
14
-
15
-
16
-
17
-
18
-
19
-
20
-
21
-
22
-
23
-
24
-
25
-
26
-
27
-
28
-
29
-
30
-
31
-
32
-
33
-
34
-
35
-
36
-
37
-
38
-
39
-
40
-
41
-
42
-
43
-
44
-
45
-
46
-
47
-
48
-
49
-
50
-
51
-
52
-
53
-
54
-
55
-
56
-
57
-
58
-
59
-
60
-
61
-
62
-
63
-
64
-
65
-
66
-
67
-
68
-
69
-
70
-
71
-
72
-
73
-
74
-
75
-
76
-
77
-
78
-
79
-
80
-
81
-
82
-
83
-
84
-
85
-
86
-
87
-
88
-
 89
89 -
 90
90 -
 91
91 -
 92
92 -
 93
93 -
 94
94 -
 95
95 -
 96
96 -
 97
97 -
 98
98 -
 99
99 -
100
-
101
-
102
-
103
-
104
-
105
-
106
-
107
-
108
-
109
 |
 |
