Lexmark X5470 User's Guide (Mac)
Lexmark X5470 Manual
 |
View all Lexmark X5470 manuals
Add to My Manuals
Save this manual to your list of manuals |
Lexmark X5470 manual content summary:
- Lexmark X5470 | User's Guide (Mac) - Page 1
Lexmark 5400 Series All-In-One User Guide January 2007 www.lexmark.com - Lexmark X5470 | User's Guide (Mac) - Page 2
- Lexmark X5470 | User's Guide (Mac) - Page 3
started...5 Performing printing and related tasks...8 Managing print jobs...14 Learning about the All-In-One software print options 16 Copying Understanding the printer 87 Understanding the printer parts...87 Understanding the software...99 Maintaining the printer 110 Print cartridges...110 - Lexmark X5470 | User's Guide (Mac) - Page 4
genuine Lexmark print cartridges...116 Ordering supplies...116 Finding information about the printer...118 Contacting Customer Support...120 Troubleshooting 121 Setup troubleshooting...121 Print troubleshooting...124 Copy troubleshooting...127 Scan troubleshooting...128 Fax troubleshooting...130 - Lexmark X5470 | User's Guide (Mac) - Page 5
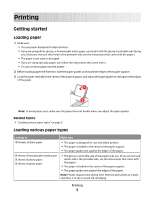
or damaged. • If you are using specialty paper, you follow the instructions that came with it. • You do not force paper into the printer. 2 Before loading paper the first time, slide the paper guides out toward the edges of the paper support. 3 Load the paper vertically in the center of the paper - Lexmark X5470 | User's Guide (Mac) - Page 6
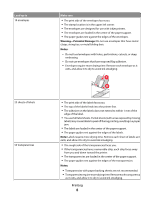
to 10 envelopes 25 sheets of labels 50 transparencies Make sure • The print side of the envelopes faces you. • The stamp location is in the upper left corner. • The envelopes are designed for use with inkjet printers. • The envelopes are loaded in the center of the paper support. • The paper guides - Lexmark X5470 | User's Guide (Mac) - Page 7
loading instructions that came with the iron-on transfers. • The print side of the transfers faces you. • The transfers are loaded in the center of the paper support. • The paper guides rest against the edges of the transfers. Note: For best results, load transfers one at a time. • The print side - Lexmark X5470 | User's Guide (Mac) - Page 8
only the number of pages needed to print the banner. • You place the required stack of banner paper on the top cover. • The leading edge of the banner paper feeds into the printer first. • The paper is loaded in the center of the paper support. • The paper guides rest against the edges of the - Lexmark X5470 | User's Guide (Mac) - Page 9
quality using the software" on page 84 Printing borderless photos From your software application, set the page margins to zero, and then adjust the image on the screen so that it covers the entire page. Note: Some applications do not support margin setting. 1 Load photo or glossy paper, with the - Lexmark X5470 | User's Guide (Mac) - Page 10
the Print dialog. a With a photo open, choose File Œ Print. b From the Printer pop-up menu, choose 5400 Series. c For Mac OS X version 10.4 or needed in the Print dialog. a From the software application, click File Œ Print. b From the Printer pop-up menu, choose 5400 Series. c Click Print. Notes: • - Lexmark X5470 | User's Guide (Mac) - Page 11
Make sure the print side of the envelopes faces you. 2 Customize the settings as needed in the Page Setup dialog. a With a document open, click Customize the settings as needed in the Print dialog. a From the software application, click File ΠPrint. b From the Printer pop-up menu, choose 5400 Series - Lexmark X5470 | User's Guide (Mac) - Page 12
you want to print. e Select a print quality other than Quick Print. Photo is recommended. 4 Click Print. Note: To support with the leading edge of the banner going into the printer. 5 Adjust the left and right paper guides. 6 Customize the settings in the Page Setup dialog. a With your document - Lexmark X5470 | User's Guide (Mac) - Page 13
in black and white This setting is available only if there is a black print cartridge installed. 1 Load paper. 2 Customize the settings in the Page Setup dialog as needed. 3 With a document open, click File ΠPrint. 4 From the Printer pop-up menu, choose 5400 Series. 5 From the pop-up menu in the - Lexmark X5470 | User's Guide (Mac) - Page 14
-up menu, choose Paper Handling. 3 Select Reverse page order. 4 Click Print. Related topics: • "Using the Print dialog" on page 101 Managing print jobs Pausing print jobs 1 While the document is printing, click the printer icon on the dock. 2 From the queue window, select the job you want to pause - Lexmark X5470 | User's Guide (Mac) - Page 15
the control panel: 1 Press . Printing stops and the print cartridge carrier returns to its home position. 2 Press to turn off the printer. To cancel a print job using the computer: 1 While the document is printing, click the printer icon on the dock. 2 From the queue window, select the job you want - Lexmark X5470 | User's Guide (Mac) - Page 16
about the All-In-One software print options Choosing a paper size 1 With a document open, click File ΠPage Setup. 2 From the "Format for" pop-up menu, choose 5400 Series. Note: When you select Any Printer, your paper size choices are limited. By selecting the name of your printer, you have many - Lexmark X5470 | User's Guide (Mac) - Page 17
the computer The printer can sort multiple copy jobs. If you print two copies of a three-page document, and you choose not to collate them, the pages print in this order: 1, 1, 2, 2, 3, 3. If you choose to collate, the pages print in this order: 1, 2, 3, 1, 2, 3. 1 With a document open, click File - Lexmark X5470 | User's Guide (Mac) - Page 18
from the Scan dialog" on page 39 • "Enhancing photo print quality using the software" on page 84 Resetting All-In-One software settings to defaults 1 From the Finder desktop, double-click the Lexmark 5400 Series folder. 2 Double-click the Lexmark 5400 Series Center icon. 3 Click Preview/Edit to view - Lexmark X5470 | User's Guide (Mac) - Page 19
or damaged. • If you are using specialty paper, you follow the instructions that came with it. • You do not force paper into the printer. 2 Before loading paper the first time, slide the paper guides out toward the edges of the paper support. 3 Load the paper vertically in the center of the paper - Lexmark X5470 | User's Guide (Mac) - Page 20
can scan and then print photos, text documents, magazine articles, newspapers, and other publications. You can scan a document for faxing. Note the ADF. 1 Make sure the computer and the printer are on. 2 Open the top cover. 3 Place the original document or item facedown on the scanner glass in the - Lexmark X5470 | User's Guide (Mac) - Page 21
topics: • "Understanding the parts of the printer" on page 88 • "Loading original documents into the Automatic Document Feeder" on page 21 Loading original documents into the Automatic Document Feeder You can load up to 10 sheets of an original document into the Automatic Document Feeder (ADF) for - Lexmark X5470 | User's Guide (Mac) - Page 22
preprinted media to dry thoroughly before loading into the ADF. • You do not use media printed with metallic ink particles. • You avoid embossed designs. Related topics: • "Understanding the parts of the printer" on page 88 • "Loading original documents on the scanner glass" on page 20 Copying 22 - Lexmark X5470 | User's Guide (Mac) - Page 23
you. (If you are not sure which side is the printable side, see the instructions that came with the paper.) 2 Place a photo facedown on the scanner glass in the upper left corner. For more information, see "Loading original documents on the scanner glass" on page 20. 3 If necessary, press Copy Mode - Lexmark X5470 | User's Guide (Mac) - Page 24
" on page 17 • "Using the control panel" on page 90 Collating copies using the computer The printer can sort multiple copy jobs. If you print two copies of a three-page document, and you choose not to collate them, the pages print in this order: 1, 1, 2, 2, 3, 3. If you choose to collate, the pages - Lexmark X5470 | User's Guide (Mac) - Page 25
want to print on one page appears. 8 Press Start Color or Start Black. Related topics: • "Loading paper" on page 5 • "Loading original documents on the side is the printable side, see the instructions that came with the paper.) 2 Load an original document facedown into the ADF or on the scanner - Lexmark X5470 | User's Guide (Mac) - Page 26
Managing copy jobs Canceling a copy job 1 Press . Scanning stops and the scanner bar returns to its home position. 2 Press to turn off the printer. Related topics: • "Using the control panel" on page 90 Copying 26 - Lexmark X5470 | User's Guide (Mac) - Page 27
can scan and then print photos, text documents, magazine articles, newspapers, and other publications. You can scan a document for faxing. Note: the ADF. 1 Make sure the computer and the printer are on. 2 Open the top cover. 3 Place the original document or item facedown on the scanner glass in the - Lexmark X5470 | User's Guide (Mac) - Page 28
topics: • "Understanding the parts of the printer" on page 88 • "Loading original documents into the Automatic Document Feeder" on page 21 Loading original documents into the Automatic Document Feeder You can load up to 10 sheets of an original document into the Automatic Document Feeder (ADF) for - Lexmark X5470 | User's Guide (Mac) - Page 29
preprinted media to dry thoroughly before loading into the ADF. • You do not use media printed with metallic ink particles. • You avoid embossed designs. Related topics: • "Understanding the parts of the printer" on page 88 • "Loading original documents on the scanner glass" on page 20 Scanning 29 - Lexmark X5470 | User's Guide (Mac) - Page 30
be printed or To be viewed on monitor/Web page. 7 From the "Send scanned image to" pop-up menu, choose a destination folder or application for 10 Crop photos, if needed. For more information, see "Cropping photos using the software" on page 38. 11 Click . Related topics: • "Loading original documents - Lexmark X5470 | User's Guide (Mac) - Page 31
glass. 3 From the Finder desktop, double-click the Lexmark 5400 Series folder. 4 Double-click the Lexmark 5400 Series Center icon. 5 From the "What is 1 Make sure the printer is connected to a computer, and both the printer and the computer are on. 2 Load an original document facedown into the ADF - Lexmark X5470 | User's Guide (Mac) - Page 32
for scanning logos, parts of a magazine page, or sections of a photo. 1 Make sure the printer is connected to a computer, and both the printer and the computer are on. 2 Load an original document or image facedown on the scanner glass. 3 From the Finder desktop, double-click the Lexmark 5400 Series - Lexmark X5470 | User's Guide (Mac) - Page 33
once. All scanned pages are saved to only one file since PDF supports multiple-page scanning. • Preview is not supported when using the Automatic Document Feeder. You can preview one page at a time when using the scanner. Related topics: • "Loading original documents on the scanner glass" on page 20 - Lexmark X5470 | User's Guide (Mac) - Page 34
only prompt once. All scanned pages are saved to only one file since PDF supports multiple-page scanning. Related topics: • "Loading original documents on the scanner glass" on page 20 • "Loading original documents into the Automatic Document Feeder" on page 21 Scanning clear images from magazines - Lexmark X5470 | User's Guide (Mac) - Page 35
editing Use the Optical Character Recognition (OCR) software feature to scan a document and produce text you can edit with a word-processing application. Note: This function will work only if you have installed ABBYY FineReader 5 Sprint X. 1 Load an original document facedown into the ADF or on the - Lexmark X5470 | User's Guide (Mac) - Page 36
Scan. The scanned image opens in the specified application. 8 From the software application, click File Œ Save As. 9 Enter the file name, format, and location where you want the scanned image to be saved. 10 Click Save. Related topics: • "Loading original documents on the scanner glass" on page 20 - Lexmark X5470 | User's Guide (Mac) - Page 37
37 Adjusting color settings when scanning You can manually adjust the color settings for optimum color output. 1 From the Finder desktop, double-click the Lexmark 5400 Series folder. 2 Double-click the Lexmark 5400 Series Center icon. 3 From the All-In-One Center, click Preview/Edit to open the Scan - Lexmark X5470 | User's Guide (Mac) - Page 38
system memory and drastically affects system performance. • An application-Opens the scanned image in the specified application. Related topics: • "Saving a scanned image" on page 36 • "Using the All-In-One Center" on page 105 Cropping photos using the software You can use the Auto-crop feature to - Lexmark X5470 | User's Guide (Mac) - Page 39
tab Go to Scan Settings Custom Settings Reduce Background Noise To Select a preset scan setting according to the color and document type of your scan. Customize the scan setting manually instead of using a preset scan setting. Adjust the amount of color you want in the scanned image, choose - Lexmark X5470 | User's Guide (Mac) - Page 40
ink document or list The list of applications in the Customize list is generated when you install the All-In-One software. You can expand this list to a maximum of 50 applications. You can add, remove, or modify an application in the Customize list. 1 From the Finder desktop, double-click the Lexmark - Lexmark X5470 | User's Guide (Mac) - Page 41
to this application. You can choose only one type of file. • Click OK. Sharpening an image 1 From the Finder desktop, double-click the Lexmark 5400 Series folder. 2 Double-click the Lexmark 5400 Series dialog" on page 39 • "Enhancing photo print quality using the software" on page 84 Scanning 41 - Lexmark X5470 | User's Guide (Mac) - Page 42
Resetting All-In-One software settings to defaults 1 From the Finder desktop, double-click the Lexmark 5400 Series folder. 2 Double-click the Lexmark 5400 Series Center icon. 3 Click Preview/Edit to view the Scan dialog. 4 Click to open the Scan Setup drawer. 5 Select the Adjustments tab. 6 Click - Lexmark X5470 | User's Guide (Mac) - Page 43
ready to fax Choosing a fax connection You can connect the printer with equipment such as a telephone, an answering machine, or a computer modem. If problems occur, see "Setup troubleshooting" on page 121. Note: The printer is an analog device that works best when directly connected to the wall - Lexmark X5470 | User's Guide (Mac) - Page 44
, telephone, or other telecommunications equipment, use the telephone line adapter included in the box with the printer. 1 Connect the adapter to the telephone line that came with the printer. Note: The UK adapter is shown. Your adapter may look different, but it will fit the telephone outlet - Lexmark X5470 | User's Guide (Mac) - Page 45
the plug from the back of the printer. 2 Connect your telecommunications equipment directly to the EXT port on the back of the printer. Note: Once this plug is removed, any country- or region-specific equipment that you connect to the printer by the adapter, as shown, will not function properly - Lexmark X5470 | User's Guide (Mac) - Page 46
installed in the EXT port of the printer. This plug is necessary for the proper functioning of the printer parts of the printer" on page 88 Connecting directly to a telephone wall jack Connect the printer jack. 2 Connect one end of the telephone cord into the LINE port of the printer. 3 Connect the - Lexmark X5470 | User's Guide (Mac) - Page 47
to telecommunications equipment, see "Using an RJ11 adapter" on page 44. 1 Make sure you have the following: • A telephone • Two telephone cords • A telephone wall jack 2 Connect one telephone cord to the LINE port of the printer, and then plug it into an active telephone wall jack. 3 Remove the - Lexmark X5470 | User's Guide (Mac) - Page 48
to telecommunications equipment, see "Using an RJ11 adapter" on page 44. 1 Make sure you have the following: • A telephone • An answering machine • Three telephone cords • A telephone wall jack 2 Connect one telephone cord into the LINE port of the printer, and then plug it into an active telephone - Lexmark X5470 | User's Guide (Mac) - Page 49
computer with a modem to send faxes from the software application. Note: Setup steps may vary depending on your country or region. For more information on connecting the printer to telecommunications equipment, see "Using an RJ11 adapter" on page 44. 1 Make sure you have the following: • A telephone - Lexmark X5470 | User's Guide (Mac) - Page 50
2 Connect a telephone cord into the LINE port of the printer, and then plug it into an active telephone wall jack. 3 Remove the protective plug from the EXT port of the printer. 4 Connect a second telephone cord from the telephone to the computer modem. Faxing 50 - Lexmark X5470 | User's Guide (Mac) - Page 51
cord from the computer modem to the EXT port of the printer. Related topics: • "Getting the printer ready to fax" on page 43 Loading original documents on the scanner glass You can scan and then print photos, text documents, magazine articles, newspapers, and other publications. You can scan - Lexmark X5470 | User's Guide (Mac) - Page 52
topics: • "Understanding the parts of the printer" on page 88 • "Loading original documents into the Automatic Document Feeder" on page 21 Loading original documents into the Automatic Document Feeder You can load up to 10 sheets of an original document into the Automatic Document Feeder (ADF) for - Lexmark X5470 | User's Guide (Mac) - Page 53
Note: Preview is not supported when using the Automatic Document Feeder. You can preview one page at a time when using the scanner. Automatic Document Feeder paper capacity Load up to 10 sheets of: • Letter-size paper • A4 paper • Legal-size paper Make sure • You adjust the paper guide on the ADF - Lexmark X5470 | User's Guide (Mac) - Page 54
preprinted media to dry thoroughly before loading into the ADF. • You do not use media printed with metallic ink particles. • You avoid embossed designs. Related topics: • "Understanding the parts of the printer" on page 88 • "Loading original documents on the scanner glass" on page 20 Faxing 54 - Lexmark X5470 | User's Guide (Mac) - Page 55
can include a calling card number as part of the fax number. • Enter a maximum of 64 digits in a fax number. • Press Group Dial entry (90-99). Notes: • For instructions on how to add Speed Dial or Group Dial panel 1 Make sure the printer is on. 2 Load an original document facedown into the ADF or - Lexmark X5470 | User's Guide (Mac) - Page 56
select a number from the Speed Dial or Group Dial list. For more information, see "Entering a fax number at a time you choose. 1 Load an original document facedown into the ADF or on the scanner glass. Note you want to send the fax. 9 Press . 10 If the printer is not set to the 24 hour mode, press - Lexmark X5470 | User's Guide (Mac) - Page 57
documents into the Automatic Document Feeder" on page 21 Sending a fax while listening to a call (On Hook Dial) The manual dialing feature lets you dial a telephone number while listening to the call through a speaker on the printer the Speed Dial or Group Dial list. For more information, see " - Lexmark X5470 | User's Guide (Mac) - Page 58
printer automatically receives faxes, see "Setting the number of rings before receiving a fax automatically" on page 62. Related topics: • "Using the control panel" on page 90 Receiving a fax manually this service, it works with the printer. When and regions. The printer supports two distinct Caller - Lexmark X5470 | User's Guide (Mac) - Page 59
: • Off-(Default). • Forward-The printer sends the fax to the designated fax number. • Print & Forward-The printer prints the fax and then sends it to appears. 8 Press . 9 Press or repeatedly until the setting you want appears. 10 Press . 11 Enter the number to which you want to forward the fax. 12 - Lexmark X5470 | User's Guide (Mac) - Page 60
. 9 Press or repeatedly until the setting you want appears. 10 Press to print the report. Related topics: • "Using the control panel" on page 90 Setting up Speed Dial using the computer 1 From the Finder desktop, double-click the Lexmark 5400 Series folder. 2 Double-click the Fax Setup Utility icon - Lexmark X5470 | User's Guide (Mac) - Page 61
Speed Dial or Group Dial entry. Print all Speed Dial and Group Dial entries in the Phone Book. Note: For instructions on how to add Speed Dial or 8 Press . 9 To change the setting, press or repeatedly until Create appears. 10 Press . 11 Enter the prefix to be dialed before each telephone number. 12 - Lexmark X5470 | User's Guide (Mac) - Page 62
a single telephone line. If you subscribe to this service, you can program your printer to have a distinctive ring pattern and phone number for On appears. 8 Press . 9 Press or repeatedly until the setting you want appears. 10 Press to save the setting. 11 Make sure the Fax Auto Answer light is on. - Lexmark X5470 | User's Guide (Mac) - Page 63
Exchange (PBX) telephone system. Ordinarily, when dialing a fax number, the printer waits to recognize the dial tone and then dials the fax number. However, appears. 8 Press . 9 Press or repeatedly until Behind PBX appears. 10 Press to save this setting. Related topics: • "Using the control panel - Lexmark X5470 | User's Guide (Mac) - Page 64
10 Press to save the setting. 11 Press or repeatedly until Your Fax Number appears. 12 Press . 13 Enter your fax number using the keypad. Note: You can enter a maximum of 64 appears. 4 Press . 5 Press or repeatedly until Fax Printing appears. 6 Press . 7 Press or repeatedly until Fax Footer - Lexmark X5470 | User's Guide (Mac) - Page 65
10 Press . 11 During the initial setup of your printer, you were prompted to enter the date and time. If you Press . 7 Press or until Host Fax Settings appears. 8 Press . 9 Press or until Block appears. 10 Press to save this setting. Related topics: • "Blocking junk faxes" on page 66 • "Using the - Lexmark X5470 | User's Guide (Mac) - Page 66
Turn ON/OFF appears. 8 Press . 9 Press or repeatedly until On appears. 10 Press . 11 If you want to block faxes from specific phone numbers: a Press b Press . c Enter a phone number. Note: You can enter a maximum of 64 numbers. d Press . e If you want to enter a corresponding name, enter it using - Lexmark X5470 | User's Guide (Mac) - Page 67
13 If you want to print a list of blocked faxes: a Press or repeatedly until Print appears. b Press to print the list. Related topics: • "Blocking or receive. 1 From the Finder desktop, double-click the Lexmark 5400 Series folder. 2 Double-click the 5400 Series Fax Setup Utility icon. 3 - Lexmark X5470 | User's Guide (Mac) - Page 68
number. Notes: - You can include a calling card number as part of the fax number. - Enter a maximum of 64 digits in a fax number. • Select incoming call options. • Select Auto Answer options. • Select whether you want to forward a fax, or print it and then forward it. • Enter a fax forwarding number - Lexmark X5470 | User's Guide (Mac) - Page 69
time, and page number) to appear on each page you receive. • Select when to print fax activity and confirmation reports. Speed Dials Create, add to, edit, or delete entries from the Speed Dial list, including Group Dial entries. 4 Click Save Settings after you finish customizing the settings. To - Lexmark X5470 | User's Guide (Mac) - Page 70
• If there is an arrow on the card, make sure it points toward the printer. 12 Slot Memory card 1 • xD Picture Card • Secure Digital • Mini Secure Digital (with adapter) Note: Make sure you connect the memory card to the adapter that came with it before inserting it into the slot. • MultiMedia Card - Lexmark X5470 | User's Guide (Mac) - Page 71
PictBridge troubleshooting" on page 137. • The printer recognizes one active media device at a time. If you insert more than one media Insert the flash drive into the PictBridge port on the front of the printer. Note: An adapter may be necessary if your drive does not fit directly into the port - Lexmark X5470 | User's Guide (Mac) - Page 72
printer is connected directly to a computer, you can transfer photos to the computer from a memory card or flash drive. Note: You cannot transfer photos from a memory device to a computer through an external network adapter Follow the instructions on the taken on more than one date, selections will - Lexmark X5470 | User's Guide (Mac) - Page 73
you are not sure which side is the printable side, see the instructions that came with the paper.) For more information, see "Loading paper" on page 5. 2 Insert a memory card or flash drive that contains the images you want to print. For more information, see "Inserting a memory card" on page 70 or - Lexmark X5470 | User's Guide (Mac) - Page 74
, or any time the printer is turned off. Related topics: • "Using the control panel" on page 90 Printing photos by date range 1 Load photo paper with the glossy or printable side facing you. (If you are not sure which side is the printable side, see the instructions that came with the paper.) For - Lexmark X5470 | User's Guide (Mac) - Page 75
Order Format (DPOF) is a feature available on some digital cameras. If your camera supports DPOF, you can specify which photos to print, how many of each, and print settings while the memory card is still in the camera. The printer recognizes these settings when you insert the memory card into the - Lexmark X5470 | User's Guide (Mac) - Page 76
information, see the camera documentation. • The printer recognizes one active media device at a time. If you insert more than one media device, a message see "Error messages" on page 138. 3 Follow the instructions in the camera documentation to select and print photos. Note: If the printer is turned - Lexmark X5470 | User's Guide (Mac) - Page 77
. d Choose an orientation. e Click OK. 3 Customize the settings as needed in the Print dialog. a With a photo open, choose File ΠPrint. b From the Printer pop-up menu, choose 5400 Series. c For Mac OS X version 10.4 or later, click Advanced. Otherwise, proceed to the next step. d From the Copies - Lexmark X5470 | User's Guide (Mac) - Page 78
OK. 3 Customize the settings as needed in the Print dialog. a From the software application, click File Œ Print. b From the Printer pop-up menu, choose 5400 Series. c Click Print. Notes: • To avoid paper jams, do not force the cards into the printer. • To prevent smudging, remove each card as it - Lexmark X5470 | User's Guide (Mac) - Page 79
using the software" on page 84 Printing color images in black and white This setting is available only if there is a black print cartridge installed. 1 Load paper. 2 Customize the settings in the Page Setup dialog as needed. 3 With a document open, click File ΠPrint. 4 From the Printer pop-up - Lexmark X5470 | User's Guide (Mac) - Page 80
-click the Lexmark 5400 Series Center icon. 4 From the "What is being scanned?" menu, select a document type other than Photo. 5 From the "How will the scanned image be used?" menu, choose To be viewed on monitor/web page. 6 From the "Send scanned image to" menu, choose an application. 7 Click Scan - Lexmark X5470 | User's Guide (Mac) - Page 81
once. All scanned pages are saved to only one file since PDF supports multiple-page scanning. • Preview is not supported when using the Automatic Document Feeder. You can preview one page at a time when using the scanner. Related topics: • "Loading original documents on the scanner glass" on page 20 - Lexmark X5470 | User's Guide (Mac) - Page 82
are saved to only one file since PDF supports multiple-page scanning. Related topics: • "Loading original documents on the scanner glass" on page 20 • "Loading original documents into the Automatic Document Feeder" on page 21 Saving a scanned image 1 Make sure the printer is connected to a computer - Lexmark X5470 | User's Guide (Mac) - Page 83
Scan. The scanned image opens in the specified application. 8 From the software application, click File Œ Save As. 9 Enter the file name, format, and location where you want the scanned image to be saved. 10 Click Save. Related topics: • "Loading original documents on the scanner glass" on page 20 - Lexmark X5470 | User's Guide (Mac) - Page 84
the crop area. • Click and drag the crop area to a part of the image you want copied. Note: These actions will deactivate Auto One Center" on page 105 Enhancing photo print quality using the software 1 From the Finder desktop, double-click the Lexmark 5400 Series folder. 2 Double-click the Lexmark - Lexmark X5470 | User's Guide (Mac) - Page 85
be printed or one instructions that came with the paper.) 2 Load an original document documents into the Automatic Document Feeder" on page 21 • "Using the control panel" on page 90 Sharpening an image 1 From the Finder desktop, double-click the Lexmark 5400 Series folder. 2 Double-click the Lexmark - Lexmark X5470 | User's Guide (Mac) - Page 86
slider to adjust the level of sharpness of the scanned image. Related topics: • "Customizing scan settings from the Scan dialog" on page 39 • "Enhancing photo print quality using the software" on page 84 Working with photos 86 - Lexmark X5470 | User's Guide (Mac) - Page 87
Attaches to the power supply port located at the back of the printer. 5 Setup sheet Instructions on setting up printer hardware and software, and information on setup troubleshooting. 6 Installation software CD • Installation software for the printer • Help • User's Guide in electronic format - Lexmark X5470 | User's Guide (Mac) - Page 88
parts of the printer 10 9 8 11 1 7 12 6 54 2 3 Use the To 1 Paper support Load paper. 2 Automatic Document Feeder (ADF) paper stop • Stop paper as it exits the ADF. • Support Automatic Document Feeder (ADF) paper guide Keep paper straight when feeding into the ADF. 8 Automatic Document - Lexmark X5470 | User's Guide (Mac) - Page 89
unit Access the print cartridges. 2 Print cartridge carrier Install, replace, or remove a print cartridge. 3 USB port Connect the printer to a ISDN (integrated services digital network), or cable modem to the printer. LINE 6 Power supply with port Connect the printer to a power source. Related - Lexmark X5470 | User's Guide (Mac) - Page 90
8 5 1 Press To 1 • Turn the printer on and off. • Stop the print, copy, scan, or fax process. 2 Copy Mode Access the copy default screen and make copies. Note: The mode is selected when the button light is on. 3 Scan Mode Access the scan default screen and scan documents. Note: The mode is - Lexmark X5470 | User's Guide (Mac) - Page 91
letters or numbers. • Scroll through menus, submenus, or settings on the display. 5 • Cancel a print, copy, scan, or fax job in progress. • Clear a fax number or end a fax card screen. • Clear current settings or error messages, and return to default settings. Understanding the printer 91 - Lexmark X5470 | User's Guide (Mac) - Page 92
when creating a Speed Dial list. • Type numbers to enter or edit the date and time shown on the display. 2 Auto Answer Set the printer to answer all incoming calls Color Start a color copy, scan, fax, or photo print job, depending on which mode is selected. 6 Start Black Start a black-and-white copy - Lexmark X5470 | User's Guide (Mac) - Page 93
selections. 10 Press Start Color or Start Black. Use this To Copies1 Specify how many copies to print. Resize1 print on a page. Collate Print one or more copies in the correct order. N-Up1 Choose how many pages to print on a page. Original Size1 Specify the size of the original document - Lexmark X5470 | User's Guide (Mac) - Page 94
ink levels. - Clean cartridges. - Align cartridges. - Print a test page. • Device Setup-Customize printer setup settings. • Defaults-Customize printer repeat step 7 and step 8 as needed. 10 If needed, press repeatedly to return to the the size of the original document. 1 Temporary setting. For - Lexmark X5470 | User's Guide (Mac) - Page 95
ink levels. - Clean cartridges. - Align cartridges. - Print a test page. • Device Setup-Customize printer setup settings. • Defaults-Customize printer repeatedly to return to the previous menus and make other setting selections. 10 Press Start Color or Start Black. Use this To Quality1 Adjust the - Lexmark X5470 | User's Guide (Mac) - Page 96
Block faxes from the numbers you specify. Tools • Maintenance - View ink levels. - Clean cartridges. - Align cartridges. - Print a test page. • Device Setup-Customize printer setup settings. • Defaults-Customize printer settings. 1 Temporary setting. For information on saving temporary and other - Lexmark X5470 | User's Guide (Mac) - Page 97
Type1 2 Specify the type of paper loaded. Tools • Maintenance - View ink levels. - Clean cartridges. - Align cartridges. - Print a test page. • Device Setup-Customize printer setup settings. • Defaults-Reset printer settings to factory defaults. 1 Setting will return to factory default setting - Lexmark X5470 | User's Guide (Mac) - Page 98
setting of a temporary setting after two minutes of inactivity or if the printer is turned off. Temporary settings Copy Mode - Copies - Resize - will not time-out after two minutes of inactivity or turning off the power but will return to the factory default settings when a memory card or - Lexmark X5470 | User's Guide (Mac) - Page 99
.lexmark.com. 2 From the home page, navigate through the menu selection, and then click Drivers & Downloads. 3 Choose the printer and the printer driver for your operating system. 4 Follow the instructions on the computer screen to download the driver and install the printer software. Understanding - Lexmark X5470 | User's Guide (Mac) - Page 100
" on page 146 Removing the printer software If the printer software is not installed properly, a communication error message appears when you try to print. Remove the printer software, and then reinstall it. 1 From the Finder desktop, double-click the Lexmark 5400 Series folder. If the folder - Lexmark X5470 | User's Guide (Mac) - Page 101
exit the Page Setup dialog. Related topics: • "Using the Print dialog" on page 101 Using the Print dialog You can open the Print dialog from almost any application: 1 With a document open, choose File Œ Print. The Print dialog appears. • For Mac OS X version 10.3: Understanding the printer 101 - Lexmark X5470 | User's Guide (Mac) - Page 102
• For Mac OS X version 10.4 or later: 2 From the Printer pop-up menu, choose 5400 Series. 3 Change the settings as needed. From here Copies & Pages Choose Copies Collated Pages Layout Output Options Scheduler Pages per Sheet Layout Direction Border Print Document Priority To Specify the number - Lexmark X5470 | User's Guide (Mac) - Page 103
loaded. Print Quality Choose a print quality. Lexmark 5400 Series Utility Go to the Utility. Troubleshooting Open the Help Center. Order Supplies Visit our Web site to order printer supplies. Contact Lexmark Visit our Web site. Software Version View the software version on installed files - Lexmark X5470 | User's Guide (Mac) - Page 104
. Print a photo. Related topics: • "Using the Page Setup dialog" on page 100 Using Printer Services Printer Services provides helpful Web links and information. From here you can: • Access the Utility. • Access Troubleshooting. • Order supplies. • Contact Customer Support. • Obtain software - Lexmark X5470 | User's Guide (Mac) - Page 105
To access Printer Services: 1 With a document open, click File Œ Print. 2 From the third pop-up menu from the top, choose Printer Services. Related topics: • "Using the Print dialog" on page 101 • "Using the Utility" on page 107 Using the All-In-One Center The All-In-One Center provides the basic - Lexmark X5470 | User's Guide (Mac) - Page 106
your selection: • To be printed • To be viewed on monitor/Web page • To be faxed • To be edited (OCR) Send scanned image to Choose where to send scanned images, such as to File, to the Clipboard, or to an application. To add, remove, or modify an application in the list, see "Editing the Customize - Lexmark X5470 | User's Guide (Mac) - Page 107
The Utility is the central source for printer maintenance and helpful Web links. From here you can: • Install the print cartridge. • Print a test page. • Print an alignment page. • Clean the print cartridge nozzles. • Order ink or supplies. • Register your printer. Understanding the printer 107 - Lexmark X5470 | User's Guide (Mac) - Page 108
the Finder desktop, double-click the Lexmark 5400 Series folder. Double-click the Lexmark 5400 Series Utility icon. • From an application: 1 With a document open, click File Œ Print. 2 From the third pop-up menu from the top, select Printer Services. 3 Click Lexmark 5400 Series Utility. The Utility - Lexmark X5470 | User's Guide (Mac) - Page 109
- Web Links tab Related topics: • "Using Printer Services" on page 104 Understanding the printer 109 - Lexmark X5470 | User's Guide (Mac) - Page 110
Maintaining the printer Print cartridges Installing print cartridges 1 If you are installing new print cartridges, remove the sticker and tape from the back and bottom of the cartridges. 1 2 Warning-Potential Damage: Do not touch the gold contact area on the back or the metal nozzles on the - Lexmark X5470 | User's Guide (Mac) - Page 111
be closed to start a new scan, print, copy, or fax job. Related topics: • "Removing a used print cartridge" on page 111 • "Aligning print cartridges" on page 112 Removing a used print cartridge 1 Make sure the printer is on. 2 Lift the scanner unit. The print cartridge carrier moves and stops at the - Lexmark X5470 | User's Guide (Mac) - Page 112
carrier lever to raise the cartridge carrier lid. 4 Remove the used print cartridge. Note: If you are removing both cartridges, repeat step 3 and step 4 for the second cartridge. Related topics: • "Installing print cartridges" on page 110 Aligning print cartridges 1 Load plain or heavyweight matte - Lexmark X5470 | User's Guide (Mac) - Page 113
appears. 7 Press . 8 Press or repeatedly until Clean Cartridges appears. 9 Press . A page prints, forcing ink through the print cartridge nozzles to clean them. 10 Print the document again to verify that the print quality has improved. 11 If print quality has not improved, try cleaning the nozzles - Lexmark X5470 | User's Guide (Mac) - Page 114
the print cartridges. Related topics: • "Cleaning the print cartridge nozzles" on page 112 • "Preserving the print cartridges" on page 114 Preserving the print cartridges • Keep a new cartridge in its packaging until you are ready to install it. • Do not remove a cartridge from the printer except - Lexmark X5470 | User's Guide (Mac) - Page 115
Photo Paper or Lexmark Photo Paper. • Use a paper that is a heavier weight or bright white. • Select a higher print quality. If the document still does not have the print quality you want, follow these steps: 1 Align the print cartridges. For more information, see "Aligning print cartridges" on page - Lexmark X5470 | User's Guide (Mac) - Page 116
Close. • If you are using the printer without a computer, press Cancel. Lexmark's warranty does not cover damage caused by non-Lexmark ink or print cartridges. Ordering supplies Ordering cartridges Lexmark 5490 Series models Item Part number Average cartridge standard page yield is up to1 - Lexmark X5470 | User's Guide (Mac) - Page 117
35 500 Photo cartridge 31 Not applicable 1 Values obtained by continuous printing. Declared yield value in accordance with ISO/IEC 24711 (FDIS). 2 Licensed Return Program Cartridge Lexmark 5400 Series models (except Lexmark 5490) Item Black cartridge Color cartridge Part number 32 33 High - Lexmark X5470 | User's Guide (Mac) - Page 118
Customer Support" on page 120 • "Using the Utility" on page 107 Finding information about the printer Setup sheet Description Where to find The Setup sheet gives you instructions for setting up You can find this document in the printer box or on the hardware and software. Lexmark Web - Lexmark X5470 | User's Guide (Mac) - Page 119
install the printer software, your printer's instructions for using the printer and other information such Help will be installed. as: 1 From the Finder desktop, double-click the • Using the software Lexmark 5400 Series folder. • Loading paper 2 Double-click the printer Help icon. • Printing - Lexmark X5470 | User's Guide (Mac) - Page 120
the printed furnishes a limited warranty that Limited Warranty included with this warranty that shipped with your this printer will be free of defects in printer, or set forth at printer. materials and workmanship for a www.lexmark.com. period of 12 months after the 1 Click customer support - Lexmark X5470 | User's Guide (Mac) - Page 121
power connection 1 Disconnect the power cord from the wall outlet, and then from the printer. 2 Plug the cord all the way into the power supply on the printer. 3 Plug the cord into an electrical outlet that other electrical devices have been using. 4 If the light is not on, press . Troubleshooting - Lexmark X5470 | User's Guide (Mac) - Page 122
Software does not install Check your operating system The following operating systems are supported: Windows 98/Me, Windows 2000, Windows XP, and Mac OS X. Check your system requirements Check that your computer meets the minimum system requirements listed on the box. USB cable may not be - Lexmark X5470 | User's Guide (Mac) - Page 123
is displayed, see "Error messages" on page 138. Check power If the light is not on, see "Power button is not lit" on page 121. Paper may not be loaded Remove and then load paper. correctly Check ink Check the ink levels, and install new print cartridges if necessary. Cartridges may have tape - Lexmark X5470 | User's Guide (Mac) - Page 124
software" on page 146. 2 If the software still does not install correctly, visit our Web site at www.lexmark.com to check for the latest software. a In all countries or regions except the United States, select your country or region. b Click the links for drivers or downloads. c Select your printer - Lexmark X5470 | User's Guide (Mac) - Page 125
install new print cartridges if necessary. Review steps to See "Improving print quality" on page 115. improve print quality Remove sheets as they To avoid ink smudging when you are working with the following media, remove each sheet are printed as it exits, and allow it to dry: • Documents - Lexmark X5470 | User's Guide (Mac) - Page 126
the print cartridge nozzles" on page 112. nozzles Print speed is slow Maximize computer processing speed Add memory Select a lower print quality Software may not be installed correctly Close all applications not in use. Try minimizing the number and size of graphics and images in the document - Lexmark X5470 | User's Guide (Mac) - Page 127
Check messages If an error message is displayed, see "Error messages" on page 138. Check ink Check the ink levels, and install a new print cartridge if necessary. Clean the scanner glass If the scanner glass is dirty, gently wipe it with a clean, lint-free cloth dampened with water. Review - Lexmark X5470 | User's Guide (Mac) - Page 128
the list of printers, double-click the name of your printer. 3 From the printer pop-up menu, click Start Jobs if you want to resume all print jobs in the queue; if you want to resume a particular print job, select the document name, and then click Resume. Software may not be installed correctly - Lexmark X5470 | User's Guide (Mac) - Page 129
Scan was not successful USB cable may not be connected Reboot computer Software may not be installed correctly 1 Check the USB cable for any obvious damage. 2 Firmly plug the square end of the USB cable into the back of the printer. 3 Firmly plug the rectangular end of the USB cable into the USB - Lexmark X5470 | User's Guide (Mac) - Page 130
From the All-In-One Center, choose a different application from the "Send scanned image to" menu. 3 Scan the document. Fax troubleshooting Cannot send or receive a fax Check messages If an error message is displayed, follow the instructions on the error message dialog. Check power If the light - Lexmark X5470 | User's Guide (Mac) - Page 131
Tools appears. 4 Press . 5 Press or repeatedly until Device Setup appears. 6 Press . 7 Press or repeatedly until Country Code appears. 8 Press . 9 Press or appears. repeatedly until the country or region where you are operating the printer 10 Press to save the setting. Troubleshooting 131 - Lexmark X5470 | User's Guide (Mac) - Page 132
If the Auto Answer light is on: • The printer will answer after the preset number of telephone rings. • If you are using a distinctive ring, see "Setting the distinctive ring" on page 62. Check ink Check the ink levels, and install a new cartridge if necessary. Check whether Fax 1 From the - Lexmark X5470 | User's Guide (Mac) - Page 133
. 10 Press or repeatedly until Dial Behind PBX appears. 11 Press to save this setting. Printer receives a blank fax Check original Check ink Ask the sender to verify the original document was loaded correctly. Check the ink levels, and install a new print cartridge if necessary. Troubleshooting - Lexmark X5470 | User's Guide (Mac) - Page 134
document is satisfactory. • Resend the fax. There may have been a problem with the quality of the telephone line connection. • Increase the fax scan resolution. Check ink Check the ink levels and install a new print cartridge 10 Press to save the setting. 11 Resend the fax. 12 If the problem - Lexmark X5470 | User's Guide (Mac) - Page 135
Caller ID" on page 58. Jams and misfeeds troubleshooting Paper jams Is the jam in the paper support? 1 Press to turn off the printer. 2 Firmly grasp the paper, and gently pull it out. 3 Press to turn the printer back on. Is the jam in the Automatic Document Feeder (ADF)? 1 Flip open the ADF by - Lexmark X5470 | User's Guide (Mac) - Page 136
Applications ΠUtilities ΠPrint Center/Printer Setup Utility. 2 From the list of printers, double-click the name of your printer. 3 From the printer pop-up menu, click Start Jobs if you want to resume all print jobs in the queue; if you want to resume a particular print job, select the document - Lexmark X5470 | User's Guide (Mac) - Page 137
print job from jamming: • Use only the number of sheets needed for the banner. • Select the following settings to enable the printer to feed paper continuously without jamming: 1 With your document slot accommodates your memory card and to see instructions on how to insert it. Check memory card - Lexmark X5470 | User's Guide (Mac) - Page 138
problem (used paper) Load only plain, unmarked paper for aligning the cartridge. The printer will read any markings on used paper, which could cause the alignment error message to appear. Black Ink Low / Color Ink Low / Photo Ink Low 1 Check the indicated ink level or levels, and install - Lexmark X5470 | User's Guide (Mac) - Page 139
color print cartridge. 7 If the error reappears, replace the color print cartridge with a new one. 1 Raise the scanner unit. 2 Remove any objects blocking the path of the cartridge carrier. 3 Make sure the cartridge carrier lids are closed. 4 Close the scanner unit. 5 Press . Troubleshooting 139 - Lexmark X5470 | User's Guide (Mac) - Page 140
Could not detect a proof sheet. Error 1104 Failed to Connect (phone line checklist) 6 Close the scanner unit. 7 Plug the power cord into the wall outlet. 8 Press to turn the printer on. 9 Reinstall the print cartridges. For more information, see "Installing print cartridges" on page 110. Make sure - Lexmark X5470 | User's Guide (Mac) - Page 141
size paper-reformat the document on letter-size paper. Invalid photo/paper size selection You have selected more than one option on step 2 of the photo proof sheet you printed and scanned. 1 Make sure you completely fill in only one circle for each option. 2 Press to continue. Troubleshooting 141 - Lexmark X5470 | User's Guide (Mac) - Page 142
the color cartridge installed. • You can print a black-and-white document with only the black cartridge installed. • You cannot copy or print when only the photo cartridge is installed. • To remove the error message, press . Memory Full (reduce memory use) If applicable: • Print pending received - Lexmark X5470 | User's Guide (Mac) - Page 143
supported images have been found on the memory card or flash drive you inserted. The printer will read photos created using the JPEG format. For more information, see the documentation the printer, or turned off the printer, before scanning the photo proof sheet. For more information, see "Printing - Lexmark X5470 | User's Guide (Mac) - Page 144
before sending the fax. Make sure cable connections for the following hardware are secure, if applicable: • Power supply • Telephone • Handset • Answering machine Photo Size Error Photo must fit on page. There are one or more photos larger than the paper size you selected. 1 Press to clear the - Lexmark X5470 | User's Guide (Mac) - Page 145
print a new photo proof sheet. For more information, see "Printing photos stored on a memory device using the proof sheet" on page 73. There is a problem to the selected setting. The printer reverts to the default setting after two minutes of inactivity or if the printer is turned off. For - Lexmark X5470 | User's Guide (Mac) - Page 146
error message appears when you try to use the printer, you may need to remove and reinstall the printer software. 1 Close all open software applications. 2 From the Finder desktop, double-click the Lexmark 5400 Series folder. 3 Double-click the Uninstaller icon. 4 Follow the instructions - Lexmark X5470 | User's Guide (Mac) - Page 147
inaccuracies or typographical errors. Changes are periodically services, except those expressly designated by the manufacturer, are the user's responsibility. © 2007 Lexmark International, Inc. All rights reserved. UNITED STATES GOVERNMENT RIGHTS This software and any accompanying documentation - Lexmark X5470 | User's Guide (Mac) - Page 148
part number 1021294 for USB attach. Use of a substitute cable not properly shielded and grounded may result in a violation of FCC regulations. Any questions regarding this compliance information statement should be directed to: Director of Lexmark Technology & Services Lexmark International, Inc - Lexmark X5470 | User's Guide (Mac) - Page 149
has been signed by the Director of Manufacturing and Technical Support, Lexmark International, Inc., S.A., Boigny, France. This product satisfies sound pressure, dBA Printing 46 Scanning 36 Copying 39 Ready inaudible Values are subject to change. See www.lexmark.com for current values - Lexmark X5470 | User's Guide (Mac) - Page 150
those described in the user documentation, to a professional service person. This product is designed, tested, and approved to meet strict global safety standards with the use of specific Lexmark components. The safety features of some parts may not always be obvious. Lexmark is not responsible for - Lexmark X5470 | User's Guide (Mac) - Page 151
remarketer, referred to in this statement as "Remarketer." Limited warranty Lexmark warrants that this product: -Is manufactured from new parts, or new and serviceable used parts, which perform like new parts -Is, during normal use, free from defects in material and workmanship If this product does - Lexmark X5470 | User's Guide (Mac) - Page 152
its duty cycle -Use of printing media outside of Lexmark specifications -Supplies (such as ink) not furnished by Lexmark -Products, components, parts, materials, software, or interfaces not furnished by Lexmark TO THE EXTENT PERMITTED BY APPLICABLE LAW, NEITHER LEXMARK NOR ITS THIRD PARTY SUPPLIERS - Lexmark X5470 | User's Guide (Mac) - Page 153
, installing the printing device software, or using the print cartridges inside, confirms your acceptance of the following license/agreement: The patented print cartridges contained inside are licensed for a single use only and is/are designed to stop working after delivering a fixed amount of ink - Lexmark X5470 | User's Guide (Mac) - Page 154
page A page with printed alignment patterns that ejects from the printer during cartridge alignment. application Any software loaded on your computer that lets you perform a specific task, such as word processing or photo editing. auto-crop A printer software option that lets you automatically - Lexmark X5470 | User's Guide (Mac) - Page 155
with the short edge of the paper. (1)The program that lets you select settings to customize a print job. (2)The program that lets your computer communicate with the printer. A software option that reduces or enlarges the final image size of a scanned item while maintaining the image proportions
-
 1
1 -
 2
2 -
 3
3 -
 4
4 -
 5
5 -
 6
6 -
 7
7 -
8
-
9
-
10
-
11
-
12
-
13
-
14
-
15
-
16
-
17
-
18
-
19
-
20
-
21
-
22
-
23
-
24
-
25
-
26
-
27
-
28
-
29
-
30
-
31
-
32
-
33
-
34
-
35
-
36
-
37
-
38
-
39
-
40
-
41
-
42
-
43
-
44
-
45
-
46
-
47
-
48
-
49
-
50
-
51
-
52
-
53
-
54
-
55
-
56
-
57
-
58
-
59
-
60
-
61
-
62
-
63
-
64
-
65
-
66
-
67
-
68
-
69
-
70
-
71
-
72
-
73
-
74
-
75
-
76
-
77
-
78
-
79
-
80
-
81
-
82
-
83
-
84
-
85
-
86
-
87
-
88
-
89
-
90
-
91
-
92
-
93
-
94
-
95
-
96
-
97
-
98
-
99
-
100
-
101
-
102
-
103
-
104
-
105
-
106
-
107
-
108
-
109
-
110
-
111
-
112
-
113
-
114
-
115
-
116
-
117
-
118
-
119
-
120
-
121
-
122
-
123
-
124
-
125
-
126
-
127
-
128
-
129
-
130
-
131
-
132
-
133
-
134
-
135
-
136
-
137
-
138
-
139
-
140
-
141
-
142
-
143
-
144
-
145
-
146
-
147
-
148
-
149
-
150
-
151
-
152
-
153
-
154
-
155
 |
 |
Lexmark 5400 Series All-In-One
User Guide
January 2007
www.lexmark.com