Lexmark X5650 User's Guide - Page 88
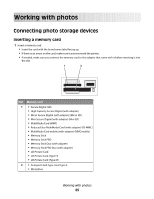
Printing photos from the computer using the printer software, Printing photos from a memory device
 |
UPC - 734646078566
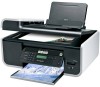
View all Lexmark X5650 manuals
Add to My Manuals
Save this manual to your list of manuals |
Page 88 highlights
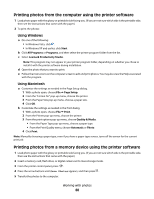
Printing photos from the computer using the printer software 1 Load photo paper with the glossy or printable side facing you. (If you are not sure which side is the printable side, then see the instructions that came with the paper.) 2 To print the photos: Using Windows a Do one of the following: • In Windows Vista, click . • In Windows XP and earlier, click Start. b Click All Programs or Programs, and then select the printer program folder from the list. c Select Lexmark Productivity Studio. Note: This program may not appear in your printer program folder, depending on whether you chose to install it with the printer software during installation. d Open the photo that you want to print. e Follow the instructions on the computer screen to edit and print photos. You may also view the Help associated with the program. Using Macintosh a Customize the settings as needed in the Page Setup dialog. 1 With a photo open, choose File Œ Page Setup. 2 From the "Format for" pop-up menu, choose the printer. 3 From the Paper Size pop-up menu, choose a paper size. 4 Click OK. b Customize the settings as needed in the Print dialog. 1 With a photo open, choose File Œ Print. 2 From the Printer pop-up menu, choose the printer. 3 From the print options pop-up menu, choose Quality & Media. • From the Paper Type pop-up menu, choose a paper type. • From the Print Quality menu, choose Automatic or Photo. 4 Click Print. Note: Manually choosing a paper type, even if you have a paper type sensor, turns off the sensor for the current print job. Printing photos from a memory device using the printer software 1 Load photo paper with the glossy or printable side facing you. (If you are not sure which side is the printable side, then see the instructions that came with the paper.) 2 Insert a memory card, flash drive, or digital camera set to mass storage mode. 3 From the printer control panel, press . 4 Press the arrow buttons until Save Photos appears, and then press . 5 Transfer the photos to the computer. Working with photos 88
-
 1
1 -
2
-
3
-
4
-
5
-
6
-
7
-
8
-
9
-
10
-
11
-
12
-
13
-
14
-
15
-
16
-
17
-
18
-
19
-
20
-
21
-
22
-
23
-
24
-
25
-
26
-
27
-
28
-
29
-
30
-
31
-
32
-
33
-
34
-
35
-
36
-
37
-
38
-
39
-
40
-
41
-
42
-
43
-
44
-
45
-
46
-
47
-
48
-
49
-
50
-
51
-
52
-
53
-
54
-
55
-
56
-
57
-
58
-
59
-
60
-
61
-
62
-
63
-
64
-
65
-
66
-
67
-
68
-
69
-
70
-
71
-
72
-
73
-
74
-
75
-
76
-
77
-
78
-
79
-
80
-
81
-
82
-
 83
83 -
 84
84 -
 85
85 -
 86
86 -
 87
87 -
 88
88 -
 89
89 -
 90
90 -
 91
91 -
 92
92 -
 93
93 -
94
-
95
-
96
-
97
-
98
-
99
-
100
-
101
-
102
-
103
-
104
-
105
-
106
-
107
-
108
-
109
-
110
-
111
-
112
-
113
-
114
-
115
-
116
-
117
-
118
-
119
-
120
-
121
-
122
-
123
-
124
-
125
-
126
-
127
-
128
-
129
-
130
-
131
-
132
-
133
-
134
-
135
-
136
-
137
-
138
-
139
-
140
-
141
-
142
-
143
-
144
-
145
-
146
-
147
-
148
-
149
-
150
-
151
-
152
-
153
-
154
-
155
-
156
-
157
-
158
-
159
-
160
-
161
-
162
-
163
-
164
-
165
-
166
-
167
-
168
-
169
-
170
-
171
-
172
-
173
 |
 |