Lexmark X5650 Network Guide - Page 10
In Mac OS X version 10.4 or earlier
 |
UPC - 734646078566
View all Lexmark X5650 manuals
Add to My Manuals
Save this manual to your list of manuals |
Page 10 highlights
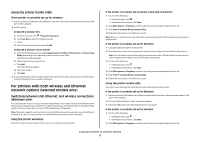
Use the printer locally (USB) Select the connection type that describes how you currently access your printer: Printer currently set up for Ethernet 1 Attach one end of a USB cable to the USB port on the back of the printer. Attach the other end to a USB port on the computer. 2 Add the printer (see "Add the printer" on page 10). 3 A second print queue will be created. Remove the Ethernet queue if you do not want to switch back to accessing the printer over an Ethernet connection. Printer currently set up for wireless 1 Attach one end of a USB cable to the USB port on the back of the printer. Attach the other end to a USB port on the computer. 2 Add the printer (see "Add the printer" on page 10). 3 A second print queue will be created. Remove the wireless queue if you do not want to switch back to accessing the printer over a wireless connection. Use the printer over an Ethernet network Select the connection type that describes how you currently access your printer: Printer currently set up for wireless 1 Plug one end of an Ethernet cable into the printer and the other end into an available port on a switch or wall jack. 2 Wait for a minute for the Ethernet network interface to become active and acquire an IP address from the network. 3 Add the printer (see "Add the printer" on page 10). 4 A second print queue will be created. Remove the wireless queue if you do not want to switch back to accessing the printer over a wireless connection. Note: The wireless interface of the printer is disabled while it is connected to an Ethernet network. Printer currently set up locally (using USB connection) 1 Plug one end of an Ethernet cable into the printer and the other end into an available port on a switch or wall jack. 2 Insert the software and installation CD into the computer you want to use to configure the printer. 3 Follow the on-screen instructions for configuring a printer on an Ethernet network. Note: You will need a USB cable to complete the configuration. Add the printer In Mac OS X version 10.5 1 From the menu bar, click ΠSystem Preferences. 2 Click Print & Fax under the Hardware section. 3 Click +. 4 Select the printer from the list and click Add. In Mac OS X version 10.4 or earlier 1 From the Finder desktop, choose Go ΠApplications ΠUtilities ΠPrint Center or Printer Setup Utility, depending on the operating system version you are using. The Printer List dialog appears. 2 Choose the printer you want to use. 3 Click Add. The Printer Browser appears. 4 Select your printer. 5 Click Add. Installing the printer on a wireless network 10
-
 1
1 -
2
-
3
-
4
-
 5
5 -
 6
6 -
 7
7 -
 8
8 -
 9
9 -
 10
10 -
 11
11 -
 12
12 -
 13
13 -
 14
14 -
 15
15 -
16
-
17
-
18
-
19
-
20
-
21
-
22
-
23
-
24
-
25
-
26
-
27
-
28
-
29
-
30
-
31
-
32
-
33
-
34
-
35
 |
 |