Lexmark X656 Quick Reference
Lexmark X656 Manual
 |
View all Lexmark X656 manuals
Add to My Manuals
Save this manual to your list of manuals |
Lexmark X656 manual content summary:
- Lexmark X656 | Quick Reference - Page 1
require the same process for loading paper. Use these instructions to load paper in either tray: 1 Pull the tray out. Note: Do not remove trays while a job prints or while Busy appears on the display. Doing so may cause a jam. 2 Squeeze the width guide tab inward as shown, and move the width - Lexmark X656 | Quick Reference - Page 2
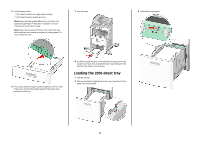
of paper was loaded than the type previously loaded in the tray, then change the Paper Type setting for the tray from the printer control panel. Loading the 2000-sheet tray 1 Pull the tray out. 2 Pull up and slide the width guide to the correct position for the paper size being loaded. 2 - Lexmark X656 | Quick Reference - Page 3
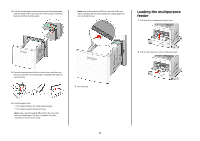
to the correct position for the paper size being loaded, and then lock the guide. Note: Notice the maximum fill line on the side of the tray which optional StapleSmart II Finisher is installed. For more information, see the User's Guide. 3 2 Pull out the extension until it is fully extended. - Lexmark X656 | Quick Reference - Page 4
self-stick adhesives. These envelopes may severely damage the printer. 6 Adjust the width guide to lightly touch the edge of the paper stack. Paper. The Paper Type setting must be set manually for all trays that do not contain plain paper. 1 Make sure the printer is on and Ready appears. 2 On the - Lexmark X656 | Quick Reference - Page 5
paper size (Example 2). Example 1: Copying to mixed paper sizes The printer has two paper trays, one tray loaded with letter-size paper and the glass. 2 If you are loading a document into the ADF, then adjust the paper guides. 3 On the home screen, touch Copy. 4 Touch Copy from, and then touch - Lexmark X656 | Quick Reference - Page 6
. 2 If you are loading a document into the ADF, then adjust the paper guides. 3 On the home screen, touch Fax. 4 Enter the fax number or Printing Printing a document 1 Load paper into a tray or feeder. 2 From the printer control panel Paper menu, set the Paper Type and Paper Size to match the loaded - Lexmark X656 | Quick Reference - Page 7
approved for use with the printer. For more information, visit the Lexmark Web site at www.lexmark.com. Notes: • Hi-Speed flash drives must support the Full-speed standard. Flash drives supporting only USB Low-speed capabilities are not supported. • USB devices must support the FAT (File Allocation - Lexmark X656 | Quick Reference - Page 8
to clean the interior may cause damage to your printer. 5 Make sure the paper support and standard exit bin are dry before beginning a new print job. Cleaning the scanner glass Clean the scanner glass if you encounter print quality problems
-
 1
1 -
 2
2 -
 3
3 -
 4
4 -
 5
5 -
 6
6 -
 7
7 -
8
 |
 |
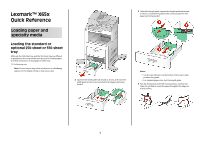
Lexmark™ X65x
Quick Reference
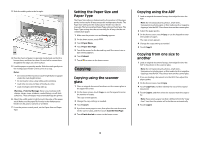
Loading paper and
specialty media
Loading the standard or
optional 250-sheet or 550-sheet
tray
Although the 250-sheet tray and the 550-sheet tray are different
in appearance, they require the same process for loading paper.
Use these instructions to load paper in either tray:
1
Pull the tray out.
Note:
Do not remove trays while a job prints or while
Busy
appears on the display. Doing so may cause a jam.
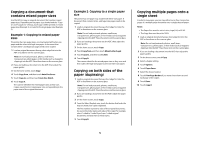
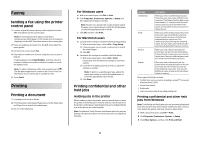
2
Squeeze the width guide tab inward as shown, and move the
width guide to the correct position for the paper size being
loaded.
3
Unlock the length guide, squeeze the length guide tab inward
as shown, and slide the guide to the correct position for the
paper size being loaded.
Notes:
•
Use the size indicators on the bottom of the tray to help
position the guides.
•
For standard paper sizes, lock the length guide.
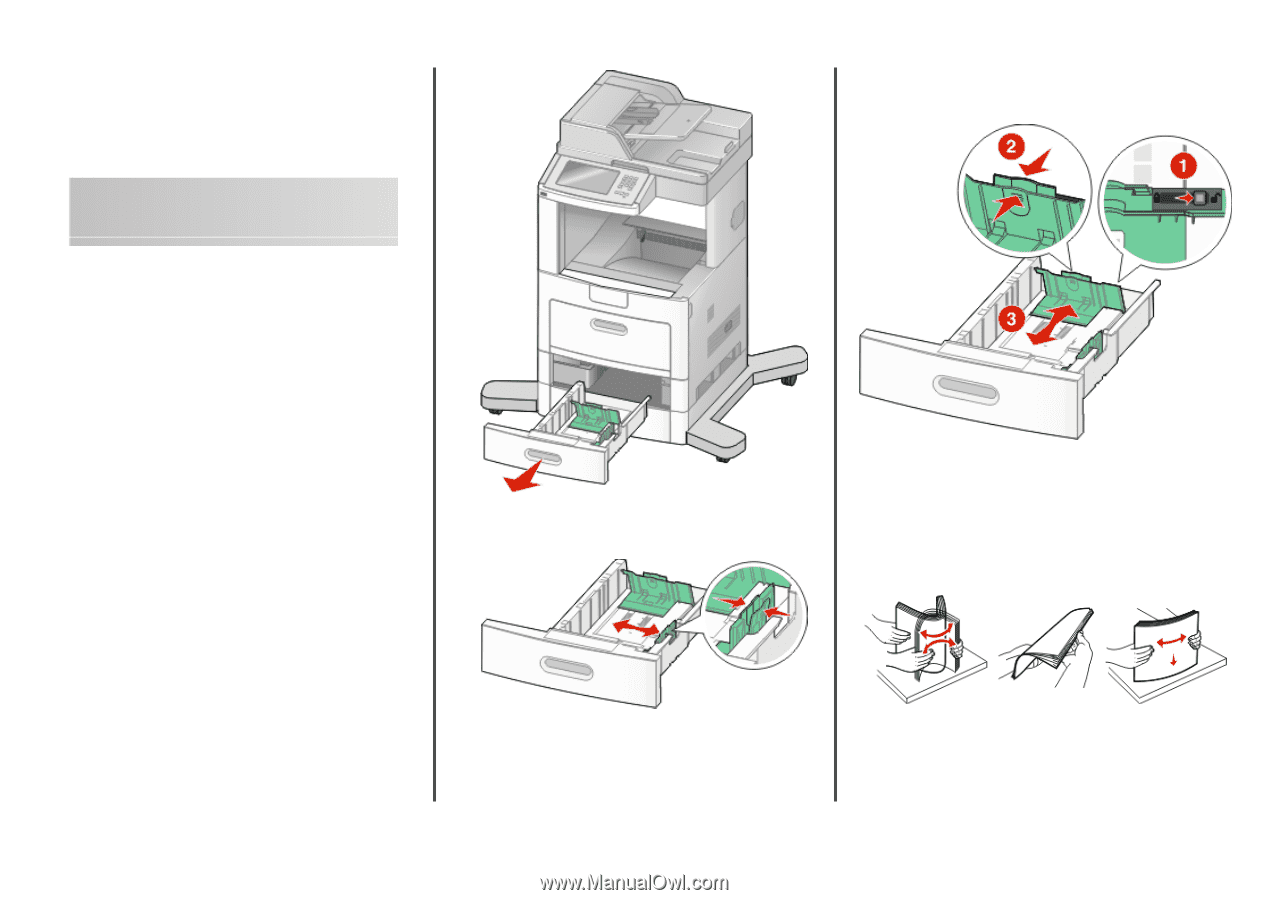
4
Flex the sheets back and forth to loosen them, and then fan
them. Do not fold or crease the paper. Straighten the edges on
a level surface.
1