Lexmark X6570 User's Guide - Page 140
Cannot print from digital camera using PictBridge, Understanding Warning levels, Check USB cable
 |
UPC - 836367002285
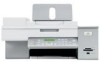
View all Lexmark X6570 manuals
Add to My Manuals
Save this manual to your list of manuals |
Page 140 highlights
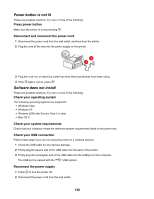
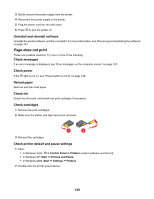
3 Click Printer. • Make sure no check mark appears next to Pause Printing. • If a check mark does not appear next to Set As Default Printer, you must select the print queue device for each file you want to print. Reconnect power supply 1 Press to turn the printer off. 2 Disconnect the power cord from the wall outlet. 3 Gently remove the power supply from the printer. 4 Reconnect the power supply to the printer. 5 Plug the power cord into the wall outlet. 6 Press to turn the printer on. Removing and reinstalling the software Uninstall the printer software, and then reinstall it. For more information, see "Removing and reinstalling the software" on page 141. Cannot print from digital camera using PictBridge These are possible solutions. Try one or more of the following: Enable PictBridge printing from camera Enable PictBridge printing on the camera by selecting the correct USB mode. For more information, see the digital camera documentation. Make sure the camera is a PictBridge-enabled digital camera 1 Disconnect the camera. 2 Connect a PictBridge-enabled digital camera to the PictBridge port. See the digital camera documentation to determine whether it is PictBridge-enabled. Check USB cable Use only the USB cable that came with the camera. Remove memory cards Remove any memory cards from the printer. Check messages If an error message appears on the display, see "Error messages on the computer screen" on page 197. Understanding Warning levels • A green check indicates system requirements were met. • A yellow question mark indicates system requirements were not met. Most major functions will work, but you may experience some performance impact. • A red question mark indicates system requirements were not met. Most major functions may not work. • A red X indicates system requirements were not met. Installation will not continue. 140
-
 1
1 -
2
-
3
-
4
-
5
-
6
-
7
-
8
-
9
-
10
-
11
-
12
-
13
-
14
-
15
-
16
-
17
-
18
-
19
-
20
-
21
-
22
-
23
-
24
-
25
-
26
-
27
-
28
-
29
-
30
-
31
-
32
-
33
-
34
-
35
-
36
-
37
-
38
-
39
-
40
-
41
-
42
-
43
-
44
-
45
-
46
-
47
-
48
-
49
-
50
-
51
-
52
-
53
-
54
-
55
-
56
-
57
-
58
-
59
-
60
-
61
-
62
-
63
-
64
-
65
-
66
-
67
-
68
-
69
-
70
-
71
-
72
-
73
-
74
-
75
-
76
-
77
-
78
-
79
-
80
-
81
-
82
-
83
-
84
-
85
-
86
-
87
-
88
-
89
-
90
-
91
-
92
-
93
-
94
-
95
-
96
-
97
-
98
-
99
-
100
-
101
-
102
-
103
-
104
-
105
-
106
-
107
-
108
-
109
-
110
-
111
-
112
-
113
-
114
-
115
-
116
-
117
-
118
-
119
-
120
-
121
-
122
-
123
-
124
-
125
-
126
-
127
-
128
-
129
-
130
-
131
-
132
-
133
-
134
-
 135
135 -
 136
136 -
 137
137 -
 138
138 -
 139
139 -
 140
140 -
 141
141 -
 142
142 -
 143
143 -
 144
144 -
 145
145 -
146
-
147
-
148
-
149
-
150
-
151
-
152
-
153
-
154
-
155
-
156
-
157
-
158
-
159
-
160
-
161
-
162
-
163
-
164
-
165
-
166
-
167
-
168
-
169
-
170
-
171
-
172
-
173
-
174
-
175
-
176
-
177
-
178
-
179
-
180
-
181
-
182
-
183
-
184
-
185
-
186
-
187
-
188
-
189
-
190
-
191
-
192
-
193
-
194
-
195
-
196
-
197
-
198
-
199
-
200
-
201
-
202
-
203
-
204
-
205
-
206
-
207
-
208
-
209
-
210
-
211
-
212
-
213
-
214
-
215
-
216
-
217
-
218
-
219
-
220
-
221
-
222
-
223
 |
 |
