Lexmark X6570 User's Guide - Page 55
Finding the signal strength, Installing the printer on a network, Con IP address - user manual
 |
UPC - 836367002285
View all Lexmark X6570 manuals
Add to My Manuals
Save this manual to your list of manuals |
Page 55 highlights
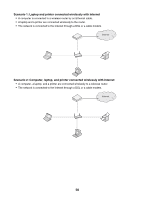
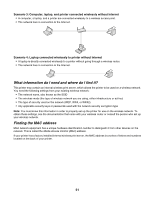
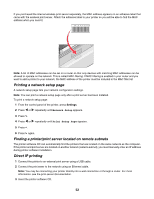
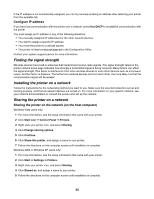
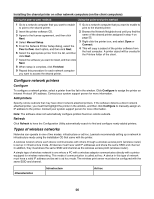
If the IP address is not automatically assigned, you can try manually entering an address after selecting your printer from the available list. Configure IP address If you have lost communication with the printer over a network, select Use DHCP to reestablish communication with the printer. You must assign an IP address in any of the following situations: • You manually assigned IP addresses for the other network devices. • You want to assign a specific IP address. • You move the printer to a remote subnet. • The printer is listed as Unconfigured in the Configuration Utility. Contact your system support person for more information. Finding the signal strength Wireless devices have built-in antennas that transmit and receive radio signals. The signal strength listed on the printer network setup page indicates how strongly a transmitted signal is being received. Many factors can affect the signal strength. One factor is interference from other wireless devices or even other devices such as microwave ovens. Another factor is distance. The farther two wireless devices are from each other, the more likely it is that the communication signal will be weaker. Installing the printer on a network Follow the instructions for the networking method you want to use. Make sure the selected network is set up and working properly, and that all relevant devices are turned on. For more information on your specific network, see your network documentation or consult the person who set up the network. Sharing the printer on a network Sharing the printer on the network (on the host computer) Windows Vista users only: 1 For more information, see the setup information that came with your printer. 2 Click Start icon Œ Control Panel Œ Printers. 3 Right-click your printer icon, and select Sharing. 4 Click Change sharing options. 5 Click Continue. 6 Click Share this printer, and assign a name to your printer. 7 Follow the directions on the computer screen until installation is complete. Windows 2000 or Windows XP users only: 1 For more information, see the setup information that came with your printer. 2 Click Start Œ Settings Œ Printers. 3 Right-click your printer icon, and select Sharing. 4 Click Shared as, and assign a name to your printer. 5 Follow the directions on the computer screen until installation is complete. 55
-
 1
1 -
2
-
3
-
4
-
5
-
6
-
7
-
8
-
9
-
10
-
11
-
12
-
13
-
14
-
15
-
16
-
17
-
18
-
19
-
20
-
21
-
22
-
23
-
24
-
25
-
26
-
27
-
28
-
29
-
30
-
31
-
32
-
33
-
34
-
35
-
36
-
37
-
38
-
39
-
40
-
41
-
42
-
43
-
44
-
45
-
46
-
47
-
48
-
49
-
 50
50 -
 51
51 -
 52
52 -
 53
53 -
 54
54 -
 55
55 -
 56
56 -
 57
57 -
 58
58 -
 59
59 -
 60
60 -
61
-
62
-
63
-
64
-
65
-
66
-
67
-
68
-
69
-
70
-
71
-
72
-
73
-
74
-
75
-
76
-
77
-
78
-
79
-
80
-
81
-
82
-
83
-
84
-
85
-
86
-
87
-
88
-
89
-
90
-
91
-
92
-
93
-
94
-
95
-
96
-
97
-
98
-
99
-
100
-
101
-
102
-
103
-
104
-
105
-
106
-
107
-
108
-
109
-
110
-
111
-
112
-
113
-
114
-
115
-
116
-
117
-
118
-
119
-
120
-
121
-
122
-
123
-
124
-
125
-
126
-
127
-
128
-
129
-
130
-
131
-
132
-
133
-
134
-
135
-
136
-
137
-
138
-
139
-
140
-
141
-
142
-
143
-
144
-
145
-
146
-
147
-
148
-
149
-
150
-
151
-
152
-
153
-
154
-
155
-
156
-
157
-
158
-
159
-
160
-
161
-
162
-
163
-
164
-
165
-
166
-
167
-
168
-
169
-
170
-
171
-
172
-
173
-
174
-
175
-
176
-
177
-
178
-
179
-
180
-
181
-
182
-
183
-
184
-
185
-
186
-
187
-
188
-
189
-
190
-
191
-
192
-
193
-
194
-
195
-
196
-
197
-
198
-
199
-
200
-
201
-
202
-
203
-
204
-
205
-
206
-
207
-
208
-
209
-
210
-
211
-
212
-
213
-
214
-
215
-
216
-
217
-
218
-
219
-
220
-
221
-
222
-
223
 |
 |