Lexmark X6650 User's Guide - Page 129
Printing a network setup
 |
UPC - 836367006047
View all Lexmark X6650 manuals
Add to My Manuals
Save this manual to your list of manuals |
Page 129 highlights
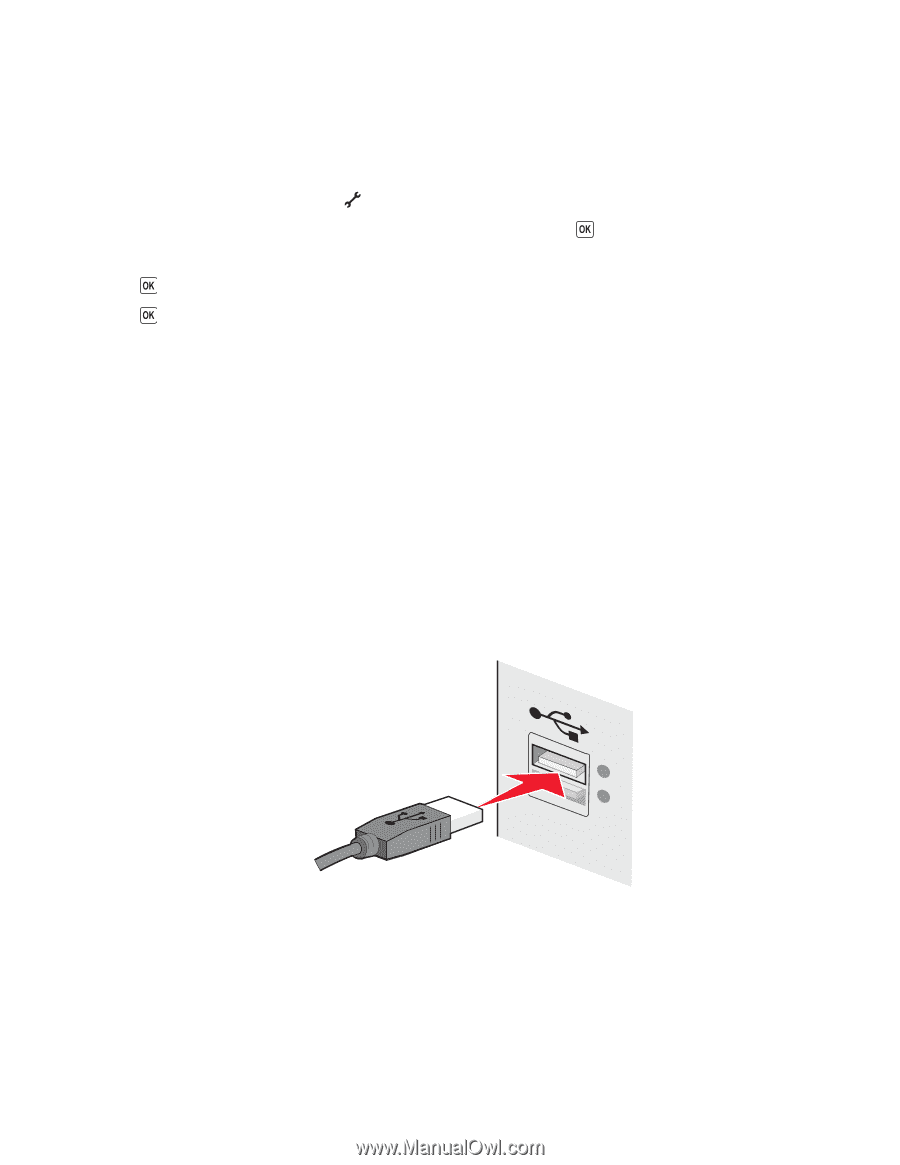
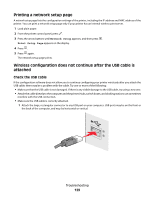
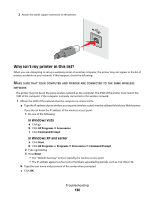
Printing a network setup page A network setup page lists the configuration settings of the printer, including the IP address and MAC address of the printer. You can print a network setup page only if your printer has an internal wireless print server. 1 Load plain paper. 2 From the printer control panel, press . 3 Press the arrow buttons until Network Setup appears, and then press . Print Setup Page appears on the display. 4 Press . 5 Press again. The network setup page prints. Wireless configuration does not continue after the USB cable is attached Check the USB cable If the configuration software does not allow you to continue configuring your printer wirelessly after you attach the USB cable, there may be a problem with the cable. Try one or more of the following: • Make sure that the USB cable is not damaged. If there is any visible damage to the USB cable, try using a new one. • Attach the cable directly to the computer and the printer. Hubs, switch boxes, and docking stations can sometimes interfere with the USB connection. • Make sure the USB cable is correctly attached. 1 Attach the large, rectangular connector to any USB port on your computer. USB ports may be on the front or the back of the computer, and may be horizontal or vertical. Troubleshooting 129
-
 1
1 -
2
-
3
-
4
-
5
-
6
-
7
-
8
-
9
-
10
-
11
-
12
-
13
-
14
-
15
-
16
-
17
-
18
-
19
-
20
-
21
-
22
-
23
-
24
-
25
-
26
-
27
-
28
-
29
-
30
-
31
-
32
-
33
-
34
-
35
-
36
-
37
-
38
-
39
-
40
-
41
-
42
-
43
-
44
-
45
-
46
-
47
-
48
-
49
-
50
-
51
-
52
-
53
-
54
-
55
-
56
-
57
-
58
-
59
-
60
-
61
-
62
-
63
-
64
-
65
-
66
-
67
-
68
-
69
-
70
-
71
-
72
-
73
-
74
-
75
-
76
-
77
-
78
-
79
-
80
-
81
-
82
-
83
-
84
-
85
-
86
-
87
-
88
-
89
-
90
-
91
-
92
-
93
-
94
-
95
-
96
-
97
-
98
-
99
-
100
-
101
-
102
-
103
-
104
-
105
-
106
-
107
-
108
-
109
-
110
-
111
-
112
-
113
-
114
-
115
-
116
-
117
-
118
-
119
-
120
-
121
-
122
-
123
-
 124
124 -
 125
125 -
 126
126 -
 127
127 -
 128
128 -
 129
129 -
 130
130 -
 131
131 -
 132
132 -
 133
133 -
 134
134 -
135
-
136
-
137
-
138
-
139
-
140
-
141
-
142
-
143
-
144
-
145
-
146
-
147
-
148
-
149
-
150
-
151
-
152
-
153
-
154
-
155
-
156
-
157
-
158
-
159
-
160
-
161
-
162
-
163
-
164
-
165
-
166
-
167
-
168
-
169
-
170
-
171
-
172
-
173
 |
 |