Lexmark X6650 User's Guide - Page 87
Printing photos, Printing photos using the printer control panel
 |
UPC - 836367006047
View all Lexmark X6650 manuals
Add to My Manuals
Save this manual to your list of manuals |
Page 87 highlights
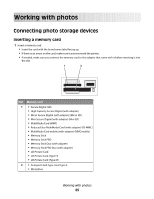
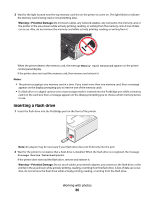
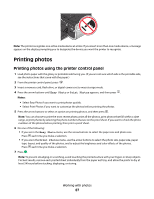
Note: The printer recognizes one active media device at a time. If you insert more than one media device, a message appears on the display prompting you to designate the device you want the printer to recognize. Printing photos Printing photos using the printer control panel 1 Load photo paper with the glossy or printable side facing you. (If you are not sure which side is the printable side, see the instructions that came with the paper.) 2 From the printer control panel, press . 3 Insert a memory card, flash drive, or digital camera set to mass storage mode. 4 Press the arrow buttons until Easy Photo or Print Photos appears, and then press . Notes: • Select Easy Photo if you want to print photos quickly. • Select Print Photos if you want to customize the photos before printing the photos. 5 Press the arrow buttons to select an option on printing photos, and then press . Note: You can choose to print the most recent photo, print all the photos, print photos that fall within a date range, or print photos by selecting the photo numbers that are on the proof sheet. If you want to check the photo numbers of the photos before printing, then print a proof sheet. 6 Do one of the following: • If you are in the Easy Photo menu, use the arrow buttons to select the paper size and photo size. Press each time you make a selection. • If you are in the Print Photos menu, use the arrow buttons to select the photo size, paper size, paper type, layout, and quality of the photos, and to adjust the brightness and color effects of the photos. Press each time you make a selection. 7 Press . Note: To prevent smudging or scratching, avoid touching the printed surface with your fingers or sharp objects. For best results, remove each printed sheet individually from the paper exit tray, and allow the prints to dry at least 24 hours before stacking, displaying, or storing. Working with photos 87
-
 1
1 -
2
-
3
-
4
-
5
-
6
-
7
-
8
-
9
-
10
-
11
-
12
-
13
-
14
-
15
-
16
-
17
-
18
-
19
-
20
-
21
-
22
-
23
-
24
-
25
-
26
-
27
-
28
-
29
-
30
-
31
-
32
-
33
-
34
-
35
-
36
-
37
-
38
-
39
-
40
-
41
-
42
-
43
-
44
-
45
-
46
-
47
-
48
-
49
-
50
-
51
-
52
-
53
-
54
-
55
-
56
-
57
-
58
-
59
-
60
-
61
-
62
-
63
-
64
-
65
-
66
-
67
-
68
-
69
-
70
-
71
-
72
-
73
-
74
-
75
-
76
-
77
-
78
-
79
-
80
-
81
-
 82
82 -
 83
83 -
 84
84 -
 85
85 -
 86
86 -
 87
87 -
 88
88 -
 89
89 -
 90
90 -
 91
91 -
 92
92 -
93
-
94
-
95
-
96
-
97
-
98
-
99
-
100
-
101
-
102
-
103
-
104
-
105
-
106
-
107
-
108
-
109
-
110
-
111
-
112
-
113
-
114
-
115
-
116
-
117
-
118
-
119
-
120
-
121
-
122
-
123
-
124
-
125
-
126
-
127
-
128
-
129
-
130
-
131
-
132
-
133
-
134
-
135
-
136
-
137
-
138
-
139
-
140
-
141
-
142
-
143
-
144
-
145
-
146
-
147
-
148
-
149
-
150
-
151
-
152
-
153
-
154
-
155
-
156
-
157
-
158
-
159
-
160
-
161
-
162
-
163
-
164
-
165
-
166
-
167
-
168
-
169
-
170
-
171
-
172
-
173
 |
 |
