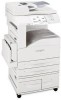
Lexmark X852E Setup Guide
Lexmark X852E - Mfp Manual
 |
UPC - 734646002806
View all Lexmark X852E manuals
Add to My Manuals
Save this manual to your list of manuals |
Lexmark X852E manual content summary:
- Lexmark X852E | Setup Guide - Page 1
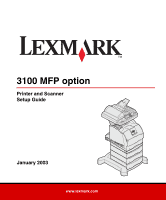
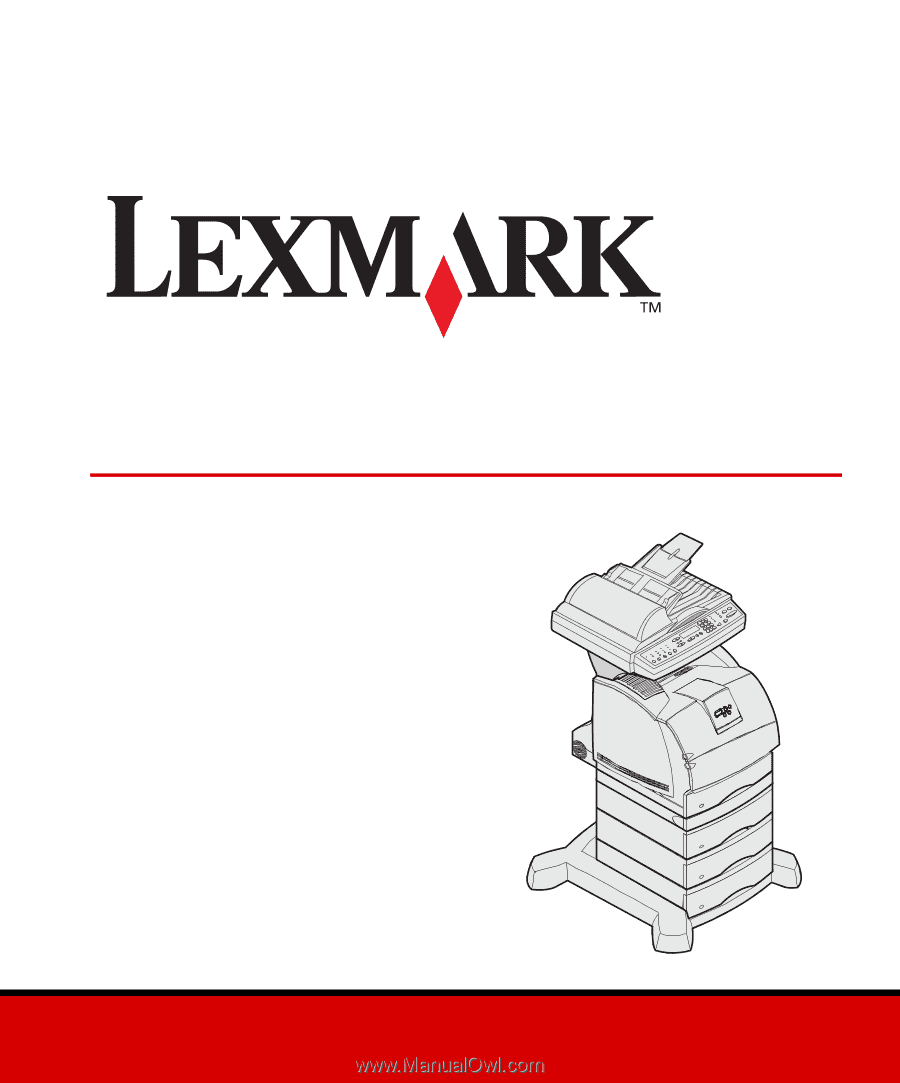
3100 MFP option Printer and Scanner Setup Guide January 2003 www.lexmark.com - Lexmark X852E | Setup Guide - Page 2
English - Lexmark X852E | Setup Guide - Page 3
. • Refer service or repairs, other than those described in the operating instructions, to a professional service person. • This product is designed, tested, and approved to meet strict global safety standards with the use of specific Lexmark components. The safety features of some parts may not - Lexmark X852E | Setup Guide - Page 4
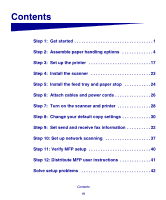
cords 26 Step 7: Turn on the scanner and printer 28 Step 8: Change your default copy settings 30 Step 9: Set send and receive fax information 32 Step 10: Set up network scanning 37 Step 11: Verify MFP setup 40 Step 12: Distribute MFP user instructions 41 Solve setup problems 42 Contents iii - Lexmark X852E | Setup Guide - Page 5
Maintain your scanner 43 Notices 48 Contents iv - Lexmark X852E | Setup Guide - Page 6
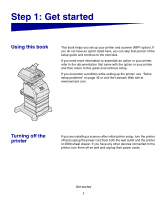
return to this guide and continue setup. If you encounter a problem while setting up the printer, see "Solve setup problems" on page 42 or visit the Lexmark Web site at www.lexmark.com. Turning off the printer If you are installing a scanner after initial printer setup, turn the printer off and - Lexmark X852E | Setup Guide - Page 7
the printer trays, covers, doors, and MFP option. It is also important to: • Allow space around the printer for proper ventilation • Provide a firm, level, and stable surface • Keep the equipment away from the direct airflow of air conditioners, heaters, or ventilators • Keep the equipment free of - Lexmark X852E | Setup Guide - Page 8
at www.lexmark.com/US/products/products_supplies. Printer, scanner shelf, and scanner Duplex unit, printer, scanner shelf, and scanner Caster base, 2000-sheet drawer, printer, scanner shelf, and scanner Caster base, 2000-sheet drawer, duplex unit, printer, scanner shelf, and scanner Caster base - Lexmark X852E | Setup Guide - Page 9
different assembly instructions for use with a 2000-sheet drawer, 500sheet drawer, or a 250-sheet drawer. Preparing the caster base CAUTION: The correct stabilizer screws must be installed in each optional drawer and the duplex unit to secure the printer and options together. 1 Remove all items - Lexmark X852E | Setup Guide - Page 10
power adapter bracket is not used with this scanner and can be discarded. Note: Be sure to set up the items in the order listed in the table. Use the following table to locate the instructions you need to set up your printer and the paper handling options you purchased. Topic Attaching the caster - Lexmark X852E | Setup Guide - Page 11
Turn the 2000-sheet drawer over so the bottom side is up. 5 Remove the four screws and rubber feet from the bottom of the 2000-sheet drawer. 6 Place the caster cover on the bottom of the 2000-sheet drawer. 7 Place the frame assembly inside the caster cover. Front Assemble paper handling options 6 - Lexmark X852E | Setup Guide - Page 12
Have someone help you lift and turn the assembled 2000- sheet drawer and caster base right side up and place it on the floor. Assemble paper handling options 7 - Lexmark X852E | Setup Guide - Page 13
have a duplex unit, go to "Installing the duplex unit" on page 11 otherwise, go to "Positioning the printer" on page 12. Assembling the caster base for the 500 or 250-sheet drawer 1 Remove the caster cover caster base in the location you have chosen for your MFP. Assemble paper handling options 8 - Lexmark X852E | Setup Guide - Page 14
Drawer bottom 1 Remove a 500-sheet drawer from the carton. 2 Remove all packing material and tape from the drawer and paper tray. 3 If you are using a table or printer stand, then place 10 otherwise, go to "Installing the duplex unit" on page 11, or "Positioning the printer" on page 12. Assemble - Lexmark X852E | Setup Guide - Page 15
drawer from the carton. 2 Remove all packing material and tape from the drawer and paper tray. 3 If you are using a table or printer stand, then place the 250- sheet drawer in that location and go to "Installing the duplex unit" on page 11 or "Positioning the printer" on page 12, otherwise continue - Lexmark X852E | Setup Guide - Page 16
7 Tighten the screws securely. Installing the duplex unit 1 Remove the duplex unit from the carton. 2 Remove all packing material and tape. 3 If you are using a table or printer stand, then place the duplex unit in that location and go to "Positioning the printer" on page 12, otherwise continue to - Lexmark X852E | Setup Guide - Page 17
. 8 Tighten the posts securely. Positioning the printer 1 Open the printer box and then remove all items from the box. 2 Make sure you have the following items: • Printer • Power cord • Setup Guide with a publications CD • Operator panel language overlays • Drivers CD • Wire bail • Operator panel - Lexmark X852E | Setup Guide - Page 18
, optional drawer, table, or printer cabinet. 10 Make sure the printer and duplex unit lock together securely. 11 If you have memory or network options to install, go to "Installing printer memory and network options" on page 14 otherwise, go to "Removing the print cartridge packaging" on page 17 - Lexmark X852E | Setup Guide - Page 19
door latches and open the side door. Removing the shield 1 Loosen, but do not remove, the six screws on the shield. 2 Lift the shield up and off the printer. 3 Locate the connectors you want to use. Memory connectors Option card connectors Firmware connectors Assemble paper handling options 14 - Lexmark X852E | Setup Guide - Page 20
with the holes on the system board. 4 Push in until the firmware card is firmly in place. Installing an option card 1 Locate the two screws on the back of the printer that attach the metal plate to the slot. 3 Remove and save the two screws, and then remove and discard the plate. 4 Unpack the - Lexmark X852E | Setup Guide - Page 21
onto the screws and then slide the shield down. 3 Tighten all six screws. 4 Close the side door. 5 Close the upper and lower front doors. Assemble paper handling options 16 - Lexmark X852E | Setup Guide - Page 22
Step 3: Set up the printer Removing the print cartridge packaging 1 Open the printer upper front door. 2 Pull the print cartridge up and out. 3 Remove the tabs and packaging from the cartridge. 4 Reinsert the print cartridge into the printer. The print cartridge will drop down and snap into place - Lexmark X852E | Setup Guide - Page 23
the language of the text displayed on the operator panel. Loading paper Complete these instructions to load paper into any of the standard or optional trays. All trays are loaded in the same way. 1 Remove the tray. 2 Adjust the length and width guides to the correct position for the size of - Lexmark X852E | Setup Guide - Page 24
other than Ready on the display, refer to the printer publications CD for instructions on clearing the message. Printing a menu settings page 1 Turn on the printer. After the printer completes its internal tests, the Ready message is displayed. 2 Turn on your computer and any other peripherals - Lexmark X852E | Setup Guide - Page 25
an IP address is automatically assigned after you connect the network cable to the printer. 1 Look for the address under the "TCP/IP" heading on the If your network is not using DHCP, then you must manually assign an IP address to the printer. 1 Press Menu until you see Network Menu, and then - Lexmark X852E | Setup Guide - Page 26
For example, at a command prompt on a network computer type ping followed by the new printer IP address (for example, 192.168.0.11): ping xxx.xxx.x.xx If the printer is active on the network, you receive a reply. Attaching the scanner shelf 1 Turn the printer off. 2 Unplug the 16 AWG power cord or - Lexmark X852E | Setup Guide - Page 27
shelf is attached. Store the cover, it will be needed if you remove the shelf. 4 Align and insert the scanner shelf mounting brackets into the slots on top of the printer. 5 Make sure the scanner shelf is positioned securely. 6 Place the tips of the wire bail into the ends of the plastic brackets - Lexmark X852E | Setup Guide - Page 28
. 2 Make sure you have the following items: Scanner Feed tray Paper tray extension Paper stop Y-line power cord Power adapter Scanner cable Setup Guide Drivers CD Spare pad assembly 3 Place all items except the scanner aside for later use. 4 Remove the scanner from the box and place it on a flat - Lexmark X852E | Setup Guide - Page 29
Step 5: Install the feed tray and paper stop Paper extension 1 Connect the paper extension to the feed tray. Feed tray 2 Attach the feed tray to the automatic document feeder. Install the feed tray and paper stop 24 - Lexmark X852E | Setup Guide - Page 30
3 Open the paper support on the feed tray. 4 Attach the paper stop to the top cover. Install the feed tray and paper stop 25 - Lexmark X852E | Setup Guide - Page 31
filter. Connect the printer to the telephone line, network, and MFP. 1 Connect the RJ-11 telephone fax line cable into the fax modem port on the printer. 4 Connect the scanner cable to the printer, but do not turn the power on yet. Telephone fax line cable (RJ-11) Ethernet network cable Scanner - Lexmark X852E | Setup Guide - Page 32
cables to the scanner 1 Connect the scanner cable to the scanner. 2 Connect the automatic document feeder cable to the connector on the back of the scanner. 3 Connect the power adapter cord to the scanner. 4 Connect the Y-line power cord to the power adapter. 5 Remove the printer power cord from - Lexmark X852E | Setup Guide - Page 33
Step 7: Turn on the scanner and printer Performing a power up sequence On/off switch 1 If you are using a print server with a modem, plug the telephone fax line cable into the phone line outlet. 2 If you disconnected the Ethernet network cable from the print server or wall outlet, reconnect it. 3 - Lexmark X852E | Setup Guide - Page 34
short wait cycle while the firmware is initialized. Please Set Date/Time is displayed on the first line of the MFP control panel and "Please Wait..." is displayed on the second line. Do not turn off the printer or unplug the scanner until the Please Wait... message disappears from the control panel - Lexmark X852E | Setup Guide - Page 35
Step 8: Change your default copy settings A number of copy settings are available for customizing the MFP output to suit your needs. Some settings or values are displayed only if a specific option is installed on your printer. The indicator light next to the value on the control panel illuminates - Lexmark X852E | Setup Guide - Page 36
of these settings depend on the printer, options, and scanner combination you have. 1 Type the IP address of the MFP in the URL field of your browser (for example, http://192.168.236.24), and then press Enter. 2 Click Configuration. 3 Select Copy Setup from the MFP menu. The Copy Setup page has the - Lexmark X852E | Setup Guide - Page 37
MarkVision Professional to access the MFP IP address and enter the Configure menu. Use the following table to find the instructions for the method you want to use. Method Performing manual fax setup Performing browser fax setup Using MarkVision Professional to set fax information Page 33 34 35 - Lexmark X852E | Setup Guide - Page 38
MFP control panel by pressing Menu and then selecting the menu for the area you want to change. To manually enter the fax setup information: 1 On the control panel, press Menu repeatedly until you see Fax display, use the numeric keypad to change the numbers in each field. After the date and time - Lexmark X852E | Setup Guide - Page 39
IP address is set, use your browser to set the required fax information. You can also configure the MFP to route faxes received through the fax modem port on the print server (with modem) to an output bin on your printer. 1 Type the IP address of the MFP in the URL field of your browser (for example - Lexmark X852E | Setup Guide - Page 40
Enter. 2 Click Configuration. 3 Under the MFP heading, click Fax Setup. 4 Click Configuration. 5 Set your options for printing the transmission logs and output bins. 6 When you finish, click Submit. See your printer documentation for supported paper sizes, paper types, and output bins. Set send and - Lexmark X852E | Setup Guide - Page 41
a unique name that identifies the destination as a group fax. Instead of entering the phone numbers of fax recipients each time you send a fax, you can create permanent fax destinations that appear on the MFP control panel. 1 Type the IP address of the MFP in the URL field of your browser, and then - Lexmark X852E | Setup Guide - Page 42
the menu item has been configured. In addition to making copies and sending faxes, the MFP lets you scan documents and send them to designated destinations on settings that preset the MFP control panel formats for all Scan to e-mail and Scan to FTP jobs. 1 Type the IP address of the MFP in the URL - Lexmark X852E | Setup Guide - Page 43
browser, and then press Enter. 2 Click Configuration. 3 Under the MFP heading, click Scan to E-mail General Setup. 4 Specify the SMTP gateway of your network or internet service provider, plus your e-mail address for the reply line of the message. 5 Enter a subject (descriptive name) and a generic - Lexmark X852E | Setup Guide - Page 44
destination. 6 Enter Server name, Log-in, Password, and Filename. 7 Select scan type and resolution. 8 Assign a shortcut number (1-245) to the destination (optional). 9 Click Add/Modify. This new destination is now available for selection from the MFP control panel menu. Set up network scanning 39 - Lexmark X852E | Setup Guide - Page 45
Step 11: Verify MFP setup Making a test copy Copy mode is the default setting of the control panel. 1 Make sure the Ready message is displayed. 2 Place your original document in the scanner. 3 Press Go/Send to send a copy to your printer. Sending a test fax Note: If Send/Fax is disabled, this - Lexmark X852E | Setup Guide - Page 46
of each set of user instructions stored on the MFP CD, and manually deliver them to users. • Copy the PDF containing the user instructions and store it in a convenient location on your network or Intranet. The PDF is stored in the Pubs directory on the MFP CD. • Browse the Lexmark Web site (www - Lexmark X852E | Setup Guide - Page 47
Use MFP Solving fax problems. Scan to network modes must be configured in order to show up in the MFP control panel. See "Set up network scanning" on page 37 for detailed instructions. Getting more help Launch the MFP CD, and then click Contact Lexmark for a complete list of phone numbers and - Lexmark X852E | Setup Guide - Page 48
Maintain your scanner Clearing a paper jam 1 Open the automatic document feeder. 2 Carefully pull out the jammed paper. 3 Close the automatic document feeder. Maintain your scanner 43 - Lexmark X852E | Setup Guide - Page 49
ink, toner particles, or paper coatings. Clean the scanner feed rollers if documents do not feed smoothly or easily, or if several documents feed at one time. 1 Turn off and disconnect the power to the scanner. 2 Open the automatic document feeder. Feed rollers 3 Wet a clean, lint-free cloth or - Lexmark X852E | Setup Guide - Page 50
the document glass 1 Open the document cover. 2 Wet a clean, lint-free cotton cloth or swab with isopropyl alcohol (95%). 3 Wipe the scanner glass and automatic document feeder area by moving the cloth or swab from side to side. Glass 4 Close the document cover. Maintain your scanner 45 - Lexmark X852E | Setup Guide - Page 51
need to transport the scanner, follow these instructions to relock the scanner: 1 Raise the scanner high enough to move the switch down to the locked position. Replacing the pad assembly If you experience problems with papers double-feeding through the automatic document feeder, the pad assembly - Lexmark X852E | Setup Guide - Page 52
3 Remove the old automatic document feeder pad assembly by squeezing and pulling out the upper part of the pad clamp. Pad clamp 4 Hold the upper part of the new clamp, squeeze, and place it gently in the pad holder. 5 Close the automatic document feeder. Maintain your scanner 47 - Lexmark X852E | Setup Guide - Page 53
in accordance with the instruction manual, may cause harmful Part 68 This equipment complies with Part 68 of the FCC Rules. A label on the back of the equipment shows its FCC registration number and ringer equivalence number equipment uses an RJ-11C Universal Service Order Code (USOC) jack, and is designed - Lexmark X852E | Setup Guide - Page 54
. Refer to the setup documentation for instructions about connecting the fax telephone cable. If you experience problems with this equipment that you cannot resolve, contact Lexmark International, Inc., for repair and warranty information. If the problems are causing harm to the telephone network - Lexmark X852E | Setup Guide - Page 55
Users Director of Manufacturing and Technical Support, Lexmark International, S.A., Boigny, France the event of problems, contact your equipment Ireland United Kingdom support for ordering information. The subscriber may request that metering pulses be placed on the line, or can have them removed - Lexmark X852E | Setup Guide - Page 56
all analog lines. Contact customer support for ordering information. South Africa telecommunications notice This modem must be used in conjunction with an approved surge protection device when connected to the PSTN. Notices 51 - Lexmark X852E | Setup Guide - Page 57
P/N 10P0083 E.C. 1P0009 Lexmark and Lexmark with diamond design are trademarks of Lexmark International, Inc., registered in the United States and/or other countries. © 2003 Lexmark International, Inc. 740 West New Circle Road Lexington, Kentucky 40550 www.lexmark.com
-
 1
1 -
 2
2 -
 3
3 -
 4
4 -
 5
5 -
 6
6 -
 7
7 -
8
-
9
-
10
-
11
-
12
-
13
-
14
-
15
-
16
-
17
-
18
-
19
-
20
-
21
-
22
-
23
-
24
-
25
-
26
-
27
-
28
-
29
-
30
-
31
-
32
-
33
-
34
-
35
-
36
-
37
-
38
-
39
-
40
-
41
-
42
-
43
-
44
-
45
-
46
-
47
-
48
-
49
-
50
-
51
-
52
-
53
-
54
-
55
-
56
-
57
 |
 |
www.lexmark.com
Printer and Scanner
Setup Guide
3100 MFP option
January 2003