Lexmark X9575 Getting Started
Lexmark X9575 Manual
 |
UPC - 734646041348
View all Lexmark X9575 manuals
Add to My Manuals
Save this manual to your list of manuals |
Lexmark X9575 manual content summary:
- Lexmark X9575 | Getting Started - Page 1
9500 Series Getting Started 2007 www.lexmark.com - Lexmark X9575 | Getting Started - Page 2
of some parts may not always be obvious. Lexmark is not responsible for the use of other replacement parts. CAUTION-SHOCK HAZARD: Do not use the fax feature during a lightning storm. Do not set up this product or make any electrical or cabling connections, such as the power supply cord or telephone - Lexmark X9575 | Getting Started - Page 3
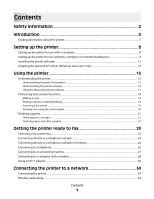
(standalone 9 Installing the printer software...13 Installing the optional XPS driver (Windows Vista users only 13 Using the printer 15 Understanding the printer...15 Understanding the parts of the printer ...15 Understanding the printer software...16 Using the Macintosh printer software...17 - Lexmark X9575 | Getting Started - Page 4
a USB cable 37 Troubleshooting 38 Setup troubleshooting...38 Power button is not lit ...38 Software does not install...38 Page does not print...40 Wireless troubleshooting...41 Check your security keys...41 Wireless setup program cannot communicate with the printer during installation 42 Wi-Fi - Lexmark X9575 | Getting Started - Page 5
. It installs with the printer software. To access the User's Guide: 1 Do one of the following: • In Windows Vista, click . • In Windows XP and earlier, click Start. 2 Click Programs or All Programs ª User's Guide. A printable version is on the User's Guide CD. Mac Help Complete instructions for - Lexmark X9575 | Getting Started - Page 6
that shipped with your printer. E-mail support For e-mail support, visit our Web site: www.lexmark.com. 1 Click CUSTOMER SUPPORT. 2 Click Technical Support. 3 Select your printer family. 4 Select your printer model. 5 From the Support Tools section, click e- Mail Support. 6 Complete the form, and - Lexmark X9575 | Getting Started - Page 7
printer will be free of defects in printer, or set forth at materials and workmanship for a www.lexmark.com. printer. period of 12 months after the 1 Click CUSTOMER SUPPORT of the printer are operating system-dependent. For complete descriptions, see the User's Guide for Windows and the Mac Help - Lexmark X9575 | Getting Started - Page 8
, click the CD icon on the desktop, and then double-click Install. 3 Follow the instructions on the computer screen to set up the printer. Your security software may notify you that Lexmark software is trying to communicate with your computer system. Always allow these programs to communicate - Lexmark X9575 | Getting Started - Page 9
instructions if you do not intend to connect the printer to a computer or to a network. 1 Unpack the printer, and find the items shown. 1, 2 Print cartridges 3, 4, 5 Telephone cord, power cord, installation cable 6 Quick Setup sheet 7 Getting Started guide 8 Installation software CDs for Windows - Lexmark X9575 | Getting Started - Page 10
3 Pull Tray 1 completely out of the printer, and then move the paper guides to the sides. 4 Load the paper, and then adjust the paper guides to rest against the paper. 5 Insert the paper tray, and then lift the paper stop. Setting up the printer 10 - Lexmark X9575 | Getting Started - Page 11
the power cord, and then turn the power on. 7 Raise the control panel display. If prompted, set the language and country or region. Press the arrow keys on the printer control panel to make your selections, and then press to save. 8 Open the printer, and then press down on the black cartridge - Lexmark X9575 | Getting Started - Page 12
10 Close the black cartridge carrier lid. 11 Press down on the color cartridge carrier lever, remove the tape from the color print cartridge, and then insert the color cartridge in the right cartridge carrier. 12 Close the color cartridge carrier lid. 13 Close the printer, and then press . An - Lexmark X9575 | Getting Started - Page 13
menu selection, and then click Drivers & Downloads. 3 Choose the printer and the printer driver for your operating system. 4 Follow the instructions on the computer screen to download the driver and install the printer software. Installing the optional XPS driver (Windows Vista users only) The XML - Lexmark X9575 | Getting Started - Page 14
From Disk dialog, click OK. 7 Click Next on the two additional dialogs that appear. For more information on the XPS driver, see the XPS readme file on the installation software CD. The file is located in the xps folder with the setupxps batch file (D:\Drivers\xps\readme). Setting up the printer 14 - Lexmark X9575 | Getting Started - Page 15
This chapter provides an overview of the parts of the printer, the printer software, and some basic printer functions. Understanding the printer Understanding the parts of the printer Use the To 1, 2 Top cover, scanner glass Copy, scan, fax, or remove an item. 3, 4, 5, 6 Automatic Document - Lexmark X9575 | Getting Started - Page 16
Power supply with port Connect the printer to a power source. Plug the power cord into the power supply at the back of the printer and then into the wall outlet. 9 Internal wireless print server Communicate with other devices on a wireless network. Understanding the printer software The software - Lexmark X9575 | Getting Started - Page 17
ways to print photos, troubleshoot printing problems, install print cartridges, and perform maintenance tasks. To access the Solution Center select Printer Status and Maintenance on the Productivity Studio Welcome Screen. • Check ink levels, order print cartridges, and find maintenance information - Lexmark X9575 | Getting Started - Page 18
on a wireless network. Printer Utility • Install print cartridges and perform other maintenance tasks. • Contact customer support. The following dialogs are available from any program that allows you to print a document. Use the Page Setup dialog Print dialog Printer Services To Choose a paper - Lexmark X9575 | Getting Started - Page 19
not sure which side is the printable side, see the instructions that came with the paper.) 2 Insert a memory printing and editing by repeating step 5 through step 8. 10 Press to go to the print preview screen. 11 Make sure the printer is connected to a computer, and both the printer and the computer - Lexmark X9575 | Getting Started - Page 20
printer has finished downloading the scan applications list. 7 Make your selections using the control panel buttons. 8 Press . 9 Follow the instructions You can include a calling card number as part of the fax number. • A fax number can include up to 64 numbers, commas, periods, and/or the symbols - Lexmark X9575 | Getting Started - Page 21
in accordance with ISO/IEC 24711. 2 Licensed Return Program Cartridge Ordering paper and other supplies To order supplies or to locate a dealer near you, visit our Web site at www.lexmark.com. Notes: • For best results, use only Lexmark print cartridges. • For best results when printing photos or - Lexmark X9575 | Getting Started - Page 22
size Lexmark PerfectFinish Photo Paper • Letter • A4 • 4 x 6 in. • 10 x 15 cm •L Note: Availability may vary by country or region. For information on how to purchase Lexmark Photo Paper or Lexmark PerfectFinish Photo Paper in your country or region, go to www.lexmark.com. Using the printer 22 - Lexmark X9575 | Getting Started - Page 23
ready to fax This chapter explains how to set up the printer for faxing. If you experience difficulties, see the "Fax troubleshooting" section of the User's Guide or the Mac Help. Choosing a fax connection You can connect the printer with equipment such as a telephone, an answering machine, or - Lexmark X9575 | Getting Started - Page 24
and receive faxes without using a computer. 1 Make sure you have a telephone cord and a telephone wall jack. 2 Connect one end of the telephone cord into the LINE port of the printer. 3 Connect the other end of the telephone cord into an active telephone wall jack. Connecting directly to a telephone - Lexmark X9575 | Getting Started - Page 25
3 Connect the other end of the telephone cord into the N slot of an active telephone wall jack. 4 If you would like to use the same line for both second telephone line (not provided) between the answering machine and the other N slot of the telephone wall jack. Getting the printer ready to fax 25 - Lexmark X9575 | Getting Started - Page 26
see "Using an RJ11 adapter" on page 30. 1 Make sure you have the following: • A telephone • Two telephone cords • A telephone wall jack 2 Connect one telephone cord to the LINE port of the printer, and then plug it into an active telephone wall jack. 3 Remove the protective plug from the EXT port of - Lexmark X9575 | Getting Started - Page 27
equipment, see "Using an RJ11 adapter" on page 30. 1 Make sure you have the following: • A telephone • An answering machine • Three telephone cords • A telephone wall jack 2 Connect one telephone cord into the LINE port of the printer, and then plug it into an active telephone wall jack. Getting the - Lexmark X9575 | Getting Started - Page 28
telephone to the answering machine. 5 Connect a third telephone cord from the answering machine to the EXT port of the printer. Connecting to a computer with a modem Connect the printer to a computer with a modem to send faxes from the software application. Note: Setup steps may vary depending on - Lexmark X9575 | Getting Started - Page 29
2 Connect one telephone cord into the LINE port of the printer, and then plug it into an active telephone wall jack. 3 Remove the protective plug from the EXT port of the printer. 4 Connect the other telephone cord from the computer modem to the EXT port of the printer. Getting the printer ready to - Lexmark X9575 | Getting Started - Page 30
equipment, use the telephone line adapter included in the box with the printer. 1 Connect one end of the telephone cord into the LINE port of the printer. 2 Connect the adapter to the telephone line that came with the printer. Note: The UK adapter is shown. Your adapter may look different, but - Lexmark X9575 | Getting Started - Page 31
connect the equipment: 1 Remove the plug from the EXT port on the back of the printer. Note: Once this plug is removed, any country- or region-specific equipment you connect to the printer by the adapter, as shown, will not function properly. 2 Connect your telecommunications equipment directly to - Lexmark X9575 | Getting Started - Page 32
• Romania • Russia • Slovenia • Spain • Turkey To connect an answering machine or other telecommunications equipment to the printer: 1 Remove the plug from the EXT port on the back of the printer. Note: Once this plug is removed, any country- or region-specific equipment that you connect to the - Lexmark X9575 | Getting Started - Page 33
You may use an adapter with your printer. Country/region • Germany • Austria • Switzerland There is a plug installed in the EXT port of the printer. This plug is necessary for the proper functioning of the printer. Note: Do not remove the plug. If you remove it, other telecommunications devices in - Lexmark X9575 | Getting Started - Page 34
instructions on installing the device. - For wireless setup purposes, the printer printer on a wireless network To set up the printer for wireless printing, you need to: • Know the name of your wireless network. This is also known as the Service should be: - Exactly 10 or 26 hexadecimal characters - Lexmark X9575 | Getting Started - Page 35
your CD or DVD drive. In Windows XP: a Click Start ª Run. b Type D:\setup.exe, where D is the letter of your CD or DVD drive. In Macintosh: a Click the CD icon on the desktop. b Double-click Install. 3 Follow the instructions on the Welcome screen to set up the printer. Connecting the printer to - Lexmark X9575 | Getting Started - Page 36
make sure that: • You have completed the initial setup of the printer. • Your router is on, and your network is set up and working properly. • Your computer is connected to your router. 1 Insert the installation software CD for Windows or Macintosh, depending on the operating system you use on your - Lexmark X9575 | Getting Started - Page 37
Install. 3 Follow the instructions on the Welcome screen to set up the printer. Connecting the printer directly to the computer with a USB cable The procedure differs depending on your operating system. The steps for Windows and Macintosh are below. 1 Insert the installation software CD for Windows - Lexmark X9575 | Getting Started - Page 38
User's Guide or Mac Help, one of which installed with your printer software. Setup troubleshooting Power button is not lit These are possible solutions. Try one or more of the following: PRESS POWER BUTTON Make sure the printer is on by pressing . DISCONNECT AND RECONNECT THE POWER CORD 1 Disconnect - Lexmark X9575 | Getting Started - Page 39
the power supply to the printer. 5 Plug the power cord into the wall outlet. 6 Press to turn the printer on. DISABLE ANTI-VIRUS PROGRAMS (FOR WINDOWS USERS ONLY) 1 Close all open software applications. 2 Disable any anti-virus programs. 3 Double-click the My Computer icon. In Windows XP, click - Lexmark X9575 | Getting Started - Page 40
outlet. Make sure the power cord is properly connected to the printer. RELOAD PAPER Remove the paper from the paper support, and then load the paper again. CHECK INK Check the ink levels, and install new print cartridges if necessary. CHECK CARTRIDGES 1 Remove the print cartridges. 2 Make sure the - Lexmark X9575 | Getting Started - Page 41
remove the power supply from the printer. 4 Reconnect the power supply to the printer. 5 Plug the power cord into the wall outlet. 6 Press to turn the printer on. REMOVE AND REINSTALL THE SOFTWARE Uninstall the printer software, and then reinstall it. Wireless troubleshooting Check your security - Lexmark X9575 | Getting Started - Page 42
printer. 4 Cancel the software installation. 5 Do one of the following: • In Windows Vista, click . • In Windows XP and earlier, click Start. 6 Click Programs or All Programs ªLexmark 9500 Series. 7 Click Wireless Configuration Utility. 8 Follow the instructions on the computer screen. Mac - Lexmark X9575 | Getting Started - Page 43
do not already know it, find the IP address of the access point. a Do one of the following: • In Windows Vista, click ª All Programs ª Accessories ª Command Prompt. • In Windows XP and earlier, click Start ª Programs or All Programs ª Accessories ª Command Prompt. b Type ipconfig. Troubleshooting 43 - Lexmark X9575 | Getting Started - Page 44
Windows Vista, click ª All Programs ª Accessories ª Command Prompt. • In Windows XP and earlier, click Start ª Programs or All Programs from. Turn off and restart the printer. 4 If the wireless access point the connection, and then click Repair. Mac users only 1 Check the status of Troubleshooting 44 - Lexmark X9575 | Getting Started - Page 45
address field. For example: 10.168.0.100 e Click problem. RUN THE WIRELESS SETUP PROGRAM AGAIN Run the Wireless Configuration Utility for Windows or the Wireless Setup Assistant for Macintosh. For more information, see "Wireless setup program cannot communicate with the printer during installation - Lexmark X9575 | Getting Started - Page 46
Guide or the Mac Help, one of which installed with your printer software. Printer cannot connect to the wireless network These are possible solutions. Try one or more of the following: MAKE SURE YOUR COMPUTER IS CONNECTED TO YOUR WIRELESS ACCESS POINT (WIRELESS ROUTER) Windows . Troubleshooting 46 - Lexmark X9575 | Getting Started - Page 47
Windows operating system) or the Wireless Setup Assistant (on a Macintosh operating system) to set up the printer again. Windows Windows Vista: ª All Programs ª Accessories ª Command Prompt. • In Windows XP and earlier: Start ª Programs or All Programs reference. Mac users only Troubleshooting 47 - Lexmark X9575 | Getting Started - Page 48
earlier, click Start ª Settings ª Printers. If you cannot find the icon for your printer, then the printer driver is not installed. 2 If the printer driver is not installed, insert the installation software CD into your computer. 3 Follow the instructions on the computer screen. Troubleshooting 48 - Lexmark X9575 | Getting Started - Page 49
was installed. b Choose Library ª Printers ª Lexmark ª 2007ª Lexmark 9500 Series folder. If you cannot find the printer folder, then the printer driver is not installed. 2 If the printer driver is not installed, insert the installation software CD into your computer. 3 Follow the instructions on - Lexmark X9575 | Getting Started - Page 50
window, and try printing again. REINSTALL SOFTWARE Uninstall and then reinstall the printer software. Note: If more than one printer appears in the "Select your printer" list, pick the printer with the MAC address that matches the address on the back of your printer. General network troubleshooting - Lexmark X9575 | Getting Started - Page 51
page: 1 From the control panel of the printer, press or repeatedly until Setup is highlighted. 2 Press . 3 Press or repeatedly until Network Setup is highlighted. 4 Press . 5 Press or repeatedly until Print Network Setup Page is highlighted. 6 Press . A network setup page prints. Troubleshooting 51 - Lexmark X9575 | Getting Started - Page 52
of operation in conjunction with other products, programs, or services, except those expressly designated by the manufacturer, are the user's responsibility. For Lexmark technical support, visit support.lexmark.com. For information on supplies and downloads, visit www.lexmark.com. If you don't have - Lexmark X9575 | Getting Started - Page 53
for a Class B digital device, pursuant to Part 15 of the FCC Rules. Operation is subject be directed to: Director of Lexmark Technology & Services Lexmark International, Inc. 740 West New is applicable if your printer has a wireless network card installed. The radiated output power of this device - Lexmark X9575 | Getting Started - Page 54
, Lexmark International, Inc., S.A., Boigny, France. This product satisfies the Class B limits of EN 55022 and safety requirements of EN 60950. European EC directives conformity statement for radio products The following notices are applicable if your printer has a wireless network card installed - Lexmark X9575 | Getting Started - Page 55
fur, sem gerðar eru í tilskipun 1999/5/EC. Italiano Con la presente Lexmark International, Inc. dichiara che questo questo prodotto è conforme ai requisiti essenziali ed Commission (FCC) compliance information statement This product complies with Part 68 of the FCC Rules. See the product online - Lexmark X9575 | Getting Started - Page 56
power sources. This has been identified as a major nationwide problem. It is recommended that the customer install conditions for the Facsimile User Instructions. The grant of a telepermit services. This equipment shall not be set up to make automatic calls to the Telecom's 111 Emergency Service - Lexmark X9575 | Getting Started - Page 57
than 10 call attempts to the same number within any 30 minute period for any single manual Lexmark poiché gli impulsi remoti sono presenti su tutte le linee analogiche in Svizzera. End-user license agreement Opening this package, installing the printing device software, or using the print cartridges - Lexmark X9575 | Getting Started - Page 58
See the User's Guide or Mac Help on your software CD for additional terms. Notices 58 - Lexmark X9575 | Getting Started - Page 59
) DHCP IP address DHCP server infrastructure mode installation cable internal wireless print server IP (Internet Protocol) address ipconfig MAC (Media Access Control) address MAC filtering network adapter/card network hub network name ping printer nickname A setting for a wireless device that lets - Lexmark X9575 | Getting Started - Page 60
Service Set). An IP address assigned manually by you A device similar to a network hub that can connect different networks together An address assigned to a network printer unauthorized access to a wireless network. WPA is not supported on ad hoc wireless networks. Other possible security settings
-
 1
1 -
 2
2 -
 3
3 -
 4
4 -
 5
5 -
 6
6 -
 7
7 -
8
-
9
-
10
-
11
-
12
-
13
-
14
-
15
-
16
-
17
-
18
-
19
-
20
-
21
-
22
-
23
-
24
-
25
-
26
-
27
-
28
-
29
-
30
-
31
-
32
-
33
-
34
-
35
-
36
-
37
-
38
-
39
-
40
-
41
-
42
-
43
-
44
-
45
-
46
-
47
-
48
-
49
-
50
-
51
-
52
-
53
-
54
-
55
-
56
-
57
-
58
-
59
-
60
 |
 |

9500 Series Getting Started
2007
www.lexmark.com