Lexmark Z603 User's Guide for Windows
Lexmark Z603 Manual
 |
View all Lexmark Z603 manuals
Add to My Manuals
Save this manual to your list of manuals |
Lexmark Z603 manual content summary:
- Lexmark Z603 | User's Guide for Windows - Page 1
™ User's Guide for Windows • Setup troubleshooting A checklist to find solutions to common setup problems. • Printer overview Learn about the printer parts and the printer software. • Printing ideas How to print several projects on various types of paper. • Maintenance Caring for your cartridges and - Lexmark Z603 | User's Guide for Windows - Page 2
740 West New Circle Road, Lexington, Kentucky 40550, U.S.A. In the United Kingdom and Eire, send to Lexmark International Ltd., Marketing and Services Department, Westhorpe House, Westhorpe, Marlow Bucks SL7 3RQ. Lexmark may use or distribute any of the information you supply in any way it believes - Lexmark Z603 | User's Guide for Windows - Page 3
Contents Chapter 1: Printer overview 5 Understanding the printer parts 5 Understanding the printer software 6 Chapter 2: Printing ideas 10 Printing 40 Chapter 3: Maintenance 42 Replacing the print cartridges 42 Aligning the print cartridges 45 Improving print quality 46 Preserving the print - Lexmark Z603 | User's Guide for Windows - Page 4
Chapter 4: Setup troubleshooting 49 Troubleshooting checklist 49 Solving printer software installation problems 50 Chapter 5: General troubleshooting 53 Understanding error messages and flashing lights 53 Resolving unsuccessful or slow printing 54 Clearing paper misfeeds or jams 56 Solving - Lexmark Z603 | User's Guide for Windows - Page 5
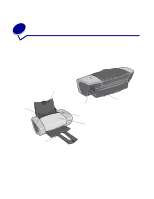
1 Printer overview Understanding the printer parts Z600 Series Color Jetprinter™ Sheet feeder Paper support Paper guide and release tab Paper exit tray USB cable connector Power supply connector Power/Resume button Front cover Printer overview 5 - Lexmark Z603 | User's Guide for Windows - Page 6
your operating system to print documents with superior results. This software has two parts: the Printer driver and the Lexmark Solution Center. Printer driver You can change your printer settings in the printer driver. To print a typical document on plain paper, you do not need to change your - Lexmark Z603 | User's Guide for Windows - Page 7
Letter • Orientation: Portrait • Layout: Normal For more information about the printer settings for different types of print jobs, see "Printing ideas" on page ink in your color cartridge. Note: This option is not available if a black cartridge is not installed. Understanding the printer software 7 - Lexmark Z603 | User's Guide for Windows - Page 8
of your document turn like the pages of a magazine. If you select Top Flip, the pages turn like the pages of a legal pad. Lexmark Solution Center The Lexmark Z600 Series Solution Center (LSC) is a guide you can refer to for printer help. There are two ways to open the LSC: • Click Start Programs - Lexmark Z603 | User's Guide for Windows - Page 9
the print cartridge nozzles. • Align the cartridges. • Solve other problems. Note: Do not access this tab while a job is in progress. • View information about ordering supplies. • Receive contact information for Lexmark Customer Support. • Register your printer. • Receive a printer software update - Lexmark Z603 | User's Guide for Windows - Page 10
the thickness of the paper. Step 1: Load the paper • Load the paper vertically against the right side of the paper support. • Do not force the paper into the printer. • Squeeze and slide the paper guide to the left side of the paper. Note: If you are using letter size paper, adjusting the paper - Lexmark Z603 | User's Guide for Windows - Page 11
the photo paper • For best results, use photo paper that is made for inkjet printers. • If your paper includes instructions, read them carefully. • Load the photo paper vertically against the right side of the paper support. • Make sure the glossy or coated side is facing you. • Do not force the - Lexmark Z603 | User's Guide for Windows - Page 12
to the left side of the photo paper. Note: If you are using letter size paper, adjusting the paper guide may not be necessary. Step 2: Customize the print settings 1 With your document open, click File Print. The Print dialog box appears. 2 From the Print dialog - Lexmark Z603 | User's Guide for Windows - Page 13
includes instructions, read them carefully. • Load the premium paper vertically against the right side of the paper support. • If there is a special mark on the paper, make sure the mark is facing away from you. • Do not force the paper into the printer. Note: Squeeze and slide the paper guide to - Lexmark Z603 | User's Guide for Windows - Page 14
Step 2: Customize the print settings 1 With your document open, click File Print. The Print dialog box appears. 2 From the Print dialog box, click Properties, Preferences, or Options. 3 Select a print quality: a From Print Properties dialog box, select the Quality/Copies tab. b From the Quality/ - Lexmark Z603 | User's Guide for Windows - Page 15
Step 1: Load the paper • Load the paper vertically against the right side of the paper support. • Do not force the paper into the printer. • Make sure the print side is facing you. • Squeeze and slide the paper guide to the left side of the paper. Note: If you are using letter size paper, adjusting - Lexmark Z603 | User's Guide for Windows - Page 16
the odd-numbered pages finish printing, the printer software prompts you to reload the paper. 1 Load the stack of paper and reloading instruction page with the printed side facing away from you and the arrows pointing down into the paper support. 2 Click Continue Printing. The even-numbered pages - Lexmark Z603 | User's Guide for Windows - Page 17
1: Load the cards • If your cards include instructions, read them carefully. • Load the cards vertically against the right side of the paper support. • Make sure the print side is facing you. • Do not force the cards into the printer. • Squeeze and slide the paper guide to the left side of the cards - Lexmark Z603 | User's Guide for Windows - Page 18
2 From the Print dialog box, click Properties, Preferences, or Options. 3 Select a print quality: a From Print Properties dialog box, select the Quality/Copies tab. b From the Quality/Speed area, select Better or Best if you are printing on photo cards or greeting cards. Select Normal for other - Lexmark Z603 | User's Guide for Windows - Page 19
Load the envelopes vertically against the right side of the paper support. • Make sure the print side is facing you. • Make sure the stamp location is in the upper left corner. • Do not force the envelopes into the printer. • Squeeze and slide the paper guide to the left side of the envelopes. Step - Lexmark Z603 | User's Guide for Windows - Page 20
, depending on the thickness of the paper. Printing color images in black helps to conserve ink in your color print cartridge. Step 1: Load the paper • Load the paper vertically against the right side of the paper support. • Make sure the print side is facing you. Printing color images in black and - Lexmark Z603 | User's Guide for Windows - Page 21
• Do not force the paper into the printer. • Squeeze and slide the paper guide to the left side of the paper. Note: If you are using letter size paper, adjusting the paper guide may not be necessary. Step 2: Customize the print settings 1 With your document open, click File Print. The Print dialog - Lexmark Z603 | User's Guide for Windows - Page 22
. Step 1: Load the paper • Load the paper vertically against the right side of the paper support. • Make sure the print side is facing you. • Do not force the paper into the printer. • Squeeze and slide the paper guide to the left side of the paper. Note: If you are using letter size paper - Lexmark Z603 | User's Guide for Windows - Page 23
Step 2: Customize the print settings 1 With your document open, click File Print. The Print dialog box appears. 2 From the Print dialog box, click Properties, Preferences, or Options. 3 Select a paper size: a From Print Properties dialog box, select the Paper Setup tab. b From the Paper Size menu, - Lexmark Z603 | User's Guide for Windows - Page 24
your printer software prompts you to reload the paper. 1 Insert the stack of paper and the reloading instruction page with the printed side facing away from you and the arrows pointing down into the paper support. 2 Click Continue Printing. If you do not want to print the reloading instruction page - Lexmark Z603 | User's Guide for Windows - Page 25
sheets of labels at a time, depending on the thickness of the sheets. Step 1: Load the labels • Use labels designed for inkjet printers. • If your labels include instructions, read them carefully. • Do not print within 1 mm (0.04 in.) of the edge of a label. • Load the labels vertically against the - Lexmark Z603 | User's Guide for Windows - Page 26
the print side is facing you. • Do not force the labels into the printer. • Squeeze and slide the paper guide to the left side of the labels. Note: If you are using letter size sheets of labels, adjusting the paper guide may not be necessary. Step 2: Customize the print settings 1 With your document - Lexmark Z603 | User's Guide for Windows - Page 27
paper at a time, depending on the thickness of the paper. Step 1: Load the paper • Load the paper vertically against the right side of the paper support. • Make sure the print side is facing you. • Do not force the paper into the - Lexmark Z603 | User's Guide for Windows - Page 28
the left side of the paper. Note: If you are using letter size paper, adjusting the paper guide may not be necessary. Note: For the best print quality, use a heavier weight paper. Step 2: Customize the print settings 1 With your document open, click File - Lexmark Z603 | User's Guide for Windows - Page 29
. 1 After the first half of your handouts prints, your printer software prompts you to reload the paper. Insert the paper and reloading instruction page with the printed side facing away from you and the arrows pointing down into the paper support. 2 Click Continue Printing. If you do not want to - Lexmark Z603 | User's Guide for Windows - Page 30
Step 1: Load the paper • Load the paper vertically against the right side of the paper support. • Make sure the print side is facing you. • Do not force the paper into the printer. • Squeeze and slide the paper guide to the left side of the paper. Note: If you are using letter size paper, adjusting - Lexmark Z603 | User's Guide for Windows - Page 31
3 Select a print quality: a From Print Properties dialog box, select the Quality/Copies tab. b From the Quality/Speed area, select Normal. Note: Higher print quality settings result in better print quality, but may take longer to print. 4 Select a print layout: a From Print Properties dialog box, - Lexmark Z603 | User's Guide for Windows - Page 32
iron-on transfer at a time. Step 1: Load the iron-on transfers • If your iron-on transfers include instructions, read them carefully. • Load the iron-on transfers vertically against the right side of the paper support. • Make sure the print side (blank side) is facing you. • Do not force the iron-on - Lexmark Z603 | User's Guide for Windows - Page 33
on transfers. Note: If you are using letter size iron-on transfers, adjusting the paper guide may not be necessary. Step 2: Customize the print settings 1 With your document open, remove each iron-on transfer as it exits the printer, and then let it dry before stacking. Printing iron-on transfers 33 - Lexmark Z603 | User's Guide for Windows - Page 34
. Step 1: Load the transparencies • Use transparencies designed for inkjet printers. • If your transparencies include instructions, read them carefully. • Load the transparencies vertically against the right side of the paper support. • Make sure the rough side (print side) of the transparencies - Lexmark Z603 | User's Guide for Windows - Page 35
Size menu, select A4 or Letter. 6 Click OK. Step 3: Print your transparencies Click OK. Note: To prevent smudging, remove each transparency as it exits the printer, and then let it dry before stacking. Printing transparencies 35 - Lexmark Z603 | User's Guide for Windows - Page 36
. Step 1: Load the paper • Load the paper vertically against the right side of the paper support. • Make sure the print side is facing you. • Do not force the paper into the printer. • Squeeze and slide the paper guide to the left side of the paper. Note: If you are using letter size paper - Lexmark Z603 | User's Guide for Windows - Page 37
3 To print the last page first: a From Print Properties dialog box, select the Quality/Copies tab. b Select Print Last Page First. 4 Follow the steps for your paper type to further customize your document. 5 Click OK. Step 3: Print your document Click OK. Note: The paper exit tray holds up to 25 - Lexmark Z603 | User's Guide for Windows - Page 38
of sheets you need to print your banner behind the printer. Note: Loading excess banner paper may cause a paper jam. For help, see "Printer has a paper jam" on page 57. 3 Load the leading edge of the banner paper into the printer against the right side of the paper support. Printing a banner 38 - Lexmark Z603 | User's Guide for Windows - Page 39
If you are using letter size banner paper, adjusting the paper guide may not be necessary. Step 2: Customize the print settings 1 select Banner as the Type, your banner paper will cause a paper jam. For help, see "Printer has a paper jam" on page 57. 5 Select a banner size: a From Print Properties - Lexmark Z603 | User's Guide for Windows - Page 40
: 76 to 216 mm (3 to 8.5 in.) - Length: 127 to 432 mm (5 to 17 in.) • Load the paper vertically against the right side of the paper support. • Make sure the print side is facing you. • Do not force the paper into the - Lexmark Z603 | User's Guide for Windows - Page 41
• Squeeze and slide the paper guide to the left side of the paper. Step 2: Customize the print settings 1 With your document open, click File Print. The Print dialog box appears. 2 From - Lexmark Z603 | User's Guide for Windows - Page 42
3 Maintenance Replacing the print cartridges The Lexmark Z600 Series uses the following cartridges: Item: Color cartridge Black cartridge Part number: 26 or 27 16 or 17 Note: You can use the printer with just a color cartridge or just a black cartridge. For information about ordering supplies, - Lexmark Z603 | User's Guide for Windows - Page 43
. Store them in an airtight container or dispose of them properly. Installing the cartridges 1 If you are installing new cartridges, remove the sticker and transparent tape from the back and bottom of the cartridges. Warning: Do not touch or remove the gold contact areas on the back and bottom - Lexmark Z603 | User's Guide for Windows - Page 44
in the left carrier. Insert the black cartridge in the right carrier. Note: To extend the life of your color cartridge and improve printing speed, install a black cartridge along with the color cartridge. 3 Snap the lids closed. 4 Close the front cover. Note: The front cover must be closed to - Lexmark Z603 | User's Guide for Windows - Page 45
Install a new print cartridge. 3 Select the type of cartridge you installed. Note: Specify whether the cartridge is a new cartridge or an old cartridge (one that has been used before). If an old cartridge is incorrectly identified as New Cartridge in the Lexmark Solution Center, ink levels may be - Lexmark Z603 | User's Guide for Windows - Page 46
For help, see "Installing the cartridges" on page 43. c Print your document again. d If print quality has not improved, continue with step 2. 2 Clean the print nozzles: a Load paper. For help, see "Step 1: Load the paper" on page 10. b Open the Lexmark Solution Center. For help, see page 8. c Click - Lexmark Z603 | User's Guide for Windows - Page 47
you are ready to install it. • Do not remove a print cartridge from the printer except to replace, clean, or store it in an airtight container. The print cartridges do not print correctly if left exposed for an extended period. Lexmark's printer warranty does not cover repair of failures or damage - Lexmark Z603 | User's Guide for Windows - Page 48
Ordering supplies To order supplies or locate a dealer near you, contact the Lexmark Web site at www.lexmark.com. Item: Black cartridge Color cartridge USB cable Part number: 16 or 17 26 or 27 12A2405 Ordering supplies 48 - Lexmark Z603 | User's Guide for Windows - Page 49
4 Setup troubleshooting Troubleshooting checklist Is the power supply firmly attached to your printer and a properly grounded electrical outlet? Are both your printer and computer on? Is your USB cable securely attached to your printer and to your computer or Lexmark adapter? Are any printer lights - Lexmark Z603 | User's Guide for Windows - Page 50
a USB cable. 3 Follow these instructions to print a test page. a Open the Lexmark Solution Center. For help, see page 8. b From the Maintenance tab, click Print a Test Page. • If the test page prints, the problem may be with your external devices, not your printer. Check the documentation that came - Lexmark Z603 | User's Guide for Windows - Page 51
and reinsert the printer software CD. 5 From your desktop, double-click My Computer. 6 Double-click your CD-ROM drive icon. If necessary, double-click setup.exe. 7 Follow the instructions on your screen to complete printer software installation. Solving printer software installation problems 51 - Lexmark Z603 | User's Guide for Windows - Page 52
icon is automatically created on your desktop. Using the World Wide Web 1 From the Lexmark Web site, www.lexmark.com, select the appropriate driver for your operating system. 2 Follow the instructions on your screen to install the printer software. Solving printer software installation problems 52 - Lexmark Z603 | User's Guide for Windows - Page 53
blinking light on your printer. For information about lights on a Lexmark adapter, refer to the adapter documentation. Paper Jam message For help clearing a paper jam, see "Printer has a paper jam" on page 57. Ink Low message A print cartridge is running out of ink. An Ink Low message appears when - Lexmark Z603 | User's Guide for Windows - Page 54
not print For help, first see the troubleshooting checklist on page 49, and then: Check the printer status: Windows 98/Me/2000 Windows XP 1 Click Start Settings Printers. 2 From the Printers folder, double-click the Lexmark Z600 Series printer icon. 3 From the Printer menu, make sure: • Set as - Lexmark Z603 | User's Guide for Windows - Page 55
printer software. 5 Click Apply. 6 Click OK. 1 Click Start Control Panel Printers and Other Hardware Printers and Faxes. 2 Right-click the Lexmark Z600 Series printer For help, first see the troubleshooting checklist on page 49, and then: • If the paper is jammed, see "Printer has a paper jam" on - Lexmark Z603 | User's Guide for Windows - Page 56
the back and bottom of the print cartridges. For help, see "Replacing the print cartridges" on page 42. • Your cartridge does not have clogged nozzles. Clean the print cartridge nozzles and contacts. For help, see "Improving print quality" on page 46. Printer prints very slowly • Close any software - Lexmark Z603 | User's Guide for Windows - Page 57
the right side of the paper support. Printer does not feed envelopes or specialty media Make sure: • Your printer feeds paper without problems. Load the envelopes or specialty media vertically against the right side of the paper support. Squeeze and slide the paper guide to the left edge of the - Lexmark Z603 | User's Guide for Windows - Page 58
problems If print quality is unsatisfactory, you may need to adjust your margin settings, select a higher print quality, align the print cartridges the printer may be smearing the ink. Remove each page as it exits the printer and let it dry completely before stacking. • Clean the print cartridge - Lexmark Z603 | User's Guide for Windows - Page 59
again. To cancel all print jobs: a Click Start Settings Printers. b Double-click your printer icon. c Select the document you want to cancel. d the screen • A cartridge may be low on ink. Check the ink levels in the Lexmark Solution Center. For help, see "Lexmark Solution Center" on problems 59 - Lexmark Z603 | User's Guide for Windows - Page 60
the print cartridge nozzles and contacts. For help, see "Improving print quality" on page 46. Photos do not print as expected • Use a photo paper designed for inkjet printers. • Select a higher print quality. • Select photo paper as the paper type. Solving specialty media problems The following - Lexmark Z603 | User's Guide for Windows - Page 61
installed and used in accordance with the instructions, may cause harmful interference to radio be directed to: Director of Lexmark Technology & Services Lexmark International, Inc. 740 West by the Director of Manufacturing and Technical Support, Lexmark International, S.A., Boigny, France. This - Lexmark Z603 | User's Guide for Windows - Page 62
Japanese VCCI notice The United Kingdom Telecommunications Act 1984 This apparatus is approved under the approval number NS/G/1234/J/100003 for the indirect connections to the public telecommunications systems in the United Kingdom. 62 - Lexmark Z603 | User's Guide for Windows - Page 63
size paper. A nonstandard paper size. default printer. The printer automatically used when you send jobs to print. default printer settings. Printer software settings defined when the printer is manufactured. driver. See printer software. duplex. A printer software option that lets you print on both - Lexmark Z603 | User's Guide for Windows - Page 64
. premium paper. Coated paper designed for reports or documents with graphics. print cartridge. The replaceable unit inside your printer that contains the ink. print cartridge nozzles. The gold area of the print cartridge that ink flows through before it is applied to your paper during printing. 64 - Lexmark Z603 | User's Guide for Windows - Page 65
location on the server where print jobs are stored for printing in the order in which they are sent. printer driver. See printer software. printer port. See USB port. printer software. (1) The program that lets you select settings to customize your print job. (2) The program that lets your computer - Lexmark Z603 | User's Guide for Windows - Page 66
11 greeting cards 17 H handouts 27 I improving print quality 58 index cards 17 Ink Low message 53 installing print cartridges 43 printer software 52 intermittent printing 58 iron-on transfers 32 L labels 25 Lexmark Solution Center 8 loading banner paper 38 booklet 22 cards 17 coated paper 11 custom - Lexmark Z603 | User's Guide for Windows - Page 67
printer cable, troubleshooting 49 printer driver installing 52 removing 52 printer parts 6 printer software driver 6 installing 52 Lexmark Solution Center 6 removing 52 uninstalling (Windows) 55 printer software CD, troubleshooting two-sided printing 14 printing problems blank pages 56 error messages - Lexmark Z603 | User's Guide for Windows - Page 68
56 software, printer 6 installing 52 removing 52 specialty paper solving problems with 60 supplies, ordering 48 T test page alignment 45 does not print 55 test page, printing 50 transfers, iron-on 32 transparencies 34 troubleshooting alignment page 56 blank pages 56 cartridges 49 error messages - Lexmark Z603 | User's Guide for Windows - Page 69
and Lexmark with diamond design are trademarks of Lexmark International, Inc., registered in the United States and/or other countries. Color Jetprinter is a trademark of Lexmark International, Inc. © 2003 Lexmark International, Inc. 740 West New Circle Road Lexington, Kentucky 40550 www.lexmark.com
-
 1
1 -
 2
2 -
 3
3 -
 4
4 -
 5
5 -
 6
6 -
 7
7 -
8
-
9
-
10
-
11
-
12
-
13
-
14
-
15
-
16
-
17
-
18
-
19
-
20
-
21
-
22
-
23
-
24
-
25
-
26
-
27
-
28
-
29
-
30
-
31
-
32
-
33
-
34
-
35
-
36
-
37
-
38
-
39
-
40
-
41
-
42
-
43
-
44
-
45
-
46
-
47
-
48
-
49
-
50
-
51
-
52
-
53
-
54
-
55
-
56
-
57
-
58
-
59
-
60
-
61
-
62
-
63
-
64
-
65
-
66
-
67
-
68
-
69
 |
 |

www.lexmark.com
Z600 Series Color Jetprinter™
•
Setup troubleshooting
A checklist to find solutions to common setup problems.
•
Printer overview
Learn about the printer parts and the printer software.
•
Printing ideas
How to print several projects on various types of paper.
• Maintenance
Caring for your cartridges and ordering supplies.
•
General troubleshooting
Error messages, print quality problems, paper jams, and much more.
User’s Guide for Windows
January 2003