LiftMaster 3280 3280 Manual
LiftMaster 3280 Manual
 |
View all LiftMaster 3280 manuals
Add to My Manuals
Save this manual to your list of manuals |
LiftMaster 3280 manual content summary:
- LiftMaster 3280 | 3280 Manual - Page 1
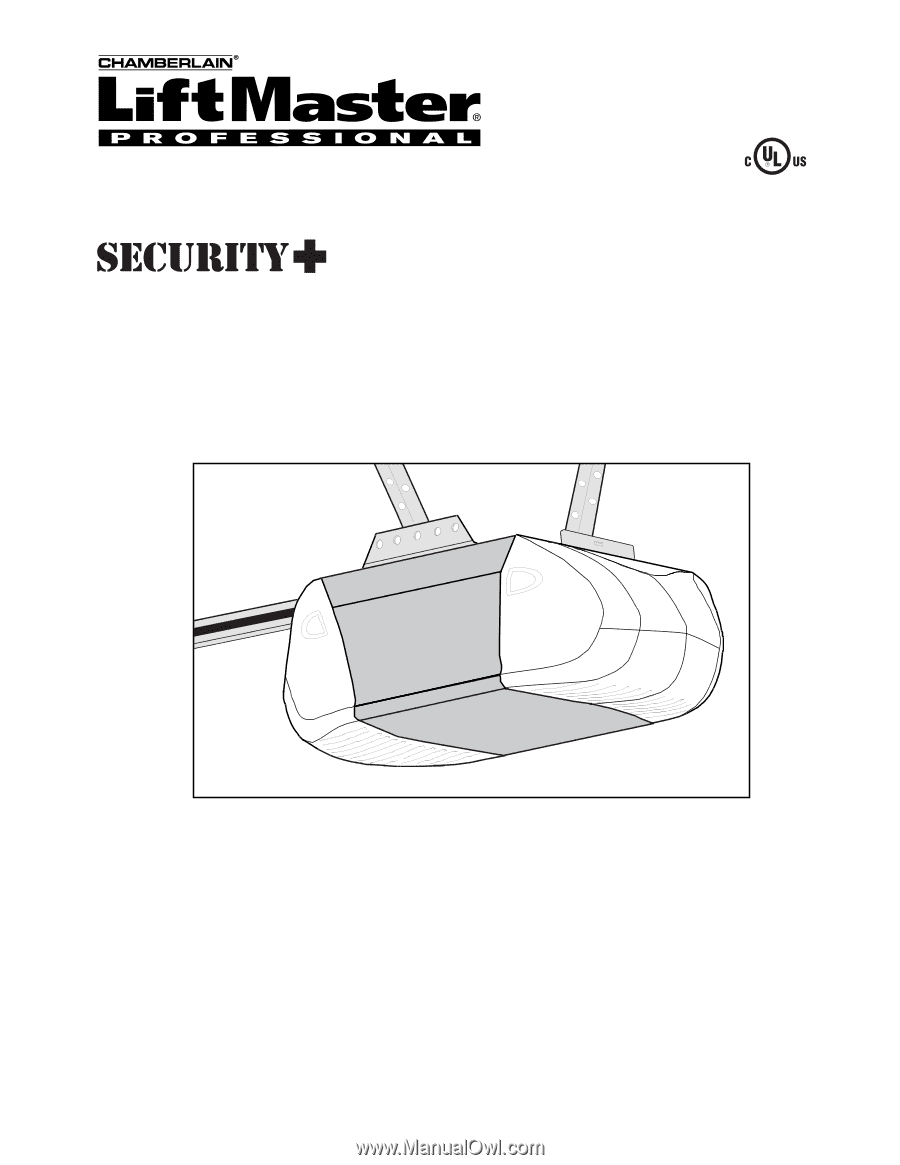
® GARAGE DOOR OPENER Model 3280 1/2HP 3280-267 1/2HP For Residential Use Only The Chamberlain Group, Inc. 845 Larch Avenue Elmhurst, Illinois 60126-1196 www.liftmaster.com Owner's Manual ■ Please read this manual and the enclosed safety materials carefully! ■ Fasten the manual near the garage door - LiftMaster 3280 | 3280 Manual - Page 2
, reprogram or change a Keyless Entry PIN 32 Repair Parts 33-34 Rail assembly parts 33 Installation parts 33 Motor unit assembly parts 34 Accessories 35 Repair Parts and Service 36 Warranty 36 INTRODUCTION Safety Symbol and Signal Word Review This garage door opener has been designed - LiftMaster 3280 | 3280 Manual - Page 3
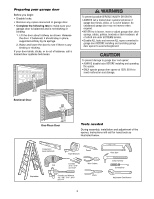
to garage door and opener: • ALWAYS disable locks BEFORE installing and operating the opener. • ONLY operate garage door opener at 120V, 60 Hz to avoid malfunction and damage. Sectional Door One-Piece Door Tools needed During assembly, installation and adjustment of the opener, instructions will - LiftMaster 3280 | 3280 Manual - Page 4
you proceed with the installation of your opener. SECTIONAL DOOR INSTALLATION Horizontal and vertical reinforcement is needed for lightweight garage doors (fiberglass, steel, aluminum, door with glass panels, etc.). See page 19 for details. Header Wall FINISHED CEILING Support bracket & fastening - LiftMaster 3280 | 3280 Manual - Page 5
✚® 3-Button Remote Control Models 3280 (1) 3280-267 (2) Remote Control Transmitter Visor Clip Styrofoam Belt Cap Retainer Belt Motor Unit with 2 Light Lenses SECURITY✚® Keyless Entry Model 3280-267 ONLY One-Piece Rail CEILING MOUNT ONLY UP Door Bracket Belt Pulley Bracket Trolley 2-Conductor - LiftMaster 3280 | 3280 Manual - Page 6
STEP 1 Attach the Rail to the Motor Unit To avoid installation difficulties, do not run the garage door opener until instructed to do so. • Remove the two washered bolts mounted in top of motor unit. • Align rail and styrofoam over sprocket. Cut tape from rail, belt and styrofoam. • REMOVE STYROFOAM - LiftMaster 3280 | 3280 Manual - Page 7
while installing or servicing opener. They could be caught in garage door or opener mechanisms. 9. Install wall-mounted garage door control: • within sight of the garage door. • out of reach of children at minimum height of 5 feet (1.5 m). • away from ALLl moving parts of the door. 10. Place - LiftMaster 3280 | 3280 Manual - Page 8
of Garage Door 2x4 Structural Supports Level (optional) Installation procedures vary according to garage door types. Follow the instructions which apply to your door. 1. Close the door and mark the inside vertical centerline of the garage door. 2. Extend the line onto the header wall above - LiftMaster 3280 | 3280 Manual - Page 9
Header Bracket You can attach the header bracket either to the wall above the garage door, or to the ceiling. Follow the instructions which will work best for your particular requirements. Do not install the header bracket over drywall. If installing into masonry, use concrete anchors (not provided - LiftMaster 3280 | 3280 Manual - Page 10
Header Wall Header Bracket Belt Pulley Bracket Garage Door INSTALLATION STEP 3 Attach the Rail to the Header Bracket • Position the opener on the garage floor below the header bracket. Use packing material as a protective base. NOTE: If the door spring is in the way you'll need help. Have someone - LiftMaster 3280 | 3280 Manual - Page 11
and outer sections. Slide the outer trolley toward the motor unit. The trolley can remain disconnected until Installation Step 12 is completed. To prevent damage to garage door, rest garage door opener rail on 2x4 placed on top section of door. Rail Door 2x4 is used to determine the correct - LiftMaster 3280 | 3280 Manual - Page 12
where the trolley slides with rail grease. NOTE: DO NOT connect power to opener at this time. HARDWARE SHOWN ACTUAL SIZE To avoid possible SERIOUS INJURY from a falling garage door opener, fasten it SECURELY to structural supports of the garage. Concrete anchors MUST be used if installing any - LiftMaster 3280 | 3280 Manual - Page 13
permanently attach entrapment warning label to wall near door control, and manual release/safety reverse test label in a prominent location on inside of garage door. NOTE: DO NOT connect power and operate opener at this time. The trolley will travel to the full open position but will not return to - LiftMaster 3280 | 3280 Manual - Page 14
to close the lens. • If the bulbs burn out prematurely due to vibration, replace with a Garage Door Opener bulb. NOTE: Use only standard light bulbs. The use of short neck or speciality light bulbs may overheat the endpanel or light socket. To prevent possible OVERHEATING of the endpanel or - LiftMaster 3280 | 3280 Manual - Page 15
or DEATH from electrocution or fire: • Be sure power is not connected to the opener, and disconnect power to circuit BEFORE removing cover to establish permanent wiring connection. • Garage door installation and wiring MUST be in compliance with all local electrical and building codes. • NEVER - LiftMaster 3280 | 3280 Manual - Page 16
the receiving eye (with a green indicator light). If an obstruction breaks the light beam while the door is closing, the door will stop and reverse to full open position, and the opener lights will flash 10 times. The units must be installed inside the garage so that the sending and receiving eyes - LiftMaster 3280 | 3280 Manual - Page 17
sure power to the opener is disconnected. Install and align the brackets so the sensors will face each other across the garage door, with the beam no higher than 6" (15 cm) above the floor. They may be installed in one of three ways, as follows. Garage door track installation (preferred): • Slip the - LiftMaster 3280 | 3280 Manual - Page 18
either sensor. NOTE: When the invisible beam path is obstructed or misaligned while the door is closing, the door will reverse. If the door is already open, it will not close. The opener lights will blink 10 times. See page 16. Connect Wire to Quick-Connect Terminals Bell Wire 1. Strip wire - LiftMaster 3280 | 3280 Manual - Page 19
of angle iron are used to create a U-shaped support. The best solution is to check with your garage door manufacturer for an opener installation door reinforcement kit. NOTE: Many door reinforcement kits provide for direct attachment of the clevis pin and door arm. In this case you will not need the - LiftMaster 3280 | 3280 Manual - Page 20
for your installation. (Refer to the dotted line optional placement drawing.) HARDWARE SHOWN ACTUAL SIZE Self-Threading Screw 1/4"-14x5/8" Header Wall 2x4 Support Finished Ceiling Header Bracket Door Bracket Optional Placement of Door Bracket Vertical Centerline of Garage Door HORIZONTAL AND - LiftMaster 3280 | 3280 Manual - Page 21
INSTALLATION STEP 12 Connect Door Arm to Trolley Follow instructions which apply to your door type as illustrated below and on the following page. SECTIONAL DOORS ONLY Make sure garage door is fully closed. Pull the emergency release handle to disconnect the outer trolley from the inner trolley. - LiftMaster 3280 | 3280 Manual - Page 22
Door Control push button. The trolley will travel to the fully open position. - Manually raise the door to the open position (parallel to the floor), and lift the door arm to the trolley. The arm should touch the trolley just in back of the door arm connector hole. Refer to the fully open trolley - LiftMaster 3280 | 3280 Manual - Page 23
interference to travel cycle: If the opener lights are flashing, the Safety Reversing Sensors are either not installed, misaligned, or obstructed. See Troubleshooting, page 18. Test the door for binding: Pull the emergency release handle. Manually open and close the door. If the door is binding - LiftMaster 3280 | 3280 Manual - Page 24
, it will stop. If anything interferes with the door's downward travel (including binding or unbalanced doors), it will reverse. Without a properly installed safety reversal system, persons (particularly small children) could be SERIOUSLY INJURED or KILLED by a closing garage door. • Too much force - LiftMaster 3280 | 3280 Manual - Page 25
the remote control push button to open the door. • Place the opener carton in the path of the door. • Press the remote control push button to close the door. The door will not move more than an inch (2.5 cm), and the opener lights will flash. The garage door opener will not close from a remote if - LiftMaster 3280 | 3280 Manual - Page 26
: • The hand-held Remote Control: Hold the large push button down until the door starts to move. • The wall-mounted Door Control: Hold the push button or bar down until the door starts to move. • The Keyless Entry (See Accessories): If provided with your garage door opener, it must be programmed - LiftMaster 3280 | 3280 Manual - Page 27
Press and hold the door control push bar. 4. After the opener lights flash, release all buttons. To Open the Door Manually To prevent possible SERIOUS INJURY or DEATH from a falling garage door: • If possible, use emergency release handle to disengage trolley ONLY when garage door is CLOSED. Weak - LiftMaster 3280 | 3280 Manual - Page 28
the instructions carefully. Repeat the safety reverse test (Adjustment Step 3, page 25) after any adjustment of limits or force. MAINTENANCE SCHEDULE Once a Month • Manually operate door. If it is unbalanced or binding, call a trained door systems technician. • Check to be sure door opens and - LiftMaster 3280 | 3280 Manual - Page 29
Light) "Learn" Button LED or Diagnostic LED Receiving Eye Safety Reversing Sensor (Green Indicator Light) 6. My motor unit hums briefly: • First verify that the trolley is against the stop bolt. • Release the door from the opener by pulling the Emergency Release Rope. • Manually bring the door - LiftMaster 3280 | 3280 Manual - Page 30
FLASHES Door control or wire shorted. 4 FLASHES Safety reversing sensors slightly misaligned (dim or flashing LED). 5 FLASHES Motor overheated or possible RPM sensor failure. Unplug to reset. 6 FLASHES Motor Circuit Failure. Replace Receiver Logic Board. Symptom: One or both of the Indicator lights - LiftMaster 3280 | 3280 Manual - Page 31
and hold the "learn" button on motor unit until the learn indicator light goes out (approximately 6 seconds). All previous codes are now erased. Reprogram each remote or keyless entry you wish to use. *3-Button Remotes If provided with your garage door opener, the large button is factory programmed - LiftMaster 3280 | 3280 Manual - Page 32
or Change a Keyless Entry PIN NOTE: Your new Keyless Entry must be programmed to operate your garage door opener. USING THE "LEARN" BUTTON USING THE MULTI-FUNCTION DOOR CONTROL LOCK LIGHT 1. Press and release the "learn" button on motor unit. The learn indicator light will glow steadily - LiftMaster 3280 | 3280 Manual - Page 33
PARTS Rail Assembly Parts 1 2 4 8 Installation Parts LOCK LIGHT 13 2 4 5 6 NOTICE 8 CEILING MOUNT ONLY UP 7 9 10 11 12 6 3 7 5 KEY PART NO. NO. DESCRIPTION 1 4A1008 Master link kit 2 41B5424 Belt pulley bracket 3 41B3869-1 Complete trolley assembly 4 109B33 Trolley - LiftMaster 3280 | 3280 Manual - Page 34
Drive/worm gear kit w/grease, Roll pins (2) 4 41B4245 Line cord 5 41A5484-1 End panel w/all labels 6 4A1344 Light socket 7 108D79 Lens 8 30B532 Capacitor - 1/2 HP. 9 12A373 Capacitor bracket 10 41A3150 Terminal block w/screws KEY PART NO. NO. DESCRIPTION 11 41C4842 Universal replacement - LiftMaster 3280 | 3280 Manual - Page 35
NO access door. Enables homeowner to open garage door manually from outside by disengaging trolley. 370LM 3-Button Mini-Remote Control with Security✚®: With key ring and fastening strip. 377LM Wireless Keyless Entry with Security✚®: Enables homeowner to operate garage door opener from outside - LiftMaster 3280 | 3280 Manual - Page 36
PRODUCT), LABOR CHARGES FOR REINSTALLING A REPAIRED OR REPLACED UNIT, REPLACEMENT OF BATTERIES AND LIGHT BULBS OR UNITS INSTALLED FOR NON-RESIDENTIAL USE. THIS LIMITED WARRANTY DOES NOT COVER ANY PROBLEMS WITH, OR RELATING TO, THE GARAGE DOOR OR GARAGE DOOR HARDWARE, INCLUDING BUT NOT LIMITED TO THE
-
 1
1 -
 2
2 -
 3
3 -
 4
4 -
 5
5 -
 6
6 -
 7
7 -
8
-
9
-
10
-
11
-
12
-
13
-
14
-
15
-
16
-
17
-
18
-
19
-
20
-
21
-
22
-
23
-
24
-
25
-
26
-
27
-
28
-
29
-
30
-
31
-
32
-
33
-
34
-
35
-
36
 |
 |
The Chamberlain Group, Inc.
845 Larch Avenue
Elmhurst, Illinois 60126-1196
www.liftmaster.com
GARAGE DOOR OPENER
Model
3280 1/2HP
3280-267 1/2HP
For Residential Use Only
Owner’s Manual
■
Please read this manual and the enclosed safety materials carefully!
■
Fasten the manual near the garage door after installation.
■
The door WILL NOT CLOSE unless the Protector System
®
is connected and
properly aligned.
■
Periodic checks of the opener are required to ensure safe operation.
■
The model number label is located on the front panel of your opener.
®