LiftMaster GH GT- Logic 4 Installation Manual - Page 11
Caution
 |
View all LiftMaster GH manuals
Add to My Manuals
Save this manual to your list of manuals |
Page 11 highlights
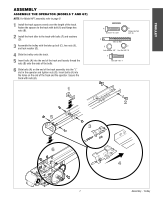
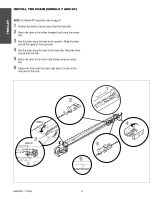
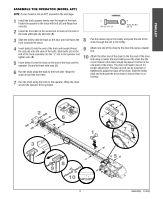
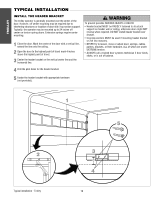
TROLLEY ATTACH THE TRACK TO THE HEADER BRACKET 1 Align the track with the header bracket. 2 Insert the pin through the track and header bracket holes. Secure with the fasteners. 3 Swing the operator up and ensure the operator is level. HARDWARE Header Pivot Pin (1) Cotter pins (2) 1 2 3 WARNING HANG THE OPERATOR 1 Secure the operator using the appropriate fasteners and locking hardware that will support the weight of the operator. CAUTION To avoid possible SERIOUS INJURY from a falling operator: • Fasten the operator SECURELY to structural supports of the building. • Concrete anchors MUST be used if installing ANY brackets into masonry. 1 AVERTISSEMENT ATTENTION 11 Typical installation - Trolley
-
 1
1 -
2
-
3
-
4
-
5
-
 6
6 -
 7
7 -
 8
8 -
 9
9 -
 10
10 -
 11
11 -
 12
12 -
 13
13 -
 14
14 -
 15
15 -
 16
16 -
17
-
18
-
19
-
20
-
21
-
22
-
23
-
24
-
25
-
26
-
27
-
28
-
29
-
30
-
31
-
32
-
33
-
34
-
35
-
36
-
37
-
38
-
39
-
40
-
41
-
42
-
43
-
44
 |
 |
11
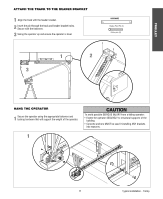
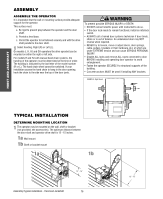
TROLLEY
Typical installation - Trolley
ATTACH THE TRACK TO THE HEADER BRACKET
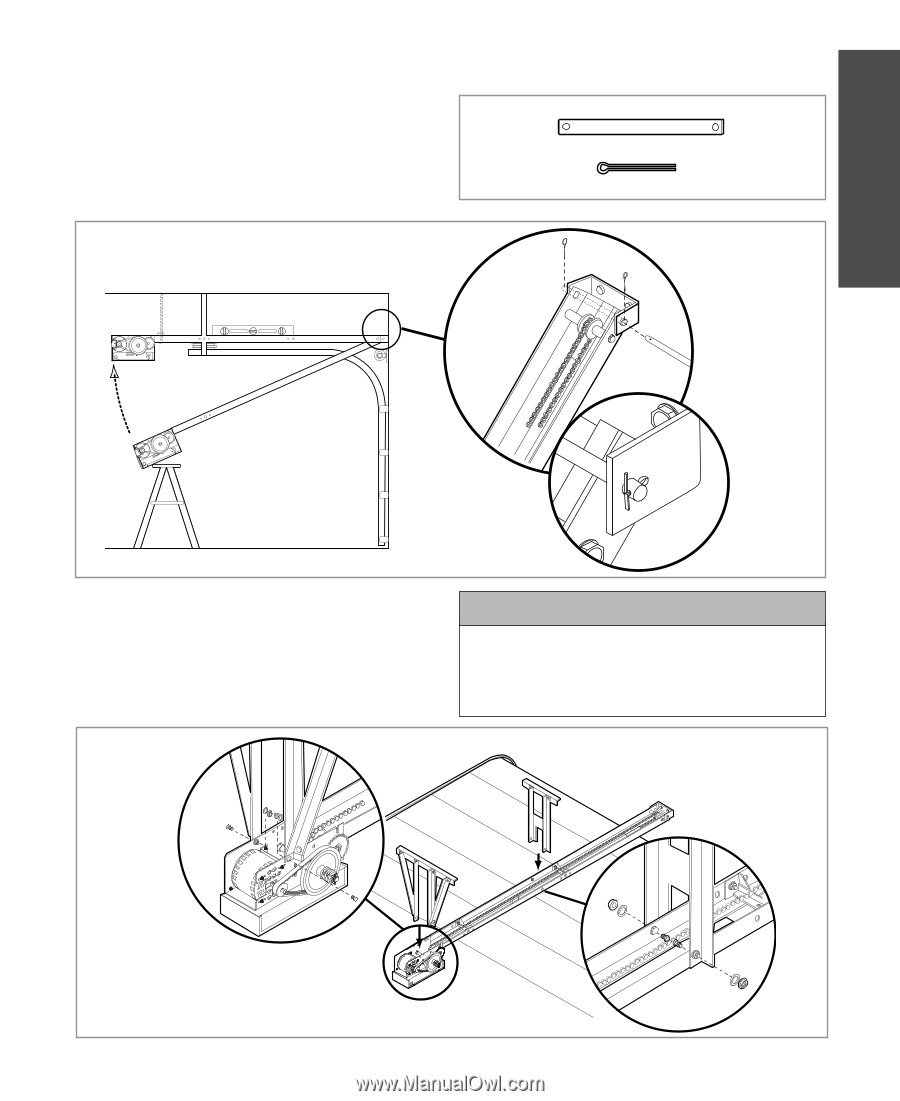
HANG THE OPERATOR
1
Secure the operator using the appropriate fasteners and
locking hardware that will support the weight of the operator.
1
1
3
2
To avoid possible SERIOUS INJURY from a falling operator:
•
Fasten the operator SECURELY to structural supports of the
building.
•
Concrete anchors MUST be used if installing ANY brackets
into masonry.
CAUTION
CAUTION
1
Align the track with the header bracket.
2
3
Insert the pin through the track and header bracket holes.
Secure with the fasteners.
Swing the operator up and ensure the operator is level.
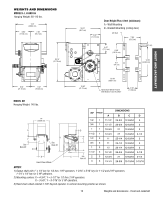
HARDWARE
Header Pivot Pin (1)
Cotter pins (2)