LiftMaster T T-Quick Start Guide for L3 Manual
LiftMaster T Manual
 |
View all LiftMaster T manuals
Add to My Manuals
Save this manual to your list of manuals |
LiftMaster T manual content summary:
- LiftMaster T | T-Quick Start Guide for L3 Manual - Page 1
Edge Sensor ( Mid Stop Programming The mid stop feature is to open the door to a preset point prior to the fully open position. 1. Close the Door. E2 2. Turn selector to Program. C2 D 3. Press the MID SET button. MRT MI TIMER N ID / `PROG OPEN D20 4. Press the OPEN button and let door open - LiftMaster T | T-Quick Start Guide for L3 Manual - Page 2
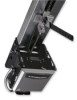
manual and/or a qualified technician for further information. Take-Up Bolt Arm Assembly Nylon Locking Nut Typical Mid-Span Support Bracket (Not Provided) 0 0 Inside the Electrical Box eLimit Switches Retaining Plate Limit Nuts IpE CLOSE OPEN Push Direction Limit Nut Will Move During Travel
-
 1
1 -
 2
2
 |
 |

icKStart
for
the
model
T
door
operator
This
QuickStart
is
intended
to
highlight
a
typical
installation.
These
instructions
are
not
intended
to
be
comprehensive.
Because
each
application
is
unique,
it
is
the
responsibility
of
the
purchaser,
designer,
installer
and
end
user
to
ensure
that
the
total
door
system
is
safe
for
its
intended
use.
Please
consult
the
manual
and/or
a
qualified
technician
for
further
information.
Board
Selector
Dial
Factory
Setting
is
C2
TS
E2
/
FSTS
D1
C2
B2
DIAG
•PROG
FAILSAFE
NON-FAILSAFE
C2
D1
E2
Mid
Stop
-
Programmable
Open
Override
-
Available
When
Photo
Eyes
or
Edge
Sensor
are
triggered,
the
Door
will
Reverse
and
Fully
Open.
CONTROL
WIRING
USE
COPPER
WIRE
ONLY
16
AWG
Minimum
1
2
3
4
5
6
7
8
9
10
11
12
13
14
CI)
Ca
C")
a
CD
z
\
O
CD
z\
m
=.
C.=
CD
m
.<
CD
N
a
c,
Blue
LiftMaster
CPS
Thru-Beam
Photo
Eyes
(-
ALM
Lrrkianerbee
8
Brown
sz
-
Tauster
ELITE'
SERIES
LOGIC
3.0
NEVER
run
Control
wiring
in
same
conduit
as
the
Power
wiring!
Maintenance
Alert
LED
—10-
6
(
MAS
Programming
(Maintenance
Alert
System)
1.
The
MAS
assists
the
installing
dealer
in
setting
up
a
routine
maintenance
program.
Once
programmed,
the
MAS
notifies
the
end
user
(with
a
flashing
LED
on
the
3
button
station)
when
a
preset
number
of
cycles/months
has
elapsed
and
scheduled
maintenance
is
due.
2.
Close
the
Door.
3.
Turn
the
selector
dial
to
Program.
T
Ts
E2
C2
PR
MAS
4.
Press
and
release
the
MAS
SET
button.
•
SET
5.
Press
the
STOP
button
once
to
clear
the
MAS
counter.
STOP
D20
D21
D13
6.
Press
the
OPEN
button
once
for
every
5,000
Cycles
increments.
Press
the
CLOSE
button
once
for
every
3
Month
increments.
Press
the
STOP
button
once
to
Clear
the
MAS
Memory.
7.
Press
the
MAS
SET
button
to
complete
the
programming.
The
OPEN
LED
will
flash
once
for
every
5,000
Cycles.
The
CLOSE
LED
will
flash
once
for
every
3
Months.
8.
Turn
the
selector
dial
back
to
the
desired
wiring
type.
C2
-
B2/
MAS
[MI
SET
OPEN
D20
taiDL
CLOSE
4D
I
STOP
D21
D13
OPEN
CLOS
T
TS
E2
\
/
/
FSTS
..-DIAG
6
4
:3
t•
PROG
Follow
ALL
local
electrical
codes
Push
and
Release
to
Open
(without
Mid
Stop
programming)
Push
and
Hold
to
Close
Push
and
Release
to
Stop
(
Timer
to
Close
Programming
Timer
automatically
closes
door
after
a
preset
time.
1.
Close
the
Door.
E2
\
2.
Turn
selector
to
Program.
DI—
C2
•
3.
Press
the
TIMER
button.
MRT
.
MID
TIMER
N
44
SET
4.
Press
the
STOP
button
to
Zero
the
Timer.
OPEN
41c
STOP
D13
5.
Press
the
OPEN
button
once
for
every
5
seconds.
Press
the
CLOSE
button
once
for
every
60
seconds.
Example:
Push
CLOSE
+
Push
OPEN
+
Push
OPEN
=
70
seconds
total
(60
seconds)
(5
seconds)
(5
seconds)
6.
Press
the
TIMER
button
to
complete
programming.
The
OPEN
LED
will
flash
once
for
every
5
sec.
The
CLOSE
LED
will
flash
once
for
every
60
sec.
MRT
.
MID
.
TIMER
N
'
14
SET
OPEN
CLOSE
STC
D20
D21
7.
Turn
selector
to
T,
TS
or
FSTS
wiring
types.
2
QIIOTE:
Photo
eyes
required
to
enable
feature.
T
TS
„
E2
\
/
f
P
--DIAG
C2
OPE
CLOS
S
OP
(
alf
the
Height
of
the
Do
4
to
6
Inches
0
0
F.\
0
0
0
0
0
0
0
fo\
fi
-
0\
Edge
Sensor
Mid
Stop
Programming
The
mid
stop
feature
is
to
open
the
door
to
a
preset
point
prior
to
the
fully
open
position.
1.
Close
the
Door.
2.
Turn
selector
to
Program.
3.
Press
the
MID
SET
button.
N
MRT
MI
ID
D
TIMER
E2
/
C2
`PROG
4.
Press
the
OPEN
button
and
let
door
open
until
it
reaches
the
desired
Mid
Stop
height,
then
press
the
STOP
button.
5.
Press
the
MID
SET
button
to
set
desired
height.
MRT
MID
6.
Turn
selector
back
to
selected
wiring
type.
OPEN
D20
STOP
Ella
T
TS
E2
\
/
/
,FSTS
--DIAG
C2
-
PROG
PROG