Linksys SLM248P Cisco Small Business SLM Smart Switches Administration Guide
Linksys SLM248P - Cisco - 10/100 Manual
 |
UPC - 745883580354
View all Linksys SLM248P manuals
Add to My Manuals
Save this manual to your list of manuals |
Linksys SLM248P manual content summary:
- Linksys SLM248P | Cisco Small Business SLM Smart Switches Administration Guide - Page 1
Cisco Small Business SLM Smart Switches ADMINISTRATION GUIDE - Linksys SLM248P | Cisco Small Business SLM Smart Switches Administration Guide - Page 2
(Design), Flip Ultra, and Welcome to the Human Network are trademarks; Changing the Way We Work, Live, Play, and Learn, Cisco Store, and Flip Gift Card are service marks; and Access Registrar, Aironet, AsyncOS, Bringing the Meeting To You, Catalyst, CCDA, CCDP, CCIE, CCIP, CCNA, CCNP, CCSP, CCVP - Linksys SLM248P | Cisco Small Business SLM Smart Switches Administration Guide - Page 3
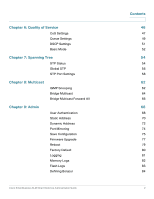
LACP PoE Power Settings Chapter 3: VLAN Management Create VLAN Port Setting Port to VLAN VLAN to Port Chapter 4: Statistics Interface Statistics Chapter 5: Security 802.1x Settings Port Security IP Access List Storm Control RADIUS Cisco Small Business SLM Smart Switches Administration Guide - Linksys SLM248P | Cisco Small Business SLM Smart Switches Administration Guide - Page 4
Multicast Forward All Chapter 9: Admin User Authentication Static Address Dynamic Address Port Mirroring Save Configuration Firmware Upgrade Reboot Factory Default Logging Memory Logs Flash Logs Defining Bonjour Cisco Small Business SLM Smart Switches Administration Guide Contents 46 47 49 51 52 - Linksys SLM248P | Cisco Small Business SLM Smart Switches Administration Guide - Page 5
core network. • The SLM224G, SLM224P, SLM248G, and SLM248P offer twenty four (24) or forty eight (48) 10/100 copper ports, with two (2) shared Gigabit copper or optical (SFP) uplink interfaces for connecting the switch to the core network. The Smart Switch's simplified user interface is an intuitive - Linksys SLM248P | Cisco Small Business SLM Smart Switches Administration Guide - Page 6
the device's IP address in the address bar and press Enter. The Login window opens: Login window When the Login window initially loads, both the Username and Password fields are empty. Enter a Username and Password and click Log In. The default user name is admin. The default password is admin - Linksys SLM248P | Cisco Small Business SLM Smart Switches Administration Guide - Page 7
Setup configuration options are as follows: • Summary • Network Settings • Time Summary The Summary window displays general device information and parameters. To open the Summary window: Cisco Small Business SLM Series Smart Switches Administration Guide 3 - Linksys SLM248P | Cisco Small Business SLM Smart Switches Administration Guide - Page 8
the IP address mode using DHCP or Static. The possible field values are: - DHCP - Retrieves the IP addresses using DHCP. - Static - The IP address is statically defined. • Base MAC Address - Displays the device's MAC address. Cisco Small Business SLM Series Smart Switches Administration Guide 4 - Linksys SLM248P | Cisco Small Business SLM Smart Switches Administration Guide - Page 9
- Switch will not recognize or forward Jumbo Frames. • Model Name - Displays the device model name. • Hardware Version - Displays the hardware version number. • Boot Version - Indicates the system boot version currently running on the device. • Firmware Version - Displays the firmware / software - Linksys SLM248P | Cisco Small Business SLM Smart Switches Administration Guide - Page 10
example, 3rd floor. • System Contact - Defines the user-defined system contact person. • Base MAC Address - Displays the MAC address. • Management VLAN - Selects the management VLAN. The default is 1. • IP Address Mode - Retrieves the IP address mode using DHCP or Static. The possible field values - Linksys SLM248P | Cisco Small Business SLM Smart Switches Administration Guide - Page 11
IP address mask. • Default Gateway -Defines the system IP default gateway. • DNS Server - Defines the DNS server IP is a list of Daylight Time start and end times in specific countries: • Albania - Last weekend of March until the Cisco Small Business SLM Series Smart Switches Administration Guide 7 - Linksys SLM248P | Cisco Small Business SLM Smart Switches Administration Guide - Page 12
first Sunday on or after 15th March. • Norway - Last weekend of March until the last weekend of October. • Paraguay - From 6th April until 7th September. Cisco Small Business SLM Series Smart Switches Administration Guide 8 - Linksys SLM248P | Cisco Small Business SLM Smart Switches Administration Guide - Page 13
November. Please see http://aa.usno.navy.mil/faq/docs/daylight_time.php. To open the Time window: STEP 1 Click Setup > Time. The Time window appears. Cisco Small Business SLM Series Smart Switches Administration Guide 9 - Linksys SLM248P | Cisco Small Business SLM Smart Switches Administration Guide - Page 14
Mean Time (GMT) and local time. For example, the Time Zone Offset for Paris is GMT +1, while the local time in New York is GMT -5. Cisco Small Business SLM Series Smart Switches Administration Guide 10 - Linksys SLM248P | Cisco Small Business SLM Smart Switches Administration Guide - Page 15
Set Offset - Specifies the amount of time for DST that can be set in minutes. The default time is 60 minutes. STEP 2 Define the relevant fields. STEP 3 Click Save Settings. The settings are modified, and the device is updated. Cisco Small Business SLM Series Smart Switches Administration Guide 11 - Linksys SLM248P | Cisco Small Business SLM Smart Switches Administration Guide - Page 16
and SLM248P only) Port Settings You use the Port Settings window to display the speed, duplex mode, and flow control used on specific ports, or use to detect the connection settings used by the attached device. Use the full-duplex mode on ports whenever possible to double the throughput of switch - Linksys SLM248P | Cisco Small Business SLM Smart Switches Administration Guide - Page 17
the port is currently operating. - Down - Indicates the port is currently not operating. • Speed - Displays the configured rate for the port. The port type determines what speed setting options are available. Port speeds can only Cisco Small Business SLM Series Smart Switches Administration Guide - Linksys SLM248P | Cisco Small Business SLM Smart Switches Administration Guide - Page 18
currently configured at 10 Mbps. - 100 - Indicates the port is currently configured at 100 Mbps. - 1000 - Indicates the port is currently configured at 1000 Mbps. • Duplex - Displays the port duplex mode, can be either Full or Half. Full indicates that the interface supports transmission between the - Linksys SLM248P | Cisco Small Business SLM Smart Switches Administration Guide - Page 19
port user-defined description. • Port Type - Displays the port type. The possible field values are: - Copper - Indicates the port has a copper port connection and displays the copper speed. - Fiber - Indicates the port has a fiber optic port connection. Both port types run at speeds of 10, 100 - Linksys SLM248P | Cisco Small Business SLM Smart Switches Administration Guide - Page 20
and full Duplex mode setting. • Current Advertisement - The port advertises its capabilities to its neighbor port to start the negotiation process. The possible field values are those specified in the Admin Advertisement field. Cisco Small Business SLM Series Smart Switches Administration Guide 16 - Linksys SLM248P | Cisco Small Business SLM Smart Switches Administration Guide - Page 21
Interface (MDI) / Media Dependent Interface with Crossover (MDIX) mode on the port. Hubs and switches are deliberately wired opposite the way end stations are wired, so that when a hub or switch is connected to an end station, a straight through Ethernet cable can be used, and the pairs are matched - Linksys SLM248P | Cisco Small Business SLM Smart Switches Administration Guide - Page 22
- Displays the user-defined LAG name. • Admin Status - Enables or disables traffic forwarding through the selected LAG. • Type - The port types that make up the LAG. The possible field values are: - eth100M - eth1000m Cisco Small Business SLM Series Smart Switches Administration Guide 18 - Linksys SLM248P | Cisco Small Business SLM Smart Switches Administration Guide - Page 23
Indicates the port operates at 10 Mbps. - 100 - Indicates the port operates at 100 Mbps. - 1000 - Indicates the port operates at 1000 Mbps. • Duplex - Displays the LAG duplex mode, can be either Full or Half, though LAGs are in most cases FULL. Full indicates that the interface supports transmission - Linksys SLM248P | Cisco Small Business SLM Smart Switches Administration Guide - Page 24
Displays the user-defined LAG name. • LACP - Enables or disables Link Aggregation Control Protocol (LACP). This box must be checked before the first port is suspended if a Lock Port action has been applied on a LAG member. Cisco Small Business SLM Series Smart Switches Administration Guide 20 - Linksys SLM248P | Cisco Small Business SLM Smart Switches Administration Guide - Page 25
- Max Capability - Indicates that all port speeds and Duplex mode settings can be accepted. - 10 Full - Indicates that the port is advertising a 10 mbps speed and full Duplex mode setting. - 100 Full - Indicates that the port is advertising a 100 mbps speed and full Duplex mode setting. - 1000 Full - Linksys SLM248P | Cisco Small Business SLM Smart Switches Administration Guide - Page 26
Port Management > LACP. The LACP window appears: LACP The LACP window is divided into two configuration areas for configuring LACP LAGs: • Global Parameter • Port Priority The LACP window also displays an LACP Port table. Cisco Small Business SLM Series Smart Switches Administration Guide 22 - Linksys SLM248P | Cisco Small Business SLM Smart Switches Administration Guide - Page 27
. PoE Power Settings The PoE Power Settings window allows you to configure the Power over Ethernet (PoE) ports on the Switch. NOTE This option is available for SLM224P and SLM248P only. To open the PoE Power Settings window: Cisco Small Business SLM Series Smart Switches Administration Guide 23 - Linksys SLM248P | Cisco Small Business SLM Smart Switches Administration Guide - Page 28
supply. • Power Consumption (milliwatts) - Indicates the actual amount of power actually supplied by the port. STEP 2 Define the relevant fields. STEP 3 Click Save Settings. The settings are modified, and the device is updated. Cisco Small Business SLM Series Smart Switches Administration Guide 24 - Linksys SLM248P | Cisco Small Business SLM Smart Switches Administration Guide - Page 29
are as follows: • Create VLAN • Port Setting • Port to VLAN • VLAN to Port Create VLAN The Create VLAN window provides information and global parameters for configuring and working with VLANs. To open the Create VLAN window: Cisco Small Business SLM Series Smart Switches Administration Guide 25 - Linksys SLM248P | Cisco Small Business SLM Smart Switches Administration Guide - Page 30
values are: - Static - Indicates the VLAN is user-defined. - Default - Indicates the VLAN is the default VLAN. STEP 2 Define the relevant fields. STEP 3 Click Save Settings. The settings are modified, and the device is updated. Cisco Small Business SLM Series Smart Switches Administration Guide 26 - Linksys SLM248P | Cisco Small Business SLM Smart Switches Administration Guide - Page 31
Frame Type - Packet type accepted on the port. Possible values are: - Tagged- Indicates that only tagged packets are accepted on the port. - All - Indicates that both tagged and untagged packets are accepted on the port. Cisco Small Business SLM Series Smart Switches Administration Guide 27 - Linksys SLM248P | Cisco Small Business SLM Smart Switches Administration Guide - Page 32
ports to a VLAN. You use the Port to VLAN window to add ports to a VLAN and delete ports from a VLAN. When you add a port to a VLAN, you also specify whether the port is tagged or untagged. To open the Port to VLAN window: Cisco Small Business SLM Series Smart Switches Administration Guide - Linksys SLM248P | Cisco Small Business SLM Smart Switches Administration Guide - Page 33
forwarded by the interface are tagged. The packets contain VLAN information. • Untagged - Packets forwarded by the interface are untagged. • Excluded - Excludes the interface from the VLAN. STEP 2 Define the relevant fields. Cisco Small Business SLM Series Smart Switches Administration Guide 29 - Linksys SLM248P | Cisco Small Business SLM Smart Switches Administration Guide - Page 34
the port number. • Join VLAN - Defines the VLANs to which the interface is joined. Pressing the Join VLAN button displays the Join VLAN to Port window. Select the VLAN to which to add the port and click Add, select the VLANs to be Cisco Small Business SLM Series Smart Switches Administration Guide - Linksys SLM248P | Cisco Small Business SLM Smart Switches Administration Guide - Page 35
a member of a LAG, it cannot be configured to a VLAN. The LAG to which it belongs can be configured to a VLAN. STEP 2 Define the relevant fields. STEP 3 Click Save Settings. The settings are modified, and the device is updated. Cisco Small Business SLM Series Smart Switches Administration Guide 31 - Linksys SLM248P | Cisco Small Business SLM Smart Switches Administration Guide - Page 36
The Interface Statistics window allows you to display statistics for the Ethernet port or LAG that you specify. You can also specify the rate at which the display will be refreshed. To open the Interface Statistics window: Cisco Small Business SLM Series Smart Switches Administration Guide 32 - Linksys SLM248P | Cisco Small Business SLM Smart Switches Administration Guide - Page 37
are displayed. - LAG - Defines the specific LAG for which interface statistics are displayed. • Refresh Rate - Defines the amount of time that passes before the interface statistics are refreshed. The possible field values are: Cisco Small Business SLM Series Smart Switches Administration Guide 33 - Linksys SLM248P | Cisco Small Business SLM Smart Switches Administration Guide - Page 38
from the selected interface. Ethernet-like Statistics The Etherlike Statistics area contains the following fields: • Frame Check Sequence (FCS) Errors - Displays the number of FCS errors received on the selected interface. Cisco Small Business SLM Series Smart Switches Administration Guide 34 - Linksys SLM248P | Cisco Small Business SLM Smart Switches Administration Guide - Page 39
paused frames transmitted from the selected interface. STEP 2 Define the relevant fields. STEP 3 Click Save Settings. The settings are modified, and the device is updated. Cisco Small Business SLM Series Smart Switches Administration Guide 35 - Linksys SLM248P | Cisco Small Business SLM Smart Switches Administration Guide - Page 40
external server. Only authenticated and approved system users can transmit and receive data. Ports are authenticated via the RADIUS server using the Extensible Authentication Protocol (EAP). To open the 802.1x Settings window: Cisco Small Business SLM Series Smart Switches Administration Guide 36 - Linksys SLM248P | Cisco Small Business SLM Smart Switches Administration Guide - Page 41
). - ForceUnauthorized - The controlled port state is set to ForceUnauthorized (discard traffic). - Auto - The controlled port state is set by the system. • Enable Periodic Reauthentication - Enables periodic reauthentication. Cisco Small Business SLM Series Smart Switches Administration Guide 37 - Linksys SLM248P | Cisco Small Business SLM Smart Switches Administration Guide - Page 42
packets that are received on specific ports. Access to the locked port is limited to users with specific MAC addresses. These addresses are either manually defined on the port, or learned on that port up to the point when it is Cisco Small Business SLM Series Smart Switches Administration Guide 38 - Linksys SLM248P | Cisco Small Business SLM Smart Switches Administration Guide - Page 43
appears. Port Security The Port Security window contains the following fields: • Interface - Indicates the interface to configure the Port Security. - Port - Indicates port to configure. - LAG - Indicates LAG to configure. Cisco Small Business SLM Series Smart Switches Administration Guide 39 - Linksys SLM248P | Cisco Small Business SLM Smart Switches Administration Guide - Page 44
source and shuts down the port. The port remains shut down until reactivated, or until the device is reset. STEP 2 Define the relevant fields. STEP 3 Click Save Settings. The settings are modified, and the device is updated. Cisco Small Business SLM Series Smart Switches Administration Guide 40 - Linksys SLM248P | Cisco Small Business SLM Smart Switches Administration Guide - Page 45
are important. For example, if the source IP address 149.36.184.198 and the wildcard mask is 255.0.0.0, the first eight bits of the IP address are used, while the last eight bits are ignored. STEP 2 Define the relevant fields. Cisco Small Business SLM Series Smart Switches Administration Guide 41 - Linksys SLM248P | Cisco Small Business SLM Smart Switches Administration Guide - Page 46
frame rates on each port and discards the frames when the rate exceeds a user-defined rate. The Storm Control window provides fields for configuring Broadcast and Multicast Storm Control. To open the Storm Control window: Cisco Small Business SLM Series Smart Switches Administration Guide 42 - Linksys SLM248P | Cisco Small Business SLM Smart Switches Administration Guide - Page 47
. • Rate Threshold - The maximum rate (Kbps) at which Broadcast or Broadcast and Multicast packets are forwarded. The ranges are 70Kbps - 100Mbps for FE ports, and 3.5Mbps - 100Mbps for GE ports. The default value is 3500Kbps. Cisco Small Business SLM Series Smart Switches Administration Guide 43 - Linksys SLM248P | Cisco Small Business SLM Smart Switches Administration Guide - Page 48
and the device is updated. RADIUS Remote Authorization Dial-In User Service (RADIUS) servers provide additional security for networks. RADIUS servers the following fields: • IP Address - The Authentication Server IP address. Cisco Small Business SLM Series Smart Switches Administration Guide 44 - Linksys SLM248P | Cisco Small Business SLM Smart Switches Administration Guide - Page 49
the source IP address that is used for communication with RADIUS servers. • Usage Type - Specifies the RADIUS server authentication type. The default value is Login. The possible field values are: - Login - Indicates that the RADIUS server is used for authenticating user name and passwords. - 802.1x - Linksys SLM248P | Cisco Small Business SLM Smart Switches Administration Guide - Page 50
of Service (QoS) is applied throughout the network. This ensures that network traffic is prioritized according to specified criteria, and that specific traffic receives . Packets are sent to a particular queue for handling as a Cisco Small Business SLM Series Smart Switches Administration Guide 46 - Linksys SLM248P | Cisco Small Business SLM Smart Switches Administration Guide - Page 51
Quality of Service CoS Settings 6 function of the traffic class to which they belong, as defined Settings window has three areas, Global CoS Mode, CoS Queue Settings and CoS Interface Default. To open the CoS Settings window: Cisco Small Business SLM Series Smart Switches Administration Guide 47 - Linksys SLM248P | Cisco Small Business SLM Smart Switches Administration Guide - Page 52
supported. • Restore Defaults - Restores the device factory defaults for mapping CoS values to a forwarding queue. The CoS Default area contains the following fields: • Interface - Interface to which the CoS configuration applies. Cisco Small Business SLM Series Smart Switches Administration Guide - Linksys SLM248P | Cisco Small Business SLM Smart Switches Administration Guide - Page 53
Quality of Service Queue Settings 6 • Default CoS - Determines the default CoS value for incoming packets for which a VLAN tag is not defined. The possible field values are 0-7. The default CoS is 0. • LAG - LAG to which the port belongs, if relevant. If the port is a member of a LAG, the LAG - Linksys SLM248P | Cisco Small Business SLM Smart Switches Administration Guide - Page 54
Quality of Service Queue Settings 6 STEP Note: WRR and Strict priority exclude each other and are system wide (to all ports). • Queue - Displays the queue for which the queue settings are displayed. The are not user defined. Cisco Small Business SLM Series Smart Switches Administration Guide 50 - Linksys SLM248P | Cisco Small Business SLM Smart Switches Administration Guide - Page 55
Quality of Service DSCP Settings 6 STEP 2 Define the relevant fields. STEP 3 Click Save Settings. The settings are The DSCP Settings window contains the following fields: • DSCP - Displays the incoming packet's DSCP value. Cisco Small Business SLM Series Smart Switches Administration Guide 51 - Linksys SLM248P | Cisco Small Business SLM Smart Switches Administration Guide - Page 56
Basic Mode window contains the following fields: • Trust Mode - Displays the trust mode. The Trust Mode determines whether the CoS (VLAN Priority Tagging) mapping or DSCP mapping determine the packet queue. Possible values are: Cisco Small Business SLM Series Smart Switches Administration Guide 52 - Linksys SLM248P | Cisco Small Business SLM Smart Switches Administration Guide - Page 57
packet queue. - DSCP - Sets trust mode to DSCP on the device. The DSCP mapping determines the packet queue. STEP 2 Define the relevant fields. STEP 3 Click Save Settings. The settings are modified, and the device is updated. Cisco Small Business SLM Series Smart Switches Administration Guide 53 - Linksys SLM248P | Cisco Small Business SLM Smart Switches Administration Guide - Page 58
. The device supports the Classic STP Port Settings STP Status The STP Status window describes the STP status on the device. To open the STP Status window: STEP 1 Click Spanning Tree > STP Status. The STP Status window appears. Cisco Small Business SLM Series Smart Switches Administration Guide - Linksys SLM248P | Cisco Small Business SLM Smart Switches Administration Guide - Page 59
the STP mode by which STP is enabled on the device. The possible field values are: - STP - Indicates Classic STP is enabled on the device. • Bridge ID - Indicates the bridge priority and MAC address. • Designated Root - Identifies the bridge priority and MAC address of the root bridge. • Root Port - Linksys SLM248P | Cisco Small Business SLM Smart Switches Administration Guide - Page 60
configuration messages. The default is 2 seconds. The range is 1 to 10 seconds. • Root reset, and the last topographic change occurred. The time is displayed in a day hour minute second format, for example, 2 days 5 hours 10 Cisco Small Business SLM Series Smart Switches Administration Guide 56 - Linksys SLM248P | Cisco Small Business SLM Smart Switches Administration Guide - Page 61
- Floods BPDU packets when spanning tree is disabled on an interface. This is the default value. • Path Cost Default Values - Specifies the method used to assign default path costs to STP ports. The possible field values are: Cisco Small Business SLM Series Smart Switches Administration Guide 57 - Linksys SLM248P | Cisco Small Business SLM Smart Switches Administration Guide - Page 62
waits between configuration messages. The default is 2 seconds. The range is 1 to 10 seconds. • Max Age - Port Settings Network administrators can assign STP settings to specific interfaces using the STP Port Settings window. Cisco Small Business SLM Series Smart Switches Administration Guide - Linksys SLM248P | Cisco Small Business SLM Smart Switches Administration Guide - Page 63
state when the port link is up. Fast Link optimizes the STP protocol convergence. STP convergence can take 30 seconds in large networks. The possible field values are: - Enable - Indicates that Fast Link is enabled on the port. Cisco Small Business SLM Series Smart Switches Administration Guide 59 - Linksys SLM248P | Cisco Small Business SLM Smart Switches Administration Guide - Page 64
in the STP topology. Ports with a lower cost are less likely to be blocked if STP detects loops. • Forward Transitions - Indicates the number of times the port has changed from the Blocking state to Forwarding state. Cisco Small Business SLM Series Smart Switches Administration Guide 60 - Linksys SLM248P | Cisco Small Business SLM Smart Switches Administration Guide - Page 65
Spanning Tree STP Port Settings 7 STEP 2 Define the relevant fields. STEP 3 Click Save Settings. The settings are modified, and the device is updated. Cisco Small Business SLM Series Smart Switches Administration Guide 61 - Linksys SLM248P | Cisco Small Business SLM Smart Switches Administration Guide - Page 66
port requesting to join a specific Multicast group issues an IGMP report, specifying which Multicast group that it wishes to join. This results in the creation of the Multicast filtering database. To open the IGMP Snooping window: Cisco Small Business SLM Series Smart Switches Administration Guide - Linksys SLM248P | Cisco Small Business SLM Smart Switches Administration Guide - Page 67
on the device. The possible field values are: - Enable - Enables IGMP Snooping on the device. - Disable - Disables IGMP Snooping on the device. VLAN IGMP Settings The Vlan IGMP Settings area contains the following fields: Cisco Small Business SLM Series Smart Switches Administration Guide 63 - Linksys SLM248P | Cisco Small Business SLM Smart Switches Administration Guide - Page 68
either to existing groups or to new Multicast groups. The Bridge Multicast window permits new Multicast service groups to be created. The Bridge Multicast window also assigns ports to a specific Multicast service address group. Cisco Small Business SLM Series Smart Switches Administration Guide 64 - Linksys SLM248P | Cisco Small Business SLM Smart Switches Administration Guide - Page 69
the configuration options below. • Static - Indicates the port is manually configured to a Multicast group. • Dynamic - Indicates the port is configured dynamically. • None - The port is not configured for Multicast service. Cisco Small Business SLM Series Smart Switches Administration Guide 65 - Linksys SLM248P | Cisco Small Business SLM Smart Switches Administration Guide - Page 70
on all VLANS in the table ports or LAGs which are attached to a neighboring Multicast router or switch. All Multicast traffic and IGMP snooping traffic is forwarded to these ports. To open the Bridge Multicast Forward All window: Cisco Small Business SLM Series Smart Switches Administration Guide - Linksys SLM248P | Cisco Small Business SLM Smart Switches Administration Guide - Page 71
setting cannot be adjusted by the user. • None - The port is not configured as a Multicast Forward all port. STEP 2 Define the relevant fields. STEP 3 Click Save Settings. The settings are modified, and the device is updated. Cisco Small Business SLM Series Smart Switches Administration Guide 67 - Linksys SLM248P | Cisco Small Business SLM Smart Switches Administration Guide - Page 72
• Firmware Upgrade • Reboot • Factory Default • Logging • Memory Logs • Flash Logs • Defining Bonjour User Authentication The User Authentication window is used to modify user passwords. To open the User Authentication window: Cisco Small Business SLM Series Smart Switches Administration Guide 68 - Linksys SLM248P | Cisco Small Business SLM Smart Switches Administration Guide - Page 73
. • User Name - Specifies the user name. • Password - Specifies the new password. The password is not displayed. As it is entered an "*" corresponding to each character is displayed in the field. (Range: 1-20 characters). Cisco Small Business SLM Series Smart Switches Administration Guide 69 - Linksys SLM248P | Cisco Small Business SLM Smart Switches Administration Guide - Page 74
in the Password field. The Add to List button adds the user configuration to the Local User's Table. STEP 2 Define the relevant fields. STEP 3 Click Save Settings. The settings are modified, and the device is updated. Static Address A static MAC address can be assigned to a specific interface on - Linksys SLM248P | Cisco Small Business SLM Smart Switches Administration Guide - Page 75
which the entry refers. • Status - Displays the type of static address entry. The possible field values are: - Permanent - The MAC address is permanent. - Delete on Reset - The MAC address is deleted when the device is reset. Cisco Small Business SLM Series Smart Switches Administration Guide 71 - Linksys SLM248P | Cisco Small Business SLM Smart Switches Administration Guide - Page 76
occurs. The default timeout is 300 seconds. - Secure - The MAC Address is defined for locked ports. STEP 2 ports. The Dynamic Address Table can be sorted by interface, VLAN, and MAC Address. To open the Dynamic Address window: Cisco Small Business SLM Series Smart Switches Administration Guide - Linksys SLM248P | Cisco Small Business SLM Smart Switches Administration Guide - Page 77
default value VLAN ID - Displays the VLAN ID to which the query refers. • Address Table Sort Key - Specifies the means by which the Dynamic MAC Address Table is sorted. The address table can be sorted by address, VLAN, or interface. Cisco Small Business SLM Series Smart Switches Administration Guide - Linksys SLM248P | Cisco Small Business SLM Smart Switches Administration Guide - Page 78
different ports from which the packets are copied. To open the Port Mirroring window: STEP 1 Click Admin > Port Mirroring. The Port Mirroring window appears. Port Mirroring The Port Mirroring window contains the following fields: Cisco Small Business SLM Series Smart Switches Administration Guide - Linksys SLM248P | Cisco Small Business SLM Smart Switches Administration Guide - Page 79
fields to specify are as follows: - Port - Indicates the port number being configured. • Type - Indicates the port mode configuration for port mirroring. The possible field values are: - RxOnly - Defines the port mirroring on received packets only. This is the default value. - TxOnly - Defines the - Linksys SLM248P | Cisco Small Business SLM Smart Switches Administration Guide - Page 80
the destination is the start up config on the device. This is an upgrade procedure. • Backup - Specifies that the source is the start up config IP Address to which the Configuration file is uploaded or from which it is downloaded. Cisco Small Business SLM Series Smart Switches Administration Guide - Linksys SLM248P | Cisco Small Business SLM Smart Switches Administration Guide - Page 81
, and the device is updated. Firmware Upgrade The Firmware Upgrade window allows you to download firmware upgrade files from a TFTP server, or from your computer via the HTTP interface. To open the Firmware Upgrade window: Cisco Small Business SLM Series Smart Switches Administration Guide 77 - Linksys SLM248P | Cisco Small Business SLM Smart Switches Administration Guide - Page 82
- Software Image - Downloads the Image file. - Boot Code - Downloads the Boot file. • TFTP Server - Specifies the TFTP Server IP Address from which files are downloaded. • File Name - Specifies the file to be downloaded when using TFTP. Cisco Small Business SLM Series Smart Switches Administration - Linksys SLM248P | Cisco Small Business SLM Smart Switches Administration Guide - Page 83
Specifies the file name to be downloaded when using HTTP. When via HTTP modified, and the device is updated. Reboot The Reboot window resets the device. The device configuration is automatically saved before the device rebooted. Cisco Small Business SLM Series Smart Switches Administration Guide 79 - Linksys SLM248P | Cisco Small Business SLM Smart Switches Administration Guide - Page 84
Configuration window. To open the Factory Default window: STEP 1 Click Admin > Factory Default. The Factory Default window appears. Factory Default STEP 2 Click Restore Default, then click OK to confirm and restart the device. Cisco Small Business SLM Series Smart Switches Administration Guide 80 - Linksys SLM248P | Cisco Small Business SLM Smart Switches Administration Guide - Page 85
The Logging window contains the following fields: • Enable Logging - Indicates if device global logs for Cache, and File Logs are enabled. Logs are enabled by default. Cisco Small Business SLM Series Smart Switches Administration Guide 81 - Linksys SLM248P | Cisco Small Business SLM Smart Switches Administration Guide - Page 86
. Memory Logs The Memory Logs window contains all system logs in a chronological order that are saved in RAM (Cache). To open the Memory Logs window: Cisco Small Business SLM Series Smart Switches Administration Guide 82 - Linksys SLM248P | Cisco Small Business SLM Smart Switches Administration Guide - Page 87
log severity. • Description - Displays the log message text. STEP 2 Click Clear Logs to reset the logs. Flash Logs The Flash Logs window contains information about log entries saved to the Log . To open the Flash Logs window: Cisco Small Business SLM Series Smart Switches Administration Guide 83 - Linksys SLM248P | Cisco Small Business SLM Smart Switches Administration Guide - Page 88
on IP networks. Bonjour's multicast Domain Name System (mDNS) service allows the device to publish device services by sending and receiving UDP packets to the following multicast address 224.0.0.251 and to port number 5353. Cisco Small Business SLM Series Smart Switches Administration Guide 84 - Linksys SLM248P | Cisco Small Business SLM Smart Switches Administration Guide - Page 89
• Serial Number • Hostname The Service Types that are provided for Bonjour are: _csbdp, (a Cisco specific Service Type), HTTP, HTTPS and Other. Other allows for additional Service Types to be added manually. To define Bonjour: Cisco Small Business SLM Series Smart Switches Administration Guide 85 - Linksys SLM248P | Cisco Small Business SLM Smart Switches Administration Guide - Page 90
is used afterwards. This is the default value. - HTTP - Specifies the Service Type selected is HTTP which is published using the default http TCP port 80. HTTP is used mainly for human-readable HTML content served over HTTP. Cisco Small Business SLM Series Smart Switches Administration Guide 86 - Linksys SLM248P | Cisco Small Business SLM Smart Switches Administration Guide - Page 91
using the default http TCP port 443. - Other - Indicates a user-defined Service Type to be added. • Service Type - Displays the selected Service Type defined in the Service Type Selection field. • Port - Defines the selected port used for the relevant Service Type. The port number for _csbdp
-
 1
1 -
 2
2 -
 3
3 -
 4
4 -
 5
5 -
 6
6 -
 7
7 -
8
-
9
-
10
-
11
-
12
-
13
-
14
-
15
-
16
-
17
-
18
-
19
-
20
-
21
-
22
-
23
-
24
-
25
-
26
-
27
-
28
-
29
-
30
-
31
-
32
-
33
-
34
-
35
-
36
-
37
-
38
-
39
-
40
-
41
-
42
-
43
-
44
-
45
-
46
-
47
-
48
-
49
-
50
-
51
-
52
-
53
-
54
-
55
-
56
-
57
-
58
-
59
-
60
-
61
-
62
-
63
-
64
-
65
-
66
-
67
-
68
-
69
-
70
-
71
-
72
-
73
-
74
-
75
-
76
-
77
-
78
-
79
-
80
-
81
-
82
-
83
-
84
-
85
-
86
-
87
-
88
-
89
-
90
-
91
 |
 |

Cisco Small Business
SLM Smart Switches
ADMINISTRATION
GUIDE