MSI FX610 User Manual
MSI FX610 Manual
 |
View all MSI FX610 manuals
Add to My Manuals
Save this manual to your list of manuals |
MSI FX610 manual content summary:
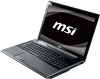
- MSI FX610 | User Manual - Page 1
CHAPTER 1 Preface - MSI FX610 | User Manual - Page 2
CE Conformity ...1-6 Safety Instructions...1-7 Safety Guideline for Using Lithium Battery 1-11 WEEE Statement ...1-15 Optical Drive Device Notice ...1-22 Trademarks...1-22 Reversion History ...1-22 Introductions Manual Map ...2-2 Unpacking...2-3 Specification...2-4 Product Overview ...2-8 Top - MSI FX610 | User Manual - Page 3
Side View ...2-22 Getting Started Power Management ...3-2 Connecting the AC Power ...3-2 Using the Battery Power...3-4 ECO Engine -- Power Saving Function 3-9 GPU Boost Function...3-11 Power Management in Windows OS 3-13 Energy Saving Tips...3-15 Basic Operations ...3-16 Safety and Comfort Tips - MSI FX610 | User Manual - Page 4
Preface 1-4 Components Replacement and Upgrade 3-43 BIOS Setup About BIOS Setup...4-2 When to Use BIOS Setup...4-2 How to Run BIOS Setup...4-2 Control Keys ...4-3 BIOS Setup Menu...4-4 Main Menu...4-5 Advanced Menu...4-7 Security Menu...4-9 Boot Menu ...4-11 Exit Menu...4-12 - MSI FX610 | User Manual - Page 5
installation. This equipment generates, uses and radiates radio frequency energy, and, if not installed and used in accordance with the instructions, may cause harmful interference to radio communications. However, there is no guarantee that interference will not occur in a particular installation - MSI FX610 | User Manual - Page 6
Preface 1-6 Š Shield interface cables and AC power cord, if any, must be used in order to comply with the emission limits. FCC Conditions This device complies with part 15 of the FCC Rules. Operation is subject to the following two conditions: „ This device may not cause harmful interference. „ - MSI FX610 | User Manual - Page 7
Preface 1-7 Safety Instructions Š Read the safety instructions carefully and thoroughly. Š All cautions and warnings on the equipment or user's manual should be noted. Keep the User's Guide that comes with the package for future reference. Keep this equipment away from humidity and high temperature - MSI FX610 | User Manual - Page 8
unplug the AC power cord before installing any add-on card or module to the equipment. Š Always disconnect the AC power cord or uninstall the battery pack or switch off the wall socket if the equipment would be left unused for a certain time to achieve zero energy consumption. Never pour liquid - MSI FX610 | User Manual - Page 9
replacement, use the same or equivalent type of battery recommended by the manufacturer only. Š Always keep the battery in a safe place. If any of the following situations arises, get the equipment checked by a service personnel: Š The power cord or plug is damaged. Š Liquid has penetrated into - MSI FX610 | User Manual - Page 10
Preface 1-10 Green Product Features Š Reduced energy consumption during use and stand-by Š Limited use of substances harmful to the environment and health Š Easily dismantled and recycled Š - MSI FX610 | User Manual - Page 11
les batteries usages conformément aux instructions du fabricant. (German) (Deutsch) VORSICHT: Explosionsgefahr bei unsachgemäßem Austausch der Batterie. Ersatz o con uno equivalente come indicato nel manuale del produttore. Smaltire le batterie usate come da istruzioni del produttore. (Russian - MSI FX610 | User Manual - Page 12
Preface 1-12 (Turkish) (Türkçe) UYARI: Pil yanlıs yerleştirilirse patlayabilir. Aynı ya da muadili bir pille degistiriniz. Kullanılmış pilleri üreticinin talimatlarına göre degerlendiriniz. (Greek (Polish) (Polski) OSTRZEŻENIE: Nieprawidłowa wymiana może spowodować eksplozję baterii. Zamianę moż - MSI FX610 | User Manual - Page 13
Preface 1-13 (Korean (Vietnamese) (Tieng Viet) LƯU Ý: Thay thế pin không tương thích có thể dẫn đến nguy cơ bị nổ. Chỉ thay thế bằng pin cùng loại hoặc loại tương ứng khuyên dùng bởi nhà sản xuất thiết bị. Vứt bỏ pin đã sử dụng theo hướng dẫn của nhà sản xuất. (Thai (Indonesian) (Bahasa - MSI FX610 | User Manual - Page 14
batteribyte. Använd samma batterityp eller en ekvivalent typ som rekommenderas av apparattillverkaren. Kassera använt batteri enligt fabrikantens instruction. (Finnish) (Suomi) VAROITUS: Paristo voi räjähtää, jos se on virheellisesti asennettu. Vaihda paristo ainoastaan valmistajan suosittelemaan - MSI FX610 | User Manual - Page 15
Preface 1-15 (Croatian) (Hrvatski) OPREZ: Opasnost od eksplozije ako se baterija zamijeni neprikladnom. Zamijenite je samo jednakom ili nadomjesnom vrstom prema preporuci proizvođača. Istrošene baterije zbrinite u skladu s uputama proizvođača. (Estonian) (Eesti) ETTEVAATUST! Plahvatusoht, kui aku - MSI FX610 | User Manual - Page 16
Preface 1-16 (French) (Français) Au sujet de la directive européenne (EU) relative aux déchets des équipement électriques et électroniques, directive 2002/96/EC, prenant effet le 13 août 2005, que les produits électriques et électroniques ne peuvent être déposés dans les décharges ou tout - MSI FX610 | User Manual - Page 17
Preface 1-17 (Turkish) (Türkçe) Avrupa Birliği (AB) Kararnamesi Elektrik ve Elektronik Malzeme Atığı, 2002/96/EC Kararnamesi altında 13 Ağustos 2005 tarihinden itibaren geçerli olmak üzere, elektrikli ve elektronik malzemeler diğer atıklar gibi çöpe atılamayacak ve bu elektonik cihazların ü - MSI FX610 | User Manual - Page 18
Preface 1-18 (Traditional Chinese 2005 年 8 月 13 2002/96/EC (Simplified Chinese 2005 年 8 月 13 2002/96/EC (Japanese 2005 年 8 月 13 EU WEEE (Korean 2005 년 8 월 13 EU 2002/96/EC (Vietnamese) (Tieng Viet) Theo Hướng dẫn của Liên minh Châu Âu ("EU") về Thiết bị điện & điện tử đã qua sử - MSI FX610 | User Manual - Page 19
Preface 1-19 (Indonesian) (Bahasa Indonesia) Sesuai dengan Regulasi Uni Eropa ("UE") perihal WEEE (Limbah Peralatan Listrik dan Elektronik), Directive 2002/96/EC, yang berlaku sejak 13, 2005, produk "peralatan listrik dan elektronik" tidak lagi dapat dibuang sebagai sampah umum dan pabrik - MSI FX610 | User Manual - Page 20
Preface 1-20 (Swedish) (Svenska) Under Europeiska unionens ("EU") Weee-direktiv (Waste Electrical and Electronic Equipment), Direktiv 2002/96/EC, vilket trädde i kraft 13 augusti, 2005, kan inte produkter från "elektriska och elektroniska utrustningar" kastas i den vanliga hushållssoporna längre - MSI FX610 | User Manual - Page 21
Preface 1-21 (Norwegian) (Norsk) Under den europeiske unionens ("EU") direktiv om deponering av elektronisk og elektrisk utstyr, direktiv 2002/96/EC, som trer i effekt 13. august 2005, kan ikke produkter av "elektronisk og elektrisk ustyr" lenger deponeres som husholdningsavfall og fabrikantene av - MSI FX610 | User Manual - Page 22
as a "CLASS 1 LASER PRODUCT." To use this model properly, read the instruction manual carefully and keep this manual for your future reference. In case of any trouble with this model, please contact your nearest "AUTHORIZED service station." To prevent direct exposure to the laser beam, do not try - MSI FX610 | User Manual - Page 23
CHAPTER 2 Introductions - MSI FX610 | User Manual - Page 24
you purchased this notebook. Also, this chapter provides the specification of this notebook, and introduces the function buttons, quick launch buttons, connectors, LEDs and externals of this notebook. Chapter 3, Getting Started, gives the basic operation instructions on using keyboard, touchpad - MSI FX610 | User Manual - Page 25
change without notice. Introductions Chapter 4, BIOS Setup, provides information on BIOS Setup program and allows you to configure future. The package should contain the following items: Notebook Quick Start Manual High-capacity Li-ion battery AC adapter and power cord Carry bag (optional) - MSI FX610 | User Manual - Page 26
Specification Physical Characteristic Dimension Weight 383 x 249.5 x 32.3 ~37 mm 2.4 kg (with 6-cell battery) CPU Processor Type L2 Cache HyperTransport Link Special Notification AMD® Champlain 512KB to 2MB 3.2GT/s or 3.6GT/s (optional) The actual processor preinstalled in the notebook - MSI FX610 | User Manual - Page 27
~240V, 50~60Hz Output: 19V 4.74A 6-cell Yes The actual AC/DC Adapter and battery pack that come with the package may vary without notice. Storage (Items listed here may optional) Special Notification The actual HDD and ODD preinstalled in the notebook depends on the model you purchased. - MSI FX610 | User Manual - Page 28
1 Mic-in/ Line-in x 1 Headphone-out/ S/PDIF-out x 1 RJ45 x 1 HDMI x 1 Card Reader x 1 (XD/ SD/ SDHC/ SDXC/ MMC/ MS/ MS Pro) The supported memory cards may vary without notice. Communication Port (Items listed here may vary without notice) LAN Giga LAN (optional) Wireless LAN 802.11b - MSI FX610 | User Manual - Page 29
HDMI Output Display LCD Type Brightness WebCam HD CMOS camera Software & BIOS USB Flash Boot BIOS Others Kensington Lock Hole Compliance Discrete/ UMA (optional) 1366 x 768 Supported Supported 15.6" 16:9 HD Brightness controlled by K/B hot-keys Supported Yes, USB floppy boot up DOS only Fast Boot - MSI FX610 | User Manual - Page 30
. Introductions Product Overview This section provides the description of basic aspects of the notebook. It will help you to know more about the appearance of this notebook before using it. Please be aware that the notebook shown in this section may vary from the actual one that users purchased - MSI FX610 | User Manual - Page 31
when webcam function is activated; LED goes out when this function is turned off. 3. Quick Launch Buttons Press the quick launch button to activate the specific applications or tools. With the help of these buttons, users will be able to do work more efficiently. Š Press the Volume Down or Volume - MSI FX610 | User Manual - Page 32
Introductions 2-10 Wireless LAN (optional) P1 GPU Boost Š Press this button to launch the of this manual for the detailed information of this GPU Boost Function. Power Button Š Press the power button to turn the notebook power ON and OFF. Š Press the power button to awake the notebook from the - MSI FX610 | User Manual - Page 33
is disabled. 5. Touchpad This is a pointing device of the notebook. 6. Keyboard The built-in keyboard provides all the functions of a full-sized keyboard. Quick Launch [Fn] Buttons Use the [Fn] buttons on the keyboard to activate the specific applications or tools. With the help of these quick - MSI FX610 | User Manual - Page 34
function off recurrently. Š Refer to the Power Management section in chapter 3 of this manual for the detailed information of this ECO Engine, Power Saving Function. Š Note that ECO to turn it off. + Bluetooth (optional) Š Press and hold the Fn button, and then press the F9 button to turn the - MSI FX610 | User Manual - Page 35
Fn button, and then press the F10 button to turn the 3G function on. Press again to turn it off. Š This 3G function is optional supported depending on the model users purchased. This function button will not be available when the 3G function is not - MSI FX610 | User Manual - Page 36
function is enabled. Š Warning: For flight safety consideration, make sure this LED indicator goes out when you are in flight. Š Note: The Bluetooth Function may be optionally supported depending on the model users purchased. Š Contact the local distributor for further information if necessary. - MSI FX610 | User Manual - Page 37
local distributor for further information if necessary. Battery: Š Glowing blue when the battery is being charged. Š Glowing amber when the battery is in low battery status. Š Blinking amber if the battery fails and it is recommended to replace a new battery. Consult the local dealer for purchasing - MSI FX610 | User Manual - Page 38
. Š Glowing blue when the system is activated. Š LED goes out when the system is turned off. 2. Card Reader The built-in card reader may support various types of memory card, such as MMC (Multi-Media Card), XD (eXtreme Digital), SD (Secure Digital), SDHC (SD High Capacity), SDXC (eXtended Capacity - MSI FX610 | User Manual - Page 39
Connector allows you to connect an external Serial ATA device. Users can now utilize shielded cable outside the notebook to take advantage of the benefits the SATA interface brings to storage. This connector may also work as an device (such as a projector) for a great view of the computer display. - MSI FX610 | User Manual - Page 40
Introductions 2-18 4. RJ-45 Connector The Ethernet connector is used to connect a LAN cable for network connection. - MSI FX610 | User Manual - Page 41
looped around a permanent object, such as a heavy table or other similar equipment, thus securing the notebook in place. 2. Power Connector To connect the AC/DC adapter and supply power for the notebook. 3. Ventilator The ventilator is designed to cool the system. DO NOT block the ventilator for air - MSI FX610 | User Manual - Page 42
, modem, portable hard disk module, printer and more. 6. Audio Port Connectors Make high quality sound blaster with stereo system and Hi-Fi function supported. Connect your speakers to the proper connectors as shown below. Mic In/Line In: Used for an external microphone. Headphone out/ SPDIF-out - MSI FX610 | User Manual - Page 43
Introductions 2-21 Rear Side View 1. Battery Pack 1 1. Battery Pack This notebook will be powered by the battery pack when the AC adapter is disconnected. - MSI FX610 | User Manual - Page 44
Unlock Button 2. Battery Pack 3. Battery Release Button 4. Ventilator 5. Stereo Speaker 5 1. Battery Lock/ Unlock Button Battery cannot be moved when the button is positioned on lock status. Once the button is slid to unlock position, the battery is removable. 2. Battery Pack This notebook will be - MSI FX610 | User Manual - Page 45
Release Button It is a bounce-back device as a preparation for releasing the battery pack. Slide it with one hand and pull the battery pack carefully with the other. 4. Ventilator The ventilator is designed to cool the system. DO NOT block the ventilator for air circulation. 5. Stereo Speaker - MSI FX610 | User Manual - Page 46
CHAPTER 3 Getting Started - MSI FX610 | User Manual - Page 47
the AC power It is strongly recommended to connect the AC/DC adapter to the notebook and use the AC power while using this notebook for the first time. When the AC power is connected, recharging the battery will start immediately. Note that the AC/DC adapter included in the package is approved - MSI FX610 | User Manual - Page 48
the AC/DC adapter. 3. Plug the DC end of the adapter to the notebook, and the male end of the power cord to the electrical outlet. Disconnecting power cord from the electrical outlet first. 5. Unplug the connector from the notebook. 6. Disconnect the power cord and the connector of AC/DC adapter. 7. - MSI FX610 | User Manual - Page 49
is an internal power source of the notebook. Be aware of that this battery pack may be damaged if users try to disassemble the battery pack on their own. Also, note that the limited warranty to the battery pack may also lose its efficacy when this battery pack is disassembled not by an authorized - MSI FX610 | User Manual - Page 50
reference only. Getting Started Installing the Battery Pack To insert the battery pack, following the steps below: 1. Locate the steady gutter of the battery pack, and the battery bolt on the battery tray as shown right. 2. Align the steady gutter and battery bolt with correct orientation and make - MSI FX610 | User Manual - Page 51
Getting Started 3-6 Releasing the Battery Pack To release the battery pack, following the steps below: 1. Make sure the notebook is turned off, and the AC power is disconnected. 3 2 2. Press the lock/unlock button to the unlocked position. 5 3. Locate the battery release button on 4 the - MSI FX610 | User Manual - Page 52
local solid waste officials for details about recycling options or for proper disposal in your area. Conserving Battery Power Efficient battery power is critical to maintain a normal operation. If the battery power is not managed well, the saved data and customized settings may be lost. To optimize - MSI FX610 | User Manual - Page 53
that have no "memory effect." It is unnecessary to discharge the battery before recharging. However, to optimize the life of battery, we suggest that consuming the battery power completely once a month is necessary. Š If you do not use the notebook for a long time, it is suggested to remove the - MSI FX610 | User Manual - Page 54
power saving modes - Gaming mode, Movie mode, Presentation mode, Office mode, and Turbo Battery mode, to extend the battery running time while performing different tasks with this notebook. Read the instructions bellow to activate the ECO Engine power saving function: 1. Press and hold the Fn - MSI FX610 | User Manual - Page 55
Getting Started 3-10 Presentation Mode Select this mode while performing presentation applications. Office Mode Select this mode while dealing with office documentation tasks. Turbo Battery Mode Select this mode to maximize the battery running time. ECO Off Selected to disable ECO Engine. - MSI FX610 | User Manual - Page 56
supported) GPU Boost Function allows users to choose between using the discrete and the internal graphic card depending on the tasks users are currently performing. With this function, users can easily and quickly select either to maximizing the graphic performance or extending the battery - MSI FX610 | User Manual - Page 57
3-12 The figures show here are for reference only. Getting Started 4 2 3 3 - MSI FX610 | User Manual - Page 58
instructions below to adjust the power management settings in Windows OS: 1. "Power Options" selection in Windows OS allows you to control the power management features of your display, hard drive, and battery " Computer menu will present various relative options as following. 5. The computer should - MSI FX610 | User Manual - Page 59
3-14 1 2 3 4 Getting Started - MSI FX610 | User Manual - Page 60
into power saving mode. Š Tune the settings in Power Options under Windows OS to optimize the computer's power management. Š Always disconnect the AC power cord or uninstall the battery pack or switch off the wall socket if the computer would be left unused for a certain time to achieve zero energy - MSI FX610 | User Manual - Page 61
notebook, please read the following instructions to assure your own safety, and make yourself comfortable during the operations. Safety and Comfort Tips The notebook to support your wrists. Š Adjust the angle/position of the LCD panel to have an optimal view. Š Avoid using your notebook in the - MSI FX610 | User Manual - Page 62
good posture. 31 5. Adjust the chair's height. 5 Having a Good Work Habit Have a good work habit is important if you have to work with your notebook for long periods of time; otherwise, it may cause discomfort or injury to you. Please keep the following tips in mind when operating. Š Change your - MSI FX610 | User Manual - Page 63
Getting Started 3-18 Knowing the Keyboard This notebook provides a full-functioned keyboard. This keyboard can be divided into four categories: Typewriter keys, Cursor keys, shown here may vary from the actual one, depending on which county users purchase the notebook. Cursor keys / Function keys - MSI FX610 | User Manual - Page 64
Getting Started 3-19 Typewriter Keys In addition to providing the major function of the keyboard, these typewrite keys also provide several keys for special purposes, such as [Ctrl,] [Alt,] and [Esc] key. When the lock keys are pressed, the corresponding LEDs will light up to indicate their status - MSI FX610 | User Manual - Page 65
Getting Started 3-20 Cursor Keys The four cursor (arrow) keys and [Home], [PgUp], [PgDn], [End] keys are used to control the cursor movement. Move the cursor left for one space. Move the cursor right for one space. Move the cursor up for one line. Move the cursor down for one line. Move to the - MSI FX610 | User Manual - Page 66
Logo key ( ) on the keyboard, which are used to perform Windows-specific functions, such as opening the Start menu and launching the shortcut menu. For more information of the two keys, please refer to your Windows manual or online help. „ [Fn] Key Switch the display output mode between - MSI FX610 | User Manual - Page 67
the touchpad function. + Decrease the LCD brightness. + Increase the LCD brightness. + Decrease the built-in speaker's volume. + Increase the built-in speaker's volume. + Disable the computer's audio function. + Force the computer into sleep state (depending on the system configuration). + - MSI FX610 | User Manual - Page 68
Use the [Fn] buttons on the keyboard to activate the specific applications or tools. With the help of these quick launch GPU Boost application. Š Refer to the Power Management section in chapter 3 of this manual for the detailed information of this GPU Boost Function. + ECO Engine (Power Saving - MSI FX610 | User Manual - Page 69
press the F9 button to turn the Bluetooth function on. Press again to turn it off. Š Press and hold the Fn button, and then press the F10 button to turn the 3G function on. Press again to turn it off. Š This 3G function is optional supported depending on the model users purchased - MSI FX610 | User Manual - Page 70
performed by users precisely. This significant Smart Pad will surely bring users not only an efficient but also an enjoyable experience of using the notebook. 1. Cursor Movement Area This pressure-sensitive area of the touchpad, allows you to place your finger on and control the cursor on the - MSI FX610 | User Manual - Page 71
button, glows when the touchpad is disabled. Brief Usages to the Smart Pad For the further information on how to use the Smart Pad function specifically, please refer to the instructions of Smart Pad by double clicking the Smart Pad icon ( the screen. ) on the lower right side of - MSI FX610 | User Manual - Page 72
Getting Started 3-27 Gestures Actions Functions Š Taping the touchpad once with one finger. Š Single clicking the Left button of the mouse. Š Double taping the touchpad with one finger. Š Double clicking the Left button of the mouse. Š Touch the touchpad with single finger and move around - MSI FX610 | User Manual - Page 73
Getting Started 3-28 Gestures Actions Functions Š Touch the touchpad with two fingers and remain the fingers on the touchpad. Š Move the two fingers on the touchpad vertically. Š Touch the touchpad with two fingers and remain both fingers on the touchpad. Š Move the two fingers on the touchpad - MSI FX610 | User Manual - Page 74
Getting Started 3-29 Gestures Actions Functions Š Touch the touchpad with three fingers and remain it on the touchpad. Š Double tapping the touchpad with one finger to enable the Magnifying Glass function. Š To control the magnifying glass, touch the touchpad with single finger and move around - MSI FX610 | User Manual - Page 75
on the touchpad still. Š Move a finger to the right or to the left to select the expected window. Š All fingers leave from the touchpad and the selected window will be popped up. Functions Š Browse the directory of "Computer" Š Switching between all the windows that have been activated currently. - MSI FX610 | User Manual - Page 76
Getting Started 3-31 Gestures Actions Functions Š Touch the touchpad with two fingers and remain both fingers on the touchpad. Š Move a finger clockwise while another remains still to rotate a selected object clockwise. Refer to the first gesture. Š Move a finger counterclockwise while another - MSI FX610 | User Manual - Page 77
Getting Started 3-32 About Hard Disk Drive Your notebook is equipped with a 2.5-inch hard disk drive. The hard disk drive is your system, please backup your critical files regularly. Do not turn off the notebook when the hard disk In-use LED is on. Do not remove or install the hard disk drive when - MSI FX610 | User Manual - Page 78
in your notebook depends on the model you purchased. „ Super Multi: Works as a multi-functional DVD Dual Drive and a DVD RAM Drive. „ Blu-ray: It is a high-capacity optical disc that holds 4.5 hours of high-definition video (HD) on a single-sided, single-layer 25GB disk. Blu-ray supports - MSI FX610 | User Manual - Page 79
the tray. 2. Do not leave the disk tray open. Getting Started Inserting the Disk The following instructions describe the general procedure when operating the optical storage device: 1. Confirm that the notebook is turned on. 2. Press the eject button on the panel and the disk tray will slide out - MSI FX610 | User Manual - Page 80
Getting Started 3-35 Removing the Disk Follow the instructions below to remove the disk that is placed in the optical storage device: 6. Press the eject button on the drive's panel and the disk tray - MSI FX610 | User Manual - Page 81
etc. To connect these devices, install the drivers for each device first if necessary, and then connect the device to the notebook. This notebook is capable to auto detect the USB devices installed, and if there is no detection of the devices, please manually enable the USB devices by going to Start - MSI FX610 | User Manual - Page 82
Getting Started 3-37 Connecting the External Display Devices This notebook provides a VGA port for connecting a larger display with higher resolution. The 15-pin-D-sub VGA port allows users to connect an external monitor or other - MSI FX610 | User Manual - Page 83
a new interface standard for PCs, displays and consumer electronics devices that supports standard, enhanced and high-definition video, plus multi-channel digital audio on a single cable. To connect the external display, make sure the notebook and the external display are both powered off, and then - MSI FX610 | User Manual - Page 84
an external Serial ATA hard disk device. Users can now utilize shielded cable outside the notebook to take advantage of the benefits the SATA interface brings to storage. The E-SATA standard interface supports "plug-and-play" technology, so that you can connect and remove the E-SATA devices without - MSI FX610 | User Manual - Page 85
Connecting the Communication Devices Using the LAN The RJ-45 connector of the notebook allows you to connect the LAN (local area network) devices, such as a hub, switch and gateway, to build a network connection. For more instructions or detailed steps on connecting to the LAN, please ask your MIS - MSI FX610 | User Manual - Page 86
3-41 Using Wireless LAN Connection (optionally supported) This notebook is equipped with wireless LAN module which allows efficient and a more secure solution to the wireless communication. For more instructions or detailed steps on connecting to the Wireless LAN, please ask your MIS staff or - MSI FX610 | User Manual - Page 87
Connection (optionally supported) This notebook is equipped with Bluetooth module which allows users to connect various Bluetooth-enabled devices to the notebook. Bluetooth provides a way to connect and exchange information between devices such as mobile phones, personal computers, printers, GPS - MSI FX610 | User Manual - Page 88
Getting Started 3-43 Components Replacement and Upgrade Please be noticed that the memory, hard disk drive, wireless LAN / Bluetooth module and battery pack preinstalled in the product users purchased may be upgradable or replaceable by user's request depending on the models users purchased. 1 2 5 - MSI FX610 | User Manual - Page 89
pack, please refer to the section of Using the Battery Power for details. This notebook is equipped with a wireless LAN/ Bluetooth module, and the module may be upgradable and replaceable by authorized dealer or service center. This notebook is equipped with a hard disk drive, and this storage - MSI FX610 | User Manual - Page 90
Started 3-45 5 This notebook is equipped with an optical drive device, and this storage device may be upgradable and replaceable by the authorized dealer or service center. To learn more about upgrade limitation, please refer to the specification in the User's Manual provided. For any further - MSI FX610 | User Manual - Page 91
CHAPTER 4 BIOS Setup - MSI FX610 | User Manual - Page 92
SETUP. Š You want to change the default settings for customized features. Š You want to reload the default BIOS settings. How to Run BIOS Setup? To run the BIOS Setup Utility, turn on the notebook and press the [Del] key during the POST procedure. If the message disappears before you respond and you - MSI FX610 | User Manual - Page 93
You can use only the keyboard to control the cursor in the BIOS Setup Utility. Press left arrow to select one menu title. Press right arrow field. Bring up help screen providing the information of control keys. 1) Exit the BIOS Setup Utility. 2) Return to the previous screen in a sub-menu. - MSI FX610 | User Manual - Page 94
to enter the other menus. Main Menu Show system overview information about BIOS version, CPU features, memory size and setting of system time and date settings, such as power consumption, USB/ PCI devices, of the notebook in order to achieve a better performance. Security Menu Install or clear - MSI FX610 | User Manual - Page 95
Date Year Day of the week, from Sun to Sat, which is determined by BIOS (read-only). The month from 01 (January) to 12 (December). The date types of the SATA/ eSATA devices installed in the notebook. Press [Enter] to bring up a window showing the detailed information of the device, including the - MSI FX610 | User Manual - Page 96
BIOS Setup 4-6 Š System Information This item provides the information about the firmware, processor, and system memory. - MSI FX610 | User Manual - Page 97
BIOS Setup 4-7 Advanced Menu Š PowerNow This item allows you to enable or disable to higher values. Setting options: 32, 64, 96, 128, 160, 192, 224, and 248. Š Legacy USB Support Selecting Enabled allows users to use USB devices, such as mouse, keyboard, or portable disk, in DOS system; or allows - MSI FX610 | User Manual - Page 98
BIOS Setup 4-8 Š AHCI Mode (Advanced Host Controller Interface) Use this item to enable or disable the AHCI Mode. Setting options: Disabled and Enabled. - MSI FX610 | User Manual - Page 99
BIOS Setup 4-9 Security Menu Š Change Supervisor Password When this item is selected, a message box shall appear on the password. Note that Supervisor Password field allows users to enter and change the settings of the BIOS SETUP UTILITY, while User Password field only allows users to enter the - MSI FX610 | User Manual - Page 100
BIOS Setup 4-10 The Password Check item is used to specify the type of BIOS password protection that is implemented. Settings are described below: Setup The password is required only when users try to access to BIOS SETUP UTILITY. Always The password is required every time when the Notebook is - MSI FX610 | User Manual - Page 101
BIOS Setup 4-11 Boot Menu Š Boot Settings Configuration Configure settings during system boot. Š Boot Device Priority These items showing the sequence of boot devices where BIOS attempts to load the disk operating system. - MSI FX610 | User Manual - Page 102
BIOS Setup 4-12 Exit Menu Š Exit & Save Changes Save the changes you have made and exit the utility. Š Exit & Discard Changes Exit the utility without saving
-
 1
1 -
 2
2 -
 3
3 -
 4
4 -
 5
5 -
 6
6 -
 7
7 -
8
-
9
-
10
-
11
-
12
-
13
-
14
-
15
-
16
-
17
-
18
-
19
-
20
-
21
-
22
-
23
-
24
-
25
-
26
-
27
-
28
-
29
-
30
-
31
-
32
-
33
-
34
-
35
-
36
-
37
-
38
-
39
-
40
-
41
-
42
-
43
-
44
-
45
-
46
-
47
-
48
-
49
-
50
-
51
-
52
-
53
-
54
-
55
-
56
-
57
-
58
-
59
-
60
-
61
-
62
-
63
-
64
-
65
-
66
-
67
-
68
-
69
-
70
-
71
-
72
-
73
-
74
-
75
-
76
-
77
-
78
-
79
-
80
-
81
-
82
-
83
-
84
-
85
-
86
-
87
-
88
-
89
-
90
-
91
-
92
-
93
-
94
-
95
-
96
-
97
-
98
-
99
-
100
-
101
-
102
 |
 |

CHAPTER 1
Preface