MSI M675-100 User Manual
MSI M675-100 - Megabook M675 - Turion 64 X2 1.8 GHz Manual
 |
UPC - 816909016826
View all MSI M675-100 manuals
Add to My Manuals
Save this manual to your list of manuals |
MSI M675-100 manual content summary:
- MSI M675-100 | User Manual - Page 1
Chapter 1 Chapter 2 Chapter 3 Chapter 4 Preface General Introductions Getting Started Customizing this Notebook BIOS setup G52-16331X4 - MSI M675-100 | User Manual - Page 2
and, if not installed and used in accordance with the instructions, may cause harmful interference to radio communications. However, there responsible for compliance could void the user's authority to operate the equipment. 2. Shield interface cables and AC power cord, if any must be used in order to - MSI M675-100 | User Manual - Page 3
Preface FCC Conditions This device complies with part 15 of the FCC Rules. Operation is subject to the following two conditions: 1. This device may not cause harmful interference. 2. This device must accept any interference received, including interference that may cause undesired operation. III - MSI M675-100 | User Manual - Page 4
. Replace only with the same or equivalent type recommended by the equipment manufacturer. Discard used batteries according to manufacturer's instructions. (Finnish) VAROITUS: Paristo voi räjähtää, jos se on virheellisesti asennettu. Vaihda paristo ainoastaan valmistajan suosittelemaan - MSI M675-100 | User Manual - Page 5
of the leak. Optical Disc Drive Notice CAUTION: This appliance contains a laser system and is classified as a "CLASS 1 LASER PRODUCT." To use this model properly, read the instruction manual carefully and keep this manual for your future reference. In case of any trouble with this model, please - MSI M675-100 | User Manual - Page 6
properly to the value of 100~240V before connecting the equipment to the power inlet. 7. Place the power cord in a way that people are unlikely to step on it. Do not place anything on the power cord. 8. Always unplug the power cord before inserting any add-on card or module. 9. All cautions and - MSI M675-100 | User Manual - Page 7
service personnel: w The power cord or plug is damaged. w Liquid has penetrated into the equipment. w The equipment has been exposed to moisture. w The equipment has not worked well or you can not get it work according to User's Manual battery replacement, use the same or equivalent type of - MSI M675-100 | User Manual - Page 8
Selon la directive européenne (EU) relative aux déchets des équipements électriques et électroniques, directive 2002/96/EC, prenant effet le 13 août 2005, les produits électriques et électroniques ne peuvent être déposés dans les décharges ou tout simplement mis à la poubelle. Les fabricants de ces - MSI M675-100 | User Manual - Page 9
2002/96/EC de la Unión Europea en materia de desechos y/o equipos electrónicos, con fecha de rigor desde el 13 de agosto de 2005, los productos clasificados como "eléctricos y equipos electrónicos" no pueden ser depositados en los contenedores habituales de su municipio, los fabricantes de equipos - MSI M675-100 | User Manual - Page 10
se tato směrnice vztahuje, budou povinni odebírat takové výrobky zpět po skončení jejich životnosti. (MAGYAR) Az Európai Unió („EU") 2005. augusztus 13-án hatályba lépő, az elektromos és elektronikus berendezések hulladékairól szóló 2002/96/EK irányelve szerint az elektromos és elektronikus berendez - MSI M675-100 | User Manual - Page 11
trademark of Microsoft Corporation. Windows®98/ME, 2000/XP are registered trademarks of Microsoft Corporation. w AMI® is a registered trademark of American Megatrends Inc. w PCMCIA and CardBus are registered trademarks of the Personal Notebook Memory Card International Association. Release History - MSI M675-100 | User Manual - Page 12
FCC-B Radio Frequency Interference Statement II FCC Conditions III Safety Guideline for Using Lithium Battery IV Caution on Using Modem V Optical Disc Drive Notice V Macrovision Notice VI Safety Instructions VI WEEE Statement VIII Trademarks ...XI Release History XI Introductions How to Use - MSI M675-100 | User Manual - Page 13
2-17 Battery Pack 2-19 Using the Battery Pack 2-22 Basic Operations 2-24 Safety and Comfort Tips 2-24 Have a Good Work Habit 2-25 Knowing the Keyboard 2-26 Knowing the Touchpad 2-32 About Fingerprint Identification (Optional, for 87-Key Series Only)........2-36 About Hard Disk Drive 2-46 - MSI M675-100 | User Manual - Page 14
Installing the PC card 3-7 Removing the PC card 3-8 Express Card Installation 3-9 Installing the Express card 3-9 Removing the Express card 3-9 Safely Remove Hardware 3-10 BIOS Setup About BIOS Setup 4-2 When to Use BIOS Setup 4-2 How to Run BIOS Setup 4-2 Control Keys 4-3 BIOS Setup Menu - MSI M675-100 | User Manual - Page 15
Preface XV - MSI M675-100 | User Manual - Page 16
Chapter 1 Chapter 2 Chapter 3 Chapter 4 Preface General Introductions Getting Started Customizing this Notebook BIOS setup - MSI M675-100 | User Manual - Page 17
for unsurpassed dependability and customer satisfaction. How to Use This Manual This User's Manual provides instructions and illustrations on how to operate this notebook. It is recommended to read this manual carefully before using this notebook. Chapter 1, General Introductions, includes the - MSI M675-100 | User Manual - Page 18
instructions not only in connecting the mouse, keyboard, webcam, printer, external monitor, IEEE 1394 devices, and communication devices, but also in installing and removing the PC card. Chapter 4, BIOS setup, provides information on BIOS Setup program and allows you to configure the system for - MSI M675-100 | User Manual - Page 19
package should contain the following items: w Notebook w User's Manual or Quick Start Guide w All-in-one application disk, containing the drivers, utilities and optional recovery function. w High-capacity Li-ion battery pack w AC adapter and power cord w Phone cable/Phone jack (optional) w Notebook - MSI M675-100 | User Manual - Page 20
Chapter 1 Chapter 2 Chapter 3 Chapter 4 Preface General Introductions Getting Started Customizing this Notebook BIOS setup - MSI M675-100 | User Manual - Page 21
Getting Started Specification Physical Characteristic Dimension 358mm(L) x 259mm(D) x 27~33mm(H) Weight 2.7kg with 6 cell battery 2.9kg with 9 cell battery CPU Processor Type 638-pin (uPGA) Support Processor Turion 64 bit Taylor processor 2.2 GHz, dual core 35W L1 Cache 64K L2 Cache - MSI M675-100 | User Manual - Page 22
Getting Started Battery Type 6 cells (Li-ion)/9 cells (Li-ion) Card Reader x 1 (SD, MMC, MS/MS-Pro, XD, SM ) Express Card Slot x 1 TV-Out x 1 (S-Video) Camera CMOS 1.3 M Pixel Communication Port 56K Fax/MODEM MDC (Azalia) MDC (AZALIA) I/F --- AZALIA S/W Modem Wake on Ring --- Support - MSI M675-100 | User Manual - Page 23
LAN Wireless LAN Bluetooth Display LCD Type Brightness Video Controller VRAM LCD CRT Getting Started State PTT Approval --- Yes (FCC/CTR21/JATE) 10/100/1000 Base on board LAN Wake on LAN --- Support on S3/S4/S5 State LAN Boot --- Yes Wfm --- Wfm 2.0 support IEEE 802.11b/g Support (Optional) Glare - MSI M675-100 | User Manual - Page 24
Started Display Detect Audio Sound Codec chip Internal Speaker Internal Microphone SoundBlaster H/W Wave Table MIDI Sound Volume Software & BIOS Support OS USB Flash Boot BIOS Others Kensington Lock Hole Fingerprint WHQL System auto detects LCD or CRT: 1. Display to CRT - only if LCD lid is closed - MSI M675-100 | User Manual - Page 25
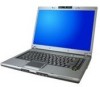
you to know more about the appearance of this Notebook before using it. Top-open View Press the Cover Latch to open the top cover (LCD Panel). The figure of top-open view and description showing below will lead you to browse the main - MSI M675-100 | User Manual - Page 26
Pads Protect your Notebook PC from random closing. 3. Stereo Speakers Make high quality sound blaster with stereo system and Hi-Fi function supported. 4. Quick Launch Buttons and Power Button Power Button: To turn your Notebook power Button to activate the Windows Search function or the Dual - MSI M675-100 | User Manual - Page 27
the computer. 7. Webcam Power Button Press this power to enable Webcam function firstly. This camera takes pictures every few minutes and updates those . Hard Disk In-use: Glowing Blue when the Notebook PC is accessing the hard disk drive. Battery: Glowing Orange when recharging. Battery LED - MSI M675-100 | User Manual - Page 28
is out of order, and it is recommended to replace a new battery. Power On / Standby: It is Blue when the power is on; it is blinking blue when it is in standby mode. 1. Wireless LAN/ 2. Bluetooth (optional): 1.Glowing Green when wireless LAN function of the computer is enabled. LED goes out when - MSI M675-100 | User Manual - Page 29
when loosing it. 2. 5 in 1 Card Reader The built-in card reader supports MMC (multi-media card), SD (secure digital), MS (memory stick)/MS Pro, SM and XD cards. 3. Audio Port Connectors Make high quality sound blaster with stereo system and Hi-Fi function supported. Microphone: Used for an external - MSI M675-100 | User Manual - Page 30
Slot The computer provides a PC card slot to support one Type-II PC card for expansion functions, such as LAN/WLAN card, modem card, memory card, etc. 3. IEEE 1394 The IEEE 1394 port is a high-speed bus that allows you to connect high-end digital devices such as the DV (digital video camera). 4. USB - MSI M675-100 | User Manual - Page 31
or projector for a great view of the computer display. 6. S-Video Connector By using a Super VHS (S-Video) cable, this connector allows you to connect a television (NTSC/PAL system) to use as a computer display. 7. Power Connector To connect the AC adapter and supply power for the computer. 2-12 - MSI M675-100 | User Manual - Page 32
hard disk module, printer and more. 2. Optical Storage Device A slim DVD Combo/ DVD dual/Super Multi/DVD Dual Layer/Light Scripe drive is available in the computer computer. 3. Kensington Lock This port is used to lock the computer to location for security. 4. RJ-45 Connector The Ethernet connector - MSI M675-100 | User Manual - Page 33
vu w 1. Kensington Lock This port is used to lock the computer to location for security. 2. Ventilator The ventilator is designed to cool the system. DO NOT block the ventilator for air circulation. 3. Battery Pack (Rear View) To supply power to computer when AC adapter is not connected. 2-14 - MSI M675-100 | User Manual - Page 34
one hand and pull the battery pack carefully with the other. 2. Battery Lock/Unlock Button Battery cannot be moved when the button is positioned on lock status. Once the button is pushed to unlock position, the battery is removable. 3. Battery Pack Supply power to your computer when the AC adapter - MSI M675-100 | User Manual - Page 35
Getting Started 4. Ventilator The ventilator is designed to cool the system. DO NOT block the ventilator for air circulation. 2-16 - MSI M675-100 | User Manual - Page 36
Adapter Please be noted that it is strongly recommended to connect the AC adapter and use the AC power while using this Notebook for the first time. When the AC adapter is connected, the battery is being charged immediately. NOTE that the AC adapter included in the package is approved for your - MSI M675-100 | User Manual - Page 37
When you disconnect the AC adapter, you should: 1. Unplug the power cord from the electrical outlet first. 2. Unplug the connector from the Notebook. 3. Disconnect the power cord and the connector of AC adapter. 4. When unplugging the power cord, always hold the connector part of the cord. Never - MSI M675-100 | User Manual - Page 38
Pack It's a better way to have extra battery for enough power supply, so you don't have to worry about the lack of battery power. It's recommend to buy a battery pack from your local dealer. To remove the battery pack: 1. Make sure the computer is turned off. 2. Check the Lock/Unlock button is - MSI M675-100 | User Manual - Page 39
Getting Started y y v x 2-20 - MSI M675-100 | User Manual - Page 40
place. 3. After the right side of the battery pack fitting the right track, then slightly press the left side of battery pack into the battery chamber. 4. Make sure the Lock/Unlock Button is in lock position. u x Warning 1. Do not try to disassemble THE BATTERY PACK. 2. Please follow your local laws - MSI M675-100 | User Manual - Page 41
main battery pack with the same or equivalent type of battery. w Do not disassemble, short-circuit or incinerate batteries or battery life and avoid a sudden power loss. w Suspend system operation if the system will be idle for a while or shorten the Suspend Timer's time period. w Turn off the system - MSI M675-100 | User Manual - Page 42
Save-to-Disk. w Plug in an external AC/DC power source. w You can use the system, suspend system operation or shut down and turn off the system without interrupting the charging process. w The battery pack uses Lithium-ion battery cells that have no "memory effect." You do not need to discharge the - MSI M675-100 | User Manual - Page 43
on the floor, so that your knees and elbows have the proper position (about 90-degree) when operating. w Put your hands on the desk naturally to support your wrists. w Adjust the angle/position of the LCD panel, so that you can have the optimal view. w Avoid using your Notebook in the space where - MSI M675-100 | User Manual - Page 44
Adjust the angle and position of LCD panel. Keep your hands and feet with optimal comfort. otherwise, it may cause discomfort or injury to you. Please keep the following tips in mind when operating. w Change your posture frequently. w Stretch and exercise you body regularly. w Remember to take - MSI M675-100 | User Manual - Page 45
Getting Started Knowing the Keyboard The Notebook's keyboard provides all the functions of a full-sized keyboard and an additional [Fn] key for specific functions on the Notebook. The keyboard can be divided into four categories: Typewriter keys, Cursor keys, Numeric keys and Function keys. 103-Key - MSI M675-100 | User Manual - Page 46
Typewriter Keys Getting Started 103-Key series 87-Key series The function of these Typewriter keys is the major function of the keyboard, which is similar to the keys on a typewriter. It also provides several - MSI M675-100 | User Manual - Page 47
cursor (arrow) keys and [Home], [PgUp], [PgDn], [End] keys at the lower right corner, which are used to control the cursor movement. 103-Key series 87-Key series Move the cursor left for one space. Move the cursor right for one space. Move the cursor up for one line. Move the cursor - MSI M675-100 | User Manual - Page 48
Getting Started Move to the previous page. + Move to the next page. + Move to the beginning of the line (or document). Move to the end of the line (or document). The Backspace key, [Ins] and [Del] keys at upper right corner are use for editing purpose. This key is used to switch the typing mode - MSI M675-100 | User Manual - Page 49
which are used to perform Windows-specific functions, such as opening the Start menu and launching the shortcut menu. For more information of the two keys, please refer to your Windows manual or online help. n [Fn] Key Switch the display output mode between the + LCD, external monitor and Both - MSI M675-100 | User Manual - Page 50
Getting Started Decrease the LCD brightness. + Increase the LCD brightness. + Decrease the built-in speaker's volume. + Increase the built-in speaker's volume. + Disable the computer's audio function. + Force the computer into suspend mode + (depending on the system configuration). 2-31 - MSI M675-100 | User Manual - Page 51
you to control the Notebook by pointing the location of the cursor on the screen and making selection with its two buttons. x u v w 1. Cursor touchpad, allows you to place your finger on it and control the cursor on the screen by moving your finger. 2. Left Button Acts as the mouse's left button. - MSI M675-100 | User Manual - Page 52
pad, the cursor on the screen will move simultaneously in the same direction. When your finger reaches the edge of the pad as point and click is the basics of operating your Notebook. Unlike the traditional pointing device rapidly on the touchpad is to execute a double-click. n Drag and Drop You can - MSI M675-100 | User Manual - Page 53
Getting Started desired location; finally, release the left button to finish the drag-and-drop operation. Move the cursor by sliding your fingertip. Using the Touchpad Put your wrist on the desk comfortably. 2-34 - MSI M675-100 | User Manual - Page 54
the size, shape, moving speed and other advanced features of the cursor on the screen. To configure the touchpad, you can use the standard Microsoft or IBM PS/2 driver in your Windows operating system. The Mouse Properties in Control Panel allows you to change the configuration. Mouse Properties - MSI M675-100 | User Manual - Page 55
About Fingerprint Identification (Optional, for 87-Key Series Only) You can logon your computer with a touch of your finger. The Driver CD into your CD/DVD-ROM drive and install Aimgene FingerPrint Driver/Utility firstly, please follow the following installing steps: 1. USC installing screen - MSI M675-100 | User Manual - Page 56
2. Click "Install" to install USC program. Getting Started 3. Click "Finish" as the installation is completed. 2-37 - MSI M675-100 | User Manual - Page 57
Getting Started 4. Click "Yes" to restart your system for the configuration changes. Configurating Universal Security Client 1. Re-boot you computer and the following USC (Universal Security Client) will show on the taskbar (The icon means you are not login to USC yet). 2. Click this USC - MSI M675-100 | User Manual - Page 58
Getting Started 3. Then the following screen appears, click "Next" to continue USC configuration. 4. Please enter your user name and credentials in the following field, then select the left fingerprint identification icon - MSI M675-100 | User Manual - Page 59
5. Enter the password to the empty field and click "Finish". Getting Started 6. Then Authentication Methods screen appears, click "Next" to register credentials for fingerprint authentication method. 2-40 - MSI M675-100 | User Manual - Page 60
Getting Started 7. To start enrollment, swipe your finger over the fingerprint sensor four times. (The default setting is forefinger.) 8. Then the color of the forefinger will change to green as you completed the previous fingerprint enrollment. Then click "Next". 2-41 - MSI M675-100 | User Manual - Page 61
Getting Started 9. It is recommended that you register at least two fingerprints, if you want to proceed without additional fingerprint registration, click "Yes" to continue. 10. Click "Finish" as USC registration is completed. 2-42 - MSI M675-100 | User Manual - Page 62
Started How to Use Fingerprint Identification As the previous fingerprint registration steps are completed, let's restart the computer and try this function. After turning on your computer, you can see Window XP desktop; then the following screen will appears to ask you to enter your user name and - MSI M675-100 | User Manual - Page 63
fingerprints to gain access to a file, application, or computer system. So you need to verify your finger. Clink "Next" to continue and follow the steps to finish the process. After the process are completed, the screen will return back to the Window XP desktop, we can see USC icon has been changed - MSI M675-100 | User Manual - Page 64
Getting Started As you click this USC icon, you will bring up one list of options for My Identity. You can select any option and change its setting. For example, if you select "Settings and Options", the following screen will appears and you can change each setting in the left column. 2-45 - MSI M675-100 | User Manual - Page 65
equipped with a 2.5-inch hard disk drive. The hard disk drive is a storage device with much higher speed and larger capacity than other storage devices, such as the floppy disk drive and optical storage devices. Therefore, it is usually used to install the operating system and software applications - MSI M675-100 | User Manual - Page 66
dual format recorder, allows you to record both the -R/RW and +R/RW formats. n Super Multi Drive: A multi format recorder, allows you to record the -R/RW, +R/RW, -RAM, CDR and CD-RW formats. n DVD Dual Layer: It provides two individual recordable layers on a single sided DVD disc. To take advantage - MSI M675-100 | User Manual - Page 67
Getting Started 1. The optical storage devices are classified as a Class 1 Laser products. Use of controls or adjustments or performance of procedures other than those specified here in may result in hazardous radiation exposure. 2. Do not touch the lens inside the drive. 2-48 - MSI M675-100 | User Manual - Page 68
Getting Started Inserting the CD The following instruction describes the general procedure when operating the optical storage device, including the DVD-ROM drive. 1. Confirm that the Notebook is turned on. 2. Press the Eject Button on the drive's panel and the CD tray will slide out partially. Then, - MSI M675-100 | User Manual - Page 69
Started Removing the CD 1. Press the Eject Button on the drive's panel and the CD tray will slide out partially. edge with your fingers and lift it up from the tray. 3. Push the tray back into the drive. 1. Confirm that the CD is placed correctly and securely in the tray before closing the tray. 2. - MSI M675-100 | User Manual - Page 70
Chapter 1 Chapter 2 Chapter 3 Chapter 4 Preface General Introductions Getting Started Customizing this Notebook BIOS setup - MSI M675-100 | User Manual - Page 71
Customizing this Notebook Connecting the External Devices The I/O (input/output) ports on the Notebook allow you to connect peripheral devices. IEEE 1394 Device LAN Modem Microphone Speakers/ Earphones Mouse/ Keyboard Printer Monitor WebCam Television 3-2 - MSI M675-100 | User Manual - Page 72
. 2. Connect your mouse to the Notebook. 3. The Notebook may auto detect your mouse driver and enable the mouse function. If there is no detection of you mouse you can manually enable the mouse by going to Start Menu à Control Panel à Add Hardware to add the new device. Connecting the Keyboard You - MSI M675-100 | User Manual - Page 73
end of the printer cable to the Notebook's USB port and the other end to the printer. 3. Connect the power cord and turn on the printer. 4. Turn on the Notebook and the system will detect a new device. Install the required driver. For further instructions, please refer to your printer's manual. 3-4 - MSI M675-100 | User Manual - Page 74
monitor's power cord and turn on the monitor. 4. Turn on the Notebook and the monitor should respond by default. If not, you can switch the display mode by pressing [Fn]+[F2]. Alternately, you can change the display mode by configuring the settings in Display Properties of Windows operating system - MSI M675-100 | User Manual - Page 75
RJ-45 connector of the Notebook allows you to connect the LAN (local area network) devices, such as a hub, switch and gateway, to build a network connection. For more instructions or detailed steps on connecting to the LAN, please ask your MIS staff or network manager for help. Using the Modem The - MSI M675-100 | User Manual - Page 76
-II PC cards that support various functions for your necessary, including the LAN/WLAN card, modem card and memory card. The following instruction provides you with a basic installation for the PC card, including how to install and remove it. For more information, please refer to the manual of your - MSI M675-100 | User Manual - Page 77
it out of the slot. 3. Reattach the dummy card back to the slot. Eject Button 1. Do not hold the "golden finger" when installing the PC card; otherwise, it may cause interference or damage to the PC card. 2. Before removing the PC card, you should stop the device in Windows operating system. 3-8 - MSI M675-100 | User Manual - Page 78
USB 2.0 interfaces. The following instruction provides you with a basic installation for the Express Card, including how to install and remove it. For more information, please refer to the manual of your Express Card. Installing the Express Card 1. Locate the Express Card slot on your notebook. If - MSI M675-100 | User Manual - Page 79
Customizing this Notebook Safely Remove Hardware If you connect any peripheral device to your system, the Safely Remove Hardware icon ( ) will appear on the taskbar. Double-click the icon to bring up the Safely Remove Hardware dialog box. You can see all connected peripheral devices here. If you - MSI M675-100 | User Manual - Page 80
Chapter 1 Chapter 2 Chapter 3 Chapter 4 Preface General Introductions Getting Started Customizing this Notebook BIOS setup - MSI M675-100 | User Manual - Page 81
, restart the system by turning it OFF and ON, or simultaneously pressing [Ctrl]+[Alt]+[Delete] keys to restart. The screen snaps and setting options in this chapter are for your references only. The actual setting screens and options on your Notebook may be different because of BIOS update. 4-2 - MSI M675-100 | User Manual - Page 82
You can use only the keyboard to control the cursor in the BIOS Setup Utility. Press left arrow to select one menu title. some items, press this key to change setting field. Bring up help screen providing the information of control keys. 1) Exit the BIOS Setup Utility. 2) Return to the previous - MSI M675-100 | User Manual - Page 83
Setup Utility, the Main menu will appear on the screen. The Main menu displays the system information, including the basic configuration. Main menu Show System Overview information about BIOS version, CPU features, Memory size and setting of System Time and Date. Advanced menu Configure IDE and USB - MSI M675-100 | User Manual - Page 84
Main menu BIOS Setup System Overview System Overview will show you BIOS version and other information about its build date and update notes. Following is CPU's information about its Type and Speed. System Time This item allows you to set the system time. The system clock will go on no matter you - MSI M675-100 | User Manual - Page 85
to set the system date. The date format is [day:month:date:year]. Day Day of the week, from Sun to Sat, which is determined by BIOS (read-only). up a window showing the detailed information of the device, including the device name, vendor, LBA mode, PIO mode and more. System Information This - MSI M675-100 | User Manual - Page 86
Advanced menu BIOS Setup Advanced Settings PowerNow This item allows you to enable or disable AMD PowerNow technology. When set to Enabled, the system always operates in a conserve power mode. If you want optimize the processor, set this item to Disabled, so that the processor's speed will vary - MSI M675-100 | User Manual - Page 87
Boot menu BIOS Setup Boot Settings Configuration Configure settings during system boot. Boot Device Priority --1st, 2nd, and 3rd Boot Device The three items allow you to set the sequence of boot devices where BIOS attempts to load the disk operating system. 4-8 - MSI M675-100 | User Manual - Page 88
select the function, a message box will appear on the screen as below: Enter New Password Type the password you want, up to six characters in length and press [Enter]. The password typed now will replace any previously set password from CMOS memory. You may also press [ESC] to abort the selection - MSI M675-100 | User Manual - Page 89
item is used to specify the type of BIOS password protection that is implemented. Settings are described Always A password prompt appears every time when the Notebook is powered on or when end users try to run Setup. To Once the password is disabled, the system will boot and you can enter Setup - MSI M675-100 | User Manual - Page 90
Exit menu BIOS Setup Exit & Save Changes Save the changes you have made and exit the utility. Exit & Discard Changes Exit the utility the previous configuration before running the utility. Load Setup Defaults Select this item to load the default settings for optimal system performance. 4-11 - MSI M675-100 | User Manual - Page 91
BIOS Setup 4-12
-
 1
1 -
 2
2 -
 3
3 -
 4
4 -
 5
5 -
 6
6 -
 7
7 -
8
-
9
-
10
-
11
-
12
-
13
-
14
-
15
-
16
-
17
-
18
-
19
-
20
-
21
-
22
-
23
-
24
-
25
-
26
-
27
-
28
-
29
-
30
-
31
-
32
-
33
-
34
-
35
-
36
-
37
-
38
-
39
-
40
-
41
-
42
-
43
-
44
-
45
-
46
-
47
-
48
-
49
-
50
-
51
-
52
-
53
-
54
-
55
-
56
-
57
-
58
-
59
-
60
-
61
-
62
-
63
-
64
-
65
-
66
-
67
-
68
-
69
-
70
-
71
-
72
-
73
-
74
-
75
-
76
-
77
-
78
-
79
-
80
-
81
-
82
-
83
-
84
-
85
-
86
-
87
-
88
-
89
-
90
-
91
 |
 |

General Introductions
Chapter 1
Getting Started
Chapter 2
Customizing this Notebook
Chapter 3
BIOS setup
Chapter 4
Preface
G52-16331X4