MSI MS 7030 User Guide - Page 100
Assigning a Dedicated Disk, Step 1: Mark the Disk as a Free Disk, Step 2: Dedicate the Free Disk
 |
View all MSI MS 7030 manuals
Add to My Manuals
Save this manual to your list of manuals |
Page 100 highlights
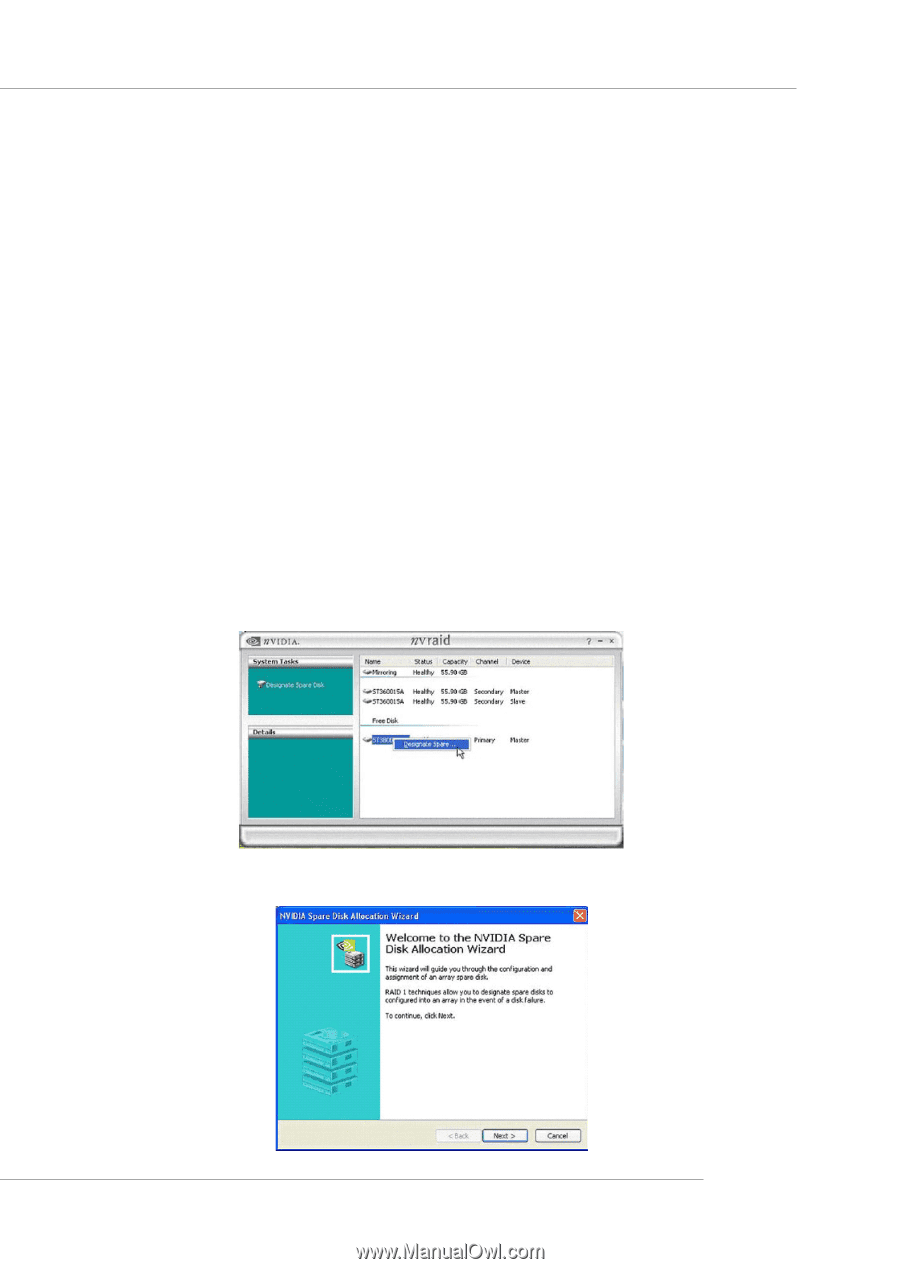
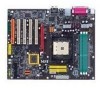
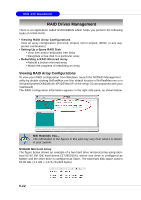
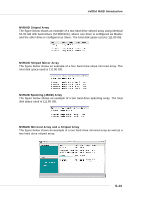
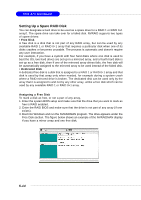
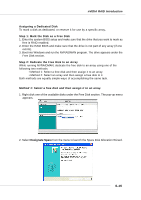
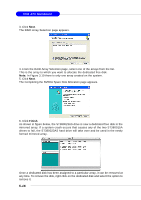
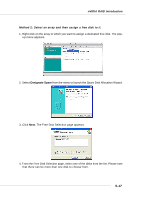
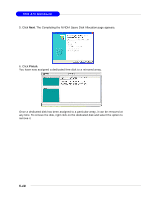
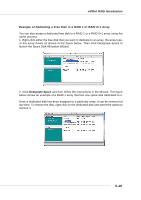
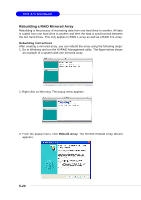
nVIDIA RAID Introduction Assigning a Dedicated Disk To mark a disk as dedicated, or reserve it for use by a specific array, Step 1: Mark the Disk as a Free Disk 1. Enter the system BIOS setup and make sure that the drive that you want to mark as free is RAID enabled. 2. Enter the RAID BIOS and make sure that the drive is not part of any array (if one exists). 3. Boot into Windows and run the NVRAIDMAN program. The drive appears under the Free Disk section. Step 2: Dedicate the Free Disk to an Array While running NVRAIDMAN, dedicate the free disk to an array using one of the following two methods: • Method 1: Select a free disk and then assign it to an array. • Method 2: Select an array and then assign a free disk to it. Both methods are equally simple ways of accomplishing the same task. Method 1: Select a free disk and then assign it to an array. 1. Right click one of the available disks under the Free Disk section. The pop-up menu appears. 2. Select Designate Spare from the menu to launch the Spare Disk Allocation Wizard. 5-15
-
 1
1 -
2
-
3
-
4
-
5
-
6
-
7
-
8
-
9
-
10
-
11
-
12
-
13
-
14
-
15
-
16
-
17
-
18
-
19
-
20
-
21
-
22
-
23
-
24
-
25
-
26
-
27
-
28
-
29
-
30
-
31
-
32
-
33
-
34
-
35
-
36
-
37
-
38
-
39
-
40
-
41
-
42
-
43
-
44
-
45
-
46
-
47
-
48
-
49
-
50
-
51
-
52
-
53
-
54
-
55
-
56
-
57
-
58
-
59
-
60
-
61
-
62
-
63
-
64
-
65
-
66
-
67
-
68
-
69
-
70
-
71
-
72
-
73
-
74
-
75
-
76
-
77
-
78
-
79
-
80
-
81
-
82
-
83
-
84
-
85
-
86
-
87
-
88
-
89
-
90
-
91
-
92
-
93
-
94
-
 95
95 -
 96
96 -
 97
97 -
 98
98 -
 99
99 -
 100
100 -
 101
101 -
 102
102 -
 103
103 -
 104
104 -
 105
105 -
106
-
107
-
108
-
109
-
110
-
111
-
112
-
113
 |
 |