MSI MS 7030 User Guide - Page 39
Control Keys, Getting Help, General Help <F1>
 |
View all MSI MS 7030 manuals
Add to My Manuals
Save this manual to your list of manuals |
Page 39 highlights
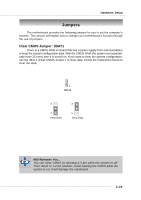
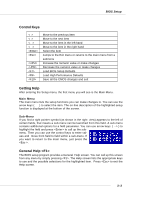
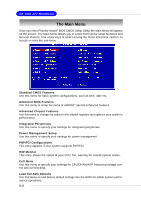
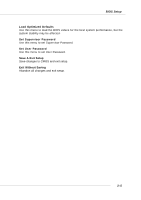
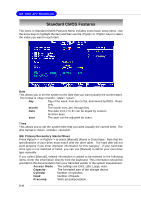
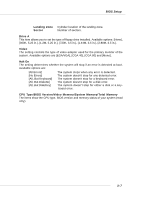
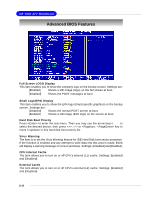
BIOS Setup Control Keys Enter> Move to the previous item Move to the next item Move to the item in the left hand Move to the item in the right hand Select the item Jumps to the Exit menu or returns to the main menu from a submenu Increase the numeric value or make changes Decrease the numeric value or make changes Load BIOS Setup Defaults Load High Performance Defaults Save all the CMOS changes and exit Getting Help After entering the Setup menu, the first menu you will see is the Main Menu. Main Menu The main menu lists the setup functions you can make changes to. You can use the arrow keys ( ↑↓ ) to select the item. The on-line description of the highlighted setup function is displayed at the bottom of the screen. Sub-Menu If you find a right pointer symbol (as shown in the right view) appears to the left of certain fields, that means a sub-menu can be launched from this field. A sub-menu contains additional options for a field parameter. You can use arrow keys ( --> ) to highlight the field and press to call up the submenu. Then you can use the control keys to enter values and move from field to field within a sub-menu. If you want to return to the main menu, just press the . General Help The BIOS setup program provides a General Help screen. You can call up this screen from any menu by simply pressing . The Help screen lists the appropriate keys to use and the possible selections for the highlighted item. Press to exit the Help screen. 3-3
-
 1
1 -
2
-
3
-
4
-
5
-
6
-
7
-
8
-
9
-
10
-
11
-
12
-
13
-
14
-
15
-
16
-
17
-
18
-
19
-
20
-
21
-
22
-
23
-
24
-
25
-
26
-
27
-
28
-
29
-
30
-
31
-
32
-
33
-
 34
34 -
 35
35 -
 36
36 -
 37
37 -
 38
38 -
 39
39 -
 40
40 -
 41
41 -
 42
42 -
 43
43 -
 44
44 -
45
-
46
-
47
-
48
-
49
-
50
-
51
-
52
-
53
-
54
-
55
-
56
-
57
-
58
-
59
-
60
-
61
-
62
-
63
-
64
-
65
-
66
-
67
-
68
-
69
-
70
-
71
-
72
-
73
-
74
-
75
-
76
-
77
-
78
-
79
-
80
-
81
-
82
-
83
-
84
-
85
-
86
-
87
-
88
-
89
-
90
-
91
-
92
-
93
-
94
-
95
-
96
-
97
-
98
-
99
-
100
-
101
-
102
-
103
-
104
-
105
-
106
-
107
-
108
-
109
-
110
-
111
-
112
-
113
 |
 |