MSI U135DX User Manual
MSI U135DX Manual
 |
View all MSI U135DX manuals
Add to My Manuals
Save this manual to your list of manuals |
MSI U135DX manual content summary:
- MSI U135DX | User Manual - Page 1
CHAPTER 1 Preface - MSI U135DX | User Manual - Page 2
Interference Statement 1-5 FCC Conditions ...1-6 Safety Instructions...1-7 Safety Guideline for Using Lithium Battery 1-10 WEEE Statement ...1-14 Trademarks ...1-21 Reversion History ...1-21 Introductions Manual Map ...2-2 Unpacking...2-3 Specification...2-4 Product Overview ...2-8 Top-open View - MSI U135DX | User Manual - Page 3
Battery Power...3-4 ECO Power Saving Function...3-9 Power Management in Windows OS 3-10 Energy Saving Tips...3-12 Basic Operations ...3-13 Safety and Comfort Tips...3-13 Having a Good Work Habit...3-14 Knowing the Keyboard 3-29 Safely Remove Hardware ...3-32 Components Replacement and Upgrade 3-33 - MSI U135DX | User Manual - Page 4
Preface 1-4 BIOS Setup About BIOS Setup...4-2 When to Use BIOS Setup...4-2 How to Run BIOS Setup...4-2 Control Keys ...4-3 BIOS Setup Menu...4-4 Main menu...4-5 Advanced menu...4-7 Boot menu ...4-9 Security menu...4-10 Save & Exit menu...4-12 - MSI U135DX | User Manual - Page 5
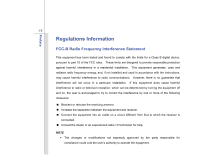
and, if not installed and used in accordance with the instructions, may cause harmful interference to radio communications. However, there to radio or television reception, which can be determined by turning the equipment off and on, the user is encouraged to try to correct the interference by one - MSI U135DX | User Manual - Page 6
Preface 1-6 Š Shield interface cables and AC power cord, if any, must be used in order to comply with the emission limits. FCC Conditions This device complies with part 15 of the FCC Rules. Operation is subject to the following two conditions: „ This device may not cause harmful interference. „ - MSI U135DX | User Manual - Page 7
Instructions Read the safety instructions carefully and thoroughly. All cautions and warnings on the equipment or user's manual should be noted. Keep the User's Guide the AC power cord or uninstall the battery pack or switch off the wall socket if the equipment would be left unused - MSI U135DX | User Manual - Page 8
to protective earthing system of the building. Always keep the strong magnetic or electrical objects away from the equipment. Š To prevent explosion caused by improper battery replacement, use the same or equivalent type of battery recommended by the manufacturer only. Š Always keep the - MSI U135DX | User Manual - Page 9
get the equipment checked by a service personnel: Š The power cord or plug is damaged. Š Liquid has penetrated into the equipment. Š The equipment has been exposed to moisture. Š The equipment has not worked well or you can not get it work according to User's Manual. Š The equipment was dropped and - MSI U135DX | User Manual - Page 10
Preface 1-10 Safety Guideline for Using Lithium Battery (English) CAUTION: Danger of explosion if battery is incorrectly replaced. Replace only with the same or equivalent type recommended by the equipment manufacturer. Discard used batteries according to manufacturer's instructions. (French) ( - MSI U135DX | User Manual - Page 11
Preface 1-11 üreticinin talimatlarına göre degerlendiriniz. (Greek (Polish) (Polski) OSTRZEŻENIE: Nieprawidłowa wymiana może spowodować eksplozję baterii. Zamianę można wykonać wyłącznie na baterię tego samego lub równoważnego typu zalecaną przez producenta urządzenia. Zużyte baterie można - MSI U135DX | User Manual - Page 12
Preface 1-12 (Vietnamese) (Tieng Viet) LƯU Ý: Thay thế pin không tương thích có thể dẫn đến nguy cơ bị nổ. Chỉ thay thế bằng pin cùng loại hoặc loại tương ứng khuyên dùng bởi nhà sản xuất thiết bị. Vứt bỏ pin đã sử dụng theo hướng dẫn của nhà sản xuất. (Thai (Indonesian) (Bahasa - MSI U135DX | User Manual - Page 13
batteribyte. Använd samma batterityp eller en ekvivalent typ som rekommenderas av apparattillverkaren. Kassera använt batteri enligt fabrikantens instruction. (Finnish) (Suomi) VAROITUS: Paristo voi räjähtää, jos se on virheellisesti asennettu. Vaihda paristo ainoastaan valmistajan suosittelemaan - MSI U135DX | User Manual - Page 14
Preface 1-14 proizvođača. (Estonian) (Eesti) ETTEVAATUST! Plahvatusoht, kui aku on valesti paigaldatud. Asendage ainult sama või tootja poolt soovitatud võrdväärse akuga. Hävitage kasutatud aku vastavalt tootja juhistele. Persian) Arabic WEEE Statement (English) Under the European - MSI U135DX | User Manual - Page 15
Preface 1-15 (German) (Deutsch) Gemäß der Richtlinie 2002/96/EG über Elektro- und Elektronik-Altgeräte dürfen Elektro- und Elektronik-Altgeräte nicht mehr als kommunale Abfälle entsorgt werden, die sich auf 13.August, 2005 wirken. Und der Hersteller von bedeckt Elektronik-Altgeräte gesetzlich zur - MSI U135DX | User Manual - Page 16
Preface 1-16 (Greek 2002/96 WEEE 13 2005 (Polish) (Polski) Zgodnie z Dyrektywą Unii Europejskiej ("UE") dotyczącą odpadów produktów elektrycznych i elektronicznych (Dyrektywa 2002/96/EC), która wchodzi w życie 13 sierpnia 2005, tzw. "produkty oraz wyposażenie elektryczne i elektroniczne " - MSI U135DX | User Manual - Page 17
Preface 1-17 (Japanese 2005 年 8 月 13 EU WEEE (Korean 2005 년 8 월 13 EU 2002/96/EC (Vietnamese) (Tieng Viet) Theo Hướng dẫn của Liên minh Châu Âu ("EU") về Thiết bị điện & điện tử đã qua sử dụng, Hướng dẫn 2002/96/EC, vốn đã có hiệu lực vào ngày 13/8/2005, các sản phẩm thuộc "thiết bị - MSI U135DX | User Manual - Page 18
Preface 1-18 odbačeni kao običan otpad i proizvođači ove opreme biće prinuđeni da uzmu natrag ove proizvode na kraju njihovog uobičajenog veka trajanja. (Netherlands) (Nederlands) De richtlijn van de Europese Unie (EU) met betrekking tot Vervuiling van Electrische en Electronische producten (2002/ - MSI U135DX | User Manual - Page 19
Preface 1-19 (Slovak) (Slovenčina) Na základe smernice Európskej únie („EU") o elektrických a elektronických zariadeniach číslo 2002/96/ES, ktorá vstúpila do platnosti 13. augusta 2005, výrobky, ktorými sú „elektrické a elektronické zariadenia" nesmú byť zneškodňované spolu s komunálnym odpadom a - MSI U135DX | User Manual - Page 20
Preface 1-20 2002/96/EC, koja je na snazi od 13. kolovoza 2005., "električni i elektronički uređaji" se ne smiju više bacati zajedno s kućnim otpadom i proizvođači su obvezni zbrinuti takve proizvode na kraju njihovog životnog vijeka. (Estonian) (Eesti) Vastavalt Euroopa Liidu ("EL") direktiivile - MSI U135DX | User Manual - Page 21
Preface 1-21 Trademarks All trademarks are the properties of their respective owners. SRS Premium Sound, SRS and the symbol are trademarks of SRS Labs ,Inc. Revision History Version 1.0 Revision Note First release Date 11, 2009 - MSI U135DX | User Manual - Page 22
CHAPTER 2 Introductions - MSI U135DX | User Manual - Page 23
notebook. Also, this chapter provides the specification of this notebook, and introduces the function buttons, quick launch buttons, connectors, LEDs and externals of this notebook. Chapter 3, Getting Started, gives the basic operation instructions on using keyboard, touchpad, hard disk drive, and - MSI U135DX | User Manual - Page 24
. The package should contain the following items: Notebook Quick Start Manual High-capacity Li-ion battery AC/DC adapter and AC power cord Carry bag (optional) All-in-one application disk, containing the full version of user's manual, drivers, utilities, and optional recovery function, etc.. - MSI U135DX | User Manual - Page 25
2-4 Introductions Specification Physical Characteristic Dimension Weight 260 (W) x 180 (D) x 19~31.5 (H) mm 1.2 kg CPU Processor Type Support Processor L2 Cache FSB Speed Special Notification Micro-FCBGA8 Intel® AtomTM N450 processor 512KB Support 667 MHz The actual processor preinstalled in - MSI U135DX | User Manual - Page 26
Introductions 2-5 Memory Technology Memory Power AC/DC Adapter Battery Type RTC Battery I/O Port Monitor(VGA) USB Mic-in Headphone Out RJ45 Card Reader cells (optional) Yes 15 pin D-Sub x 1 x 3 (USB version 2.0) x 1 x 1 x 1 x 1 (SD / MMC / MS) The supported memory cards may vary without notice. - MSI U135DX | User Manual - Page 27
without notice) LAN 10/100 Ethernet Wireless LAN Optional Supported WiMax Optional Supported Bluetooth Optional Supported 3G/ 3.5G Optional Supported Audio Sound Interface Internal Speaker Sound Volume Intel HD audio link 2 speakers with housing Adjust by volume button, K/B hot-key & SW - MSI U135DX | User Manual - Page 28
Introductions 2-7 WebCam CMOS (optional) Software & BIOS USB Flash Boot BIOS Others Kensington Lock Hole Compliance Supported Yes, USB floppy boot up DOS only Fast Boot Support --- Yes x 1 WHQL - MSI U135DX | User Manual - Page 29
actual one that users purchased. Top-open View The figure of top-open view and description shown below will lead you to browse the main operating area of your notebook. 1 The figures show here are for reference only. 1. Webcam/ Webcam LED 2. Power Button / Power LED 3. Keyboard / Quick Launch [Fn - MSI U135DX | User Manual - Page 30
all the functions of a full-sized keyboard. Quick Launch [Fn] Buttons Use the [Fn] buttons on the keyboard to activate the specific applications or tools. With the help of these quick launch buttons, users will be able to do work more efficiently. + Webcam + ECO (Power Saving) Press and hold - MSI U135DX | User Manual - Page 31
2-10 + 3G/ Wireless LAN / Bluetooth / WiMax (optional) Š Press and hold the Fn button, and then press the F11 button repeatedly to enable or disable the 3G/ Wireless LAN/ Bluetooth/ WiMax function recurrently. Š Note: Functions listed here may be optional supported depending on the model users - MSI U135DX | User Manual - Page 32
, or when the notebook is turned off. Wireless LAN (WiFi) / WiMax (optional): Š Wireless LAN LED indicator glows green when Wireless LAN (WiFi) or WiMax function is enabled. Š Note: Functions listed here may be optional supported depending on the model users purchased. Š Warning: For flight safety - MSI U135DX | User Manual - Page 33
Introductions 2-12 Bluetooth Bluetooth: Š Bluetooth LED indicator glows blue when Bluetooth function is enabled. Š Warning: For flight safety consideration, make sure this LED indicator goes out when you are in flight. Š Contact the local distributor for - MSI U135DX | User Manual - Page 34
Introductions 2-13 Front Side View 1 1 1. Stereo Speakers 1. Stereo Speakers Give high quality sound blaster with stereo system and Hi-Fi function supported. - MSI U135DX | User Manual - Page 35
2.0 port allows you to connect USB-interface peripheral devices, such as the mouse, keyboard, modem, portable hard disk module, printer and more. 2. Card Reader The built-in card reader may support various types of memory card, such as MMC (Multi-Media Card), XD (eXtreme Digital), SD (Secure Digital - MSI U135DX | User Manual - Page 36
Introductions 2-15 3. Audio Port Connectors Make high quality sound blaster with stereo system and Hi-Fi function supported. Headphone: A connector for speakers or headphones. Microphone: Used for an external microphone. 4. VGA Port The 15-pin D-sub VGA port allows you to connect an - MSI U135DX | User Manual - Page 37
Connector To connect the AC/ DC adapter and supply power for the notebook. 2. Kensington Lock This notebook provides a Kensington Lock hole, which allows users to secure the notebook in place with a key or some mechanical PIN device and attached through a rubberised metal cable. The end of the cable - MSI U135DX | User Manual - Page 38
Introductions 2-17 4. USB Port The USB 2.0 port allows you to connect USB-interface peripheral devices, such as the mouse, keyboard, modem, portable hard disk module, printer and more. - MSI U135DX | User Manual - Page 39
Introductions 2-18 Rear Side View 1 1. Battery Pack 1. Battery Pack This notebook will be powered by the battery pack when the AC/ DC adapter is disconnected. - MSI U135DX | User Manual - Page 40
Battery Release Button 2. Battery Lock/ Unlock Button 3. Battery Pack 4. Ventilator 1. Battery Release Button It is a bounce-back device as a preparation for releasing the battery pack. Slide it with one hand and pull the battery pack carefully with the other. 2. Battery Lock/ Unlock Button Battery - MSI U135DX | User Manual - Page 41
Introductions 2-20 3. Battery Pack This notebook will be powered by the battery pack when the AC/ DC adapter is disconnected. 4. Ventilator The ventilator is designed to cool the system. DO NOT block the ventilator for air circulation. - MSI U135DX | User Manual - Page 42
CHAPTER 3 Getting Started - MSI U135DX | User Manual - Page 43
adapter to the notebook and use the AC power while using this notebook for the first time. When the AC power is connected, recharging the battery will start immediately. Note that the AC/DC adapter included in the package is approved for your notebook; using other adapter model may damage either - MSI U135DX | User Manual - Page 44
Getting Started 3-3 Connecting the AC Power 1. Unpack the package to find the AC/DC adapter and power cord. 2. Attach the power cord to the connector of the AC/DC adapter. 3. Plug the DC end of the adapter to the notebook, and the male end of the power cord to the electrical outlet. Disconnecting - MSI U135DX | User Manual - Page 45
the notebook. Be aware of that this battery pack may be damaged if users try to disassemble the battery pack on their own. Also, note that the limited warranty to the battery pack may also lose its efficacy when this battery pack is disassembled not by an authorized machinist. To prevent explosion - MSI U135DX | User Manual - Page 46
steps below: 1. Use both hands to align and insert the battery pack into the compartment with correct orientation. 2. Slightly slide and press the battery pack into the right position until the battery back is fastened in the compartment. 3. Press the lock/ unlock button to the Lock position. 12 3 - MSI U135DX | User Manual - Page 47
steps below: 1. Make sure the notebook is turned off, and the AC power is disconnected. 2. Press the lock/ unlock button in the unlocked position. 3. Locate the battery release button on the bottom side. 4. Push and hold the release button to the battery releasing direction as shown on the bottom - MSI U135DX | User Manual - Page 48
may present a risk of fire or explosion, which could cause serious injury. Š Only replace the main battery pack with the same or equivalent type of battery. Š Do not disassemble, short-circuit or incinerate batteries or store them to temperatures above +60° C (+140° F). Š Do not temper with - MSI U135DX | User Manual - Page 49
tips before recharging the battery: Š If a charged battery pack is not available, save your work and close all turn off the system without interrupting the charging process. Š The battery pack uses Lithium-ion battery cells that have no "memory effect." It is unnecessary to discharge the battery - MSI U135DX | User Manual - Page 50
3-9 ECO Power Saving Function (Optional Supported) Getting Started While the AC power is disconnected, read the instructions bellow to activate the ECO Power Saving function under battery mode: 1. Press and hold the Fn button. 2. Press the F10 button repeatedly to enable/disable the ECO Power - MSI U135DX | User Manual - Page 51
turn off your display or set your PC to standby/hibernate mode after a period of user inactivity. Follow the instructions below to adjust the power management settings in Windows OS: 1. Power Options in Windows to a command from any of following: Š the power button, Š the mouse, Š the keyboard. - MSI U135DX | User Manual - Page 52
3-11 1 2 3 4 Getting Started - MSI U135DX | User Manual - Page 53
after a period of user inactivity. Š Utilize the Fn and F12 sleep mode keys to turn into power saving mode. Š Tune the settings in Power Options under Windows OS to optimize the computer's power management. Š Always disconnect the AC power cord or uninstall the battery pack or switch off the wall - MSI U135DX | User Manual - Page 54
instructions to assure your own safety, and make yourself comfortable during the operations. Safety and Comfort Tips The notebook is a portable platform that allows you to work when operating. Š Put your hands on the desk naturally to support your wrists. Š Adjust the angle/position of the LCD panel - MSI U135DX | User Manual - Page 55
panel. 3. Adjust the desk's height. 4. Sit straight and keep a good posture. 3 5. Adjust the chair's height. 1 5 Having a Good Work Habit Have a good work habit is important if you have to work with your notebook for long periods of time; otherwise, it may cause discomfort or injury to you - MSI U135DX | User Manual - Page 56
provides a full-functioned keyboard. This keyboard can be divided into four categories: Typewriter keys, Cursor keys, Numeric keys and Function keys. Typewriter keys Numeric keys The keyboard shown here may vary from the actual one, depending on which county users purchase the notebook. Cursor - MSI U135DX | User Manual - Page 57
Getting Started 3-16 Typewriter keys Numeric keys Cursor keys / Function keys - MSI U135DX | User Manual - Page 58
3-17 Typewriter Keys In addition to providing the major function of the keyboard, these typewrite keys also provide several keys for special purposes, such Keys Find the numeric keys among the keyboard, and activate the Num Lock function to use these numeric keys to enter numbers and calculations. - MSI U135DX | User Manual - Page 59
the line (or document). The Backspace key, [Ins] and [Del] keys at upper right corner are use for editing purpose. This key is used to switch the typing mode between "insert" and "overtype" modes. Press this key to delete one character to the right of the cursor and move the following - MSI U135DX | User Manual - Page 60
Logo key ( ) on the keyboard, which are used to perform Windows-specific functions, such as opening the Start menu and launching the shortcut menu. For more information of the two keys, please refer to your Windows manual or online help. „ [Fn] Key + Switch the display output mode between the - MSI U135DX | User Manual - Page 61
. Š Note that ECO Engine is an optional function. Š Press and hold the Fn button, and then press the F11 button repeatedly to enable or disable the 3G/ Wireless LAN/ Bluetooth/ WiMax function recurrently. Š Note: Functions listed here may be optional supported depending on the model users purchased. - MSI U135DX | User Manual - Page 62
pointing the location of the cursor on the screen and making selection with its two buttons. 1. Cursor Movement Area This pressure-sensitive area and control the cursor on the screen by moving one of your finger. 2. Enter Buttons Acts as the Enter button of the keyboard. 1 2 The touchpad figures - MSI U135DX | User Manual - Page 63
-handed user, you may want to swap the functions of the two buttons. In addition, you can change the size, shape, moving speed and other advanced features of the cursor on the screen. To configure the touchpad, you can use the standard Microsoft or IBM PS/2 driver in your Windows operating system - MSI U135DX | User Manual - Page 64
Getting Started 3-23 that your each tap on the touchpad is equivalent to pressing the left button. Tapping twice more rapidly on the touchpad is to execute a double-click. 1. Move the cursor by sliding 2 your fingertip. 1 2. Put your wrist on the desk comfortably. - MSI U135DX | User Manual - Page 65
operating system and software applications. To avoid unexpected data loss in your system, please backup your critical files regularly. Do not turn off the notebook when the hard disk In-use LED is on. Do not remove or install the hard disk drive when the notebook is turned - MSI U135DX | User Manual - Page 66
optical storage device may vary depending on the model you purchased. The devices shown in the reference figures here may be different from the devices users have. - MSI U135DX | User Manual - Page 67
This notebook provides USB ports for connecting various USB devices, such as mouse, keyboard, digital camera, webcam, printer, and external optical storage device, ete.. To connect these devices, install the drivers for each device first if necessary, and then connect the device to the notebook - MSI U135DX | User Manual - Page 68
larger display with higher resolution. The 15-pin D-sub VGA port allows users to connect an external monitor or other standard VGA-compatible device (such the external display should respond by default. If not, you can switch the display mode by pressing [Fn]+[F2]. Alternately, you can change the - MSI U135DX | User Manual - Page 69
Using the LAN The RJ-45 connector of the notebook allows you to connect the LAN (local area network) devices, such as a hub, switch and gateway, to build a network connection. For more instructions or detailed steps on connecting to the LAN, please ask your MIS staff or network manager for help. - MSI U135DX | User Manual - Page 70
Getting Started 3-29 Using Wireless LAN Connection (optional supported) This notebook is equipped with wireless LAN module which allows to users to perform fast data transmission with the standard IEEE 802.11 for wireless LAN. This gives users the mobility to move around within a broad coverage - MSI U135DX | User Manual - Page 71
Getting Started 3-30 Using Bluetooth Connection (optional supported) This notebook is equipped with Bluetooth module which allows to users to connect various Bluetooth-enabled devices to the notebook. Bluetooth provides a way to connect and exchange information between devices such as mobile phones - MSI U135DX | User Manual - Page 72
. The diagram shown below is for reference only. Safely Remove Hardware Select the device you want to unplug or eject, and then click Stop. When Windows notifies you that it is safe to do so unplug the device from your computer. Hardware Devices: 1 USB Mass Storage Device Stop a Hardware device - MSI U135DX | User Manual - Page 73
Started 3-32 Components Replacement and Upgrade Please be noticed that the memory, hard disk drive, wireless LAN / Bluetooth module and battery pack preinstalled in the product users purchased may be upgradable or replaceable by user's request depending on the models users purchased. 2 3 1 4 - MSI U135DX | User Manual - Page 74
battery pack, and the battery pack is replaceable by users. To replace the battery pack, please refer to the section of Using Battery power for details. This notebook is equipped with a wireless LAN/ Bluetooth module, and the module may be upgradable and replaceable by authorized dealer or service - MSI U135DX | User Manual - Page 75
, please refer to the specification in the User's Manual provided. For any further information about the product users purchased, please contact the local dealer. Do not attempt to upgrade or replace any component of the product, if you are not an authorized dealer or service center, since it may - MSI U135DX | User Manual - Page 76
CHAPTER 4 BIOS Setup - MSI U135DX | User Manual - Page 77
disappears before you respond and you still wish to enter Setup, either restart the system by turning it OFF and ON, or simultaneously pressing [Ctrl]+[Alt]+[Delete] keys to restart. Be noted that the screen snaps and setting options in this chapter are for your references only. The actual setting - MSI U135DX | User Manual - Page 78
BIOS Setup 4-3 Control Keys You can use only the keyboard to control the cursor in the BIOS Setup Utility. Press left . In some items, press this key to change setting field. Bring up help screen providing the information of control keys. 1) Exit the BIOS Setup Utility. 2) Return to the previous - MSI U135DX | User Manual - Page 79
will appear on the screen. Select the tags to enter the other menus. Main Menu Show system overview information about BIOS version, CPU features, memory size and setting of the password settings for administrator and user. Save & Exit Menu Save or discard the changes before leaving the BIOS Setup - MSI U135DX | User Manual - Page 80
12 (December). The date from 01 to 31. The year can be adjusted by users. Š System Time This item allows you to set the system time. The system clock installed in the notebook. Press [Enter] to bring up a window showing the detailed information of the device, including the device name, vendor, LBA mode - MSI U135DX | User Manual - Page 81
BIOS Setup 4-6 Š System Information This item provides the information about the firmware, processor, and system memory. - MSI U135DX | User Manual - Page 82
This item allows you to enable or disable Intel SpeedStep technology. When set to Disabled, the system always operates in a conserve power mode (the processor works at FSB400-600MHz or FSB533-800MHz). If you want optimize the processor, set this item to Enabled, so that the processor's speed will be - MSI U135DX | User Manual - Page 83
BIOS Setup 4-8 Š Legacy USB Support Selecting Enabled allows users to use USB devices, such as mouse, keyboard, or portable disk, in DOS system; or allows users to boot the system by USB device. Setting options: Enabled, Disabled and Auto. - MSI U135DX | User Manual - Page 84
is to set the Num Lock State when the system is powered on. Setting to On will turn on the Num Lock key when the system is powered on. Setting to Off will allow the users to use the arrow keys on the numeric keypad. Š Set Boot Priority These items showing the - MSI U135DX | User Manual - Page 85
BIOS Setup 4-10 Security Menu Š Administrator Password / User Password When this item is selected, a message box shall appear on the screen as below: Enter New Password Type a maximum of twenty-digit password and press [Enter]. The password typed now will replace any previously set password from - MSI U135DX | User Manual - Page 86
item is used to specify the type of BIOS password protection that is implemented. Settings are described below: Setup The password is required only when users try to access to BIOS SETUP UTILITY. Always The password is required every time when the Notebook is powered on or when - MSI U135DX | User Manual - Page 87
Save the changes you have made and reset the utility. Š Discard Changes and Reset Ignore the previous configuration and reset the BIOS setup utility. Š Discard Changes Abandon your changes and reload the previous configuration before running the utility. Š Restore Defaults Select this item to load
-
 1
1 -
 2
2 -
 3
3 -
 4
4 -
 5
5 -
 6
6 -
 7
7 -
8
-
9
-
10
-
11
-
12
-
13
-
14
-
15
-
16
-
17
-
18
-
19
-
20
-
21
-
22
-
23
-
24
-
25
-
26
-
27
-
28
-
29
-
30
-
31
-
32
-
33
-
34
-
35
-
36
-
37
-
38
-
39
-
40
-
41
-
42
-
43
-
44
-
45
-
46
-
47
-
48
-
49
-
50
-
51
-
52
-
53
-
54
-
55
-
56
-
57
-
58
-
59
-
60
-
61
-
62
-
63
-
64
-
65
-
66
-
67
-
68
-
69
-
70
-
71
-
72
-
73
-
74
-
75
-
76
-
77
-
78
-
79
-
80
-
81
-
82
-
83
-
84
-
85
-
86
-
87
 |
 |

CHAPTER 1
Preface