Magellan CrossoverGPS 2500T Manual - English
Magellan CrossoverGPS 2500T Manual
 |
UPC - 763357115703
View all Magellan CrossoverGPS 2500T manuals
Add to My Manuals
Save this manual to your list of manuals |
Magellan CrossoverGPS 2500T manual content summary:
- Magellan CrossoverGPS 2500T | Manual - English - Page 1
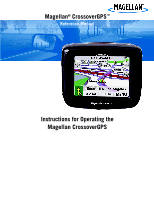
Magellan® CrossoverGPS™ Reference Manual Instructions for Operating the Magellan CrossoverGPS - Magellan CrossoverGPS 2500T | Manual - English - Page 2
be replaced, please contact Magellan Technical Support. About Charging the Magellan CrossoverGPS • Use only the AC adapter approved for your Magellan CrossoverGPS. Use of another type of AC adapter can result in malfunction and/or possible fire hazard due to battery over heating. • Use only the car - Magellan CrossoverGPS 2500T | Manual - English - Page 3
. There are no serviceable parts inside. Replace the Magellan CrossoverGPS if it is damaged or exposed to excess moisture. About the Battery • Do not attempt to replace the battery. Please contact Magellan Technical Support for issues related to the battery. • Use the charger approved for your - Magellan CrossoverGPS 2500T | Manual - English - Page 4
this device must accept any interference received, including interference that may cause users must follow the specific operating instructions for satisfying RF exposure compliance. user's authority to operate this equipment. The Magellan CrossoverGPS must be installed and operated at a Canada. 3 - Magellan CrossoverGPS 2500T | Manual - English - Page 5
CrossoverGPS, Turn it on and go, TrueView, QuickSpell, SmartDetour, and SmartVolume are trademarks of Magellan Navigation, Inc. No part of this user manual may be reproduced or transmitted in any form or by any means, electronic or mechanical, including photocopying and recording, for any purpose - Magellan CrossoverGPS 2500T | Manual - English - Page 6
Menu 4 Accessing the Application Menu 5 Satellite Status ...5 Magellan CrossoverGPS Vehicle Navigation Screens 6 Map Screen ...6 Main Menu Screens 7 Main Menu - Active Route 7 Main Menu - No Active Route 9 Locate Screen ...10 Maneuver List Screen 10 Creating Routes 11 Overview ...11 Creating - Magellan CrossoverGPS 2500T | Manual - English - Page 7
trip 21 Renaming a multiple destination trip 21 Magellan CrossoverGPS Enhanced POIs 22 Overview ...22 Accessing the Trip ...25 Map Screen Overview 26 Creating a Waypoint from the Map Screen 27 Creating a Waypoint from the Compass Screen 27 Creating a Waypoint from the Marine Navigation Menu 27 - Magellan CrossoverGPS 2500T | Manual - English - Page 8
Goto Route from the Map Screen 36 Creating a Goto Route from the Outdoor Navigation Menu 37 Creating a Trip Navigation Instruction (Vehicle Navigation only 43 GPS Options ...43 Backup and Restore (Vehicle Navigation only 43 Export Data / Import Data (Marine and Outdoor Navigation only 43 System - Magellan CrossoverGPS 2500T | Manual - English - Page 9
46 Installing the Software 46 Magellan CrossoverGPS POI Manager 47 Latitude ...47 Longitude ...47 Altitude ...48 Opening a POI File 48 Creating a New POI FIle 49 Adding Individual POI's 49 Importing a Data FIle 51 Magellan CrossoverGPS Music Manager 52 Magellan CrossoverGPS Photo Manager - Magellan CrossoverGPS 2500T | Manual - English - Page 10
companion for all your trips, from a trip to the grocery store or a hike to the country store. What the Magellan CrossoverGPS can do for you... • Provide turn-by-turn driving instructions to any address you enter. • Contains an address book that you can save addresses that you commonly need to go - Magellan CrossoverGPS 2500T | Manual - English - Page 11
. Most users will find that they can use the Magellan CrossoverGPS right out of the box and just refer to this manual on those rare occasions when a little help on a function is needed. Magellan CrossoverGPS Power The Magellan CrossoverGPS uses a touchscreen display for all user inputs. The - Magellan CrossoverGPS 2500T | Manual - English - Page 12
the firmware. Headphone Connector - (under protective cover) Please check local laws for use of headphones while driving. External Power Input - (under protective cover) Connects power to the Magellan CrossoverGPS from a cigarette lighter adapter or an approved AC adapter. Magellan CrossoverGPS - Magellan CrossoverGPS 2500T | Manual - English - Page 13
instructions using the built-in street maps. Marine - The Marine button takes you to the Marine Navigation application in the Magellan maps can be added by purchasing one of the Magellan MapSend Topographic products from www.magellanGPS.com. System - The System button takes you the System - Magellan CrossoverGPS 2500T | Manual - English - Page 14
access the Application Menu from System Settings, press the 'X' in the upper right corner. Satellite Status All of the navigation screens display a bar graph of the satellite status in the upper right corner. When the bars are green, the Magellan CrossoverGPS is getting GPS signals and is computing - Magellan CrossoverGPS 2500T | Manual - English - Page 15
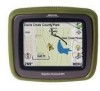
Navigation Screens Map Screen The Map Screen is the most commonly used screen on the Magellan CrossoverGPS. Whether you are getting directions or just driving around town, the Map screen will give you the peace of mind of knowing where you are. 1 13 2 12 3 11 4 5 10 6 9 7 8 This map - Magellan CrossoverGPS 2500T | Manual - English - Page 16
tapped, displays the maneuver list screen. Tapping this button displays a volume control slider and a mute button. When tapped, zooms in the map display. Satellite Status 13 Main Menu - Active Route 2 3 4 1 12 11 10 10 5 6 7 8 9 Magellan Crossover Vehicle Navigation Screens 7 - Magellan CrossoverGPS 2500T | Manual - English - Page 17
applications and system settings. Functional only when travelling on a multidestination trip. Provides access to tools to modify the trip you are on. Accesses the trip computer feature providing information about the trip that can be saved. Magellan Crossover Vehicle Navigation Screens 8 - Magellan CrossoverGPS 2500T | Manual - English - Page 18
destination. Create a route to an intersection. Accesses the second page of the route main menu. Used to access additional map regions stored in the Magellan CrossoverGPS. Accesses the options menu. Accesses the first page of the route main menu. Magellan Crossover Vehicle Navigation Screens 9 - Magellan CrossoverGPS 2500T | Manual - English - Page 19
and the route re-calculated. The bottom of the screen displays from left to right, the heading, distance to next maneuver, time to next maneuver and distance for the entire route. Tap the "X" in the upper right corner to return to the Map screen. Magellan Crossover Vehicle Navigation Screens 10 - Magellan CrossoverGPS 2500T | Manual - English - Page 20
the Map screen with information guiding you to your destination. Creating a route to a street address Most street addresses should be very easy to enter without any problems. If you are having problems entering an specific address, or just need additional information, go to the Magellan web - Magellan CrossoverGPS 2500T | Manual - English - Page 21
fall within the street number range displayed at the top of the screen). 4. Select the method to be used to calculate the route. a route using POIs POIs (points of interest) have been preloaded into the Magellan CrossoverGPS for commonly used categories such as banks, restaurants, gas stations, etc. - Magellan CrossoverGPS 2500T | Manual - English - Page 22
available list, select the routing method you want to use and the Magellan CrossoverGPS will begin calculating the route. This is a sample list of selected, select the routing method you want to use and the Magellan CrossoverGPS will begin calculating the route. This function is available whether - Magellan CrossoverGPS 2500T | Manual - English - Page 23
available street list, and enter the address number for the street (it must fall within the street number range displayed at the top of the screen). 5. Tap Save to store the home address. Changing the home address 1. From the Main Menu, tap Home. 2. Tap Change to change your home address. 3. Confirm - Magellan CrossoverGPS 2500T | Manual - English - Page 24
(it must fall within the street number range displayed at the top of the screen). 6. Tap Save to store the home address. Create a route to the Route. 3. Select the routing method you want to use and the Magellan CrossoverGPS will begin calculating the route home. Using the address book Creating - Magellan CrossoverGPS 2500T | Manual - English - Page 25
5. (Optional) Edit the name of the address by tapping on top line of the address. 6. (Optional) Tap the Favorite check box to add this address to your list of favorite addresses. 7. Tap Save. 8. Tap Route to begin routing to the destination or tap the 'X' multiple times to exit out and return to the - Magellan CrossoverGPS 2500T | Manual - English - Page 26
Menu if you are done. Creating a new address 1. From the Main Menu, tap Address Book. 2. Tap Create New Entry 3. Select Select on Map, Select Address, Dining, ATM, Gas.. or Intersection. Select on Map: The Map screen is displayed. Use your finger or stylus to pan the crosshair cursor around the - Magellan CrossoverGPS 2500T | Manual - English - Page 27
provided later in this chapter for intersections. (Setting a destination as an intersection will provide you with instructions to travel to two cross streets you have selected.) 4. The Edit Address Book screen is displayed. Edit the name or information line if desired. If this address is to be added - Magellan CrossoverGPS 2500T | Manual - English - Page 28
screen. 8. The first destination has been added to the trip. To add more destinations, tap on the destination in the Trip List and select Add. Using the instructions the Menu. 2. Select Trip Planner. 3. Select Guide Me. 4. Select the Trip to be activated from the list of saved trips. Using the - Magellan CrossoverGPS 2500T | Manual - English - Page 29
5. A list of the individual destinations is displayed. Tap on the first destination on the list to activate the trip. 6. Select the routing method to compute the trip. Editing a multiple destination trip You can also pick which destination to begin the trip on, skipping over destinations prior to - Magellan CrossoverGPS 2500T | Manual - English - Page 30
Deleting a multiple destination trip 1. From the Main Menu, tap to go to page 2 of the Menu. 2. Select Trip Planner. 3. Select Delete, Rename. 4. Select Delete. 5. Select the Trip to be deleted from the list of saved trips. 6. Confirm the deletion by tapping Yes. Renaming a multiple destination - Magellan CrossoverGPS 2500T | Manual - English - Page 31
CrossoverGPS Enhanced POIs Overview Personal POIs can be created using the Magellan PC Tools and loaded into your Magellan CrossoverGPS or an optional SD card. The Enhanced POI option provides a way of loading POIs into the receiver and can then be used to create a route. Accessing the Enhanced - Magellan CrossoverGPS 2500T | Manual - English - Page 32
the Favorite checkbox. 9. Tap Save. 10. You can now route to this POI by tapping Route or return to the main menu by tapping Cancel. Magellan CrossoverGPS Enhanced POIs 23 - Magellan CrossoverGPS 2500T | Manual - English - Page 33
will have additional marine navigational information that can enhance your marine trip. Marine Map without BlueNav map loaded. Marine Map with BlueNav map loaded. Magellan BlueNav charts are available from Magellan at http://www.magellangps.com/ products/software.asp. The Magellan CrossoverGPS is - Magellan CrossoverGPS 2500T | Manual - English - Page 34
the water the Magellan CrossoverGPS drops and records electronic breadcrumbs that represent your movement. When you look at the map screen you will notice with two destinations (or two legs). You would use the Magellan CrossoverGPS to create a trip that goes from your port waypoint, to the - Magellan CrossoverGPS 2500T | Manual - English - Page 35
heading Arrow points towards North. When tapped displays the compass screen. Displays navigation data selected. Displays the current distance scale for the map. Tap and hold for 3 seconds. A list of possible data types is displayed. Tap on the data type you want shown. Tap to display the Marine - Magellan CrossoverGPS 2500T | Manual - English - Page 36
Compass Screen 1. Tap 2. Tap 3. Tap on any of the fields to edit the name, lat/lon, altitude or information. 4. Tap Favorite to include this waypoint in your Favorites list. 5. Tap Save. 6. A waypoint is created and indicated by an 'x' on the map. Creating a Waypoint from the Marine Navigation Menu - Magellan CrossoverGPS 2500T | Manual - English - Page 37
Tap Save. Going to your Port 1. Tap 2. Select Goto Port. 3. The Map screen is displayed with a Goto route line displayed. Navigate along this line to return to your port. Creating a Goto Route from the Map Screen 1. Pan the cursor along the map to the location you want to go to. 2. Tap 3. Tap Go To - Magellan CrossoverGPS 2500T | Manual - English - Page 38
again or use the search feature to find the desired waypoint. 4. Tap on the waypoint name from the list of waypoints. 5. Tap Go To. 6. The Map screen is displayed with a Goto route line displayed. Navigate along this line to go to your destination waypoint. Creating a Trip 1. From the Marine - Magellan CrossoverGPS 2500T | Manual - English - Page 39
Activating a Trip 1. From the Marine Navigation menu, tap 2. Select Guide Me. 3. Tap on the name of the saved trip you want to use. 4. A list of the waypoints in the trip is displayed. Tap on the first waypoint in the list to navigate on the entire trip. 5. The map is displayed with the route - Magellan CrossoverGPS 2500T | Manual - English - Page 40
or goto you can use the Bow View to help navigate to your destination. The three data fields at the bottom of the display are customizable. Tap and hold on the data field for 3 seconds. A popup menu will appear with a list of available data types. The red arrow indicates the direction you need to - Magellan CrossoverGPS 2500T | Manual - English - Page 41
the left side of the Magellan CrossoverGPS. 2. If the unit is on or after you turn it on, a message will be displayed that maps have been found on the SD card. 3. Tap Yes. 4. Select the map you want to load. Changing Regions 1. Access the Outdoor Navigation Menu. (From the Map screen, tap the MENU - Magellan CrossoverGPS 2500T | Manual - English - Page 42
the Magellan CrossoverGPS drops and records electronic breadcrumbs that represent your movement. When you look at the map screen you will Magellan CrossoverGPS to create a trip that goes from your basecamp waypoint, to the bridge waypoint, and finally to the scenic waypoint. Outdoor Navigation - Magellan CrossoverGPS 2500T | Manual - English - Page 43
Arrow points towards North. When tapped displays the compass screen. Displays navigation data selected. Displays the current distance scale for the map. Tap and hold for 3 seconds. A list of possible data types is displayed. Tap on the data type you want shown. Tap to display the Outdoor - Magellan CrossoverGPS 2500T | Manual - English - Page 44
Compass Screen 1. Tap 2. Tap 3. Tap on any of the fields to edit the name, lat/lon, altitude or information. 4. Tap Favorite to include this waypoint in your Favorites list. 5. Tap Save. 6. A waypoint is created and indicated by an 'x' on the map. Creating a Waypoint from the Outdoor Navigation Menu - Magellan CrossoverGPS 2500T | Manual - English - Page 45
Going to your Base Camp 1. Tap 2. Select Goto Basecamp. 3. The Map screen is displayed with a Goto route line displayed. Navigate along this line to return to your basecamp. Creating a Goto Route from the Map Screen 1. Pan the cursor along the map to the location you want to go to. 2. Tap 3. Tap Go - Magellan CrossoverGPS 2500T | Manual - English - Page 46
again or use the search feature to find the desired waypoint. 4. Tap on the waypoint name from the list of waypoints. 5. Tap Go To. 6. The Map screen is displayed with a Goto route line displayed. Navigate along this line to go to your destination waypoint. Creating a Trip 1. From the Outdoor - Magellan CrossoverGPS 2500T | Manual - English - Page 47
Activating a Trip 1. From the Outdoor Navigation menu, tap 2. Select Guide Me. 3. Tap on the name of the saved trip you want to use. 4. A list of the waypoints in the trip is displayed. Tap on the first waypoint in the list to navigate on the entire trip. 5. The map is displayed with the route - Magellan CrossoverGPS 2500T | Manual - English - Page 48
at the bottom of the display are customizable. Tap and hold on the data field for 3 seconds. A popup menu will appear with a list of available data types. Accessing the Nav Road View 1. From the Outdoor Navigation menu, tap Tap on the "X" in the lower right corner to exit Nav Road View. Outdoor - Magellan CrossoverGPS 2500T | Manual - English - Page 49
: When you have added maps using Magellan BlueNav or Magellan MapSend Topo the POI category list will be created from the categories supplied on the optional maps. With no accessory map installed, the POI list will be empty for marine and contain the vehicle navigation POI list for outdoor. Address - Magellan CrossoverGPS 2500T | Manual - English - Page 50
Tap on these buttons to go to the map color selection screen. Select the desired color from the list on the left. Route Preferences (Vehicle Navigation only) You can turn automatic re-routing on or off. With automatic re-routing on, the receiver will automatically recalculate the route whenever you - Magellan CrossoverGPS 2500T | Manual - English - Page 51
Detour Options (Vehicle Navigation only) The Magellan CrossoverGPS detects when you are on a route and you are moving slowly or not moving at all on a freeway. It then provides you with the option of detouring around the problem area. It can alert you visually on the map by displaying the detour - Magellan CrossoverGPS 2500T | Manual - English - Page 52
it is having problems getting GPS signals. You will be prompted to enter an address for your present location that the Magellan CrossoverGPS can base its satellite search from. (It is extremely unlikely that you will ever need to use this option unless instructed to do so by a service technician if - Magellan CrossoverGPS 2500T | Manual - English - Page 53
Magellan CrossoverGPS. The following is a listing of the accessible settings. From the Main Menu screen, tap on the Application Menu icon and then the System internal battery only. This will lengthen the usable battery life between battery charging. Power This setting tells the Magellan CrossoverGPS - Magellan CrossoverGPS 2500T | Manual - English - Page 54
about the software and firmware installed in the Magellan CrossoverGPS. Also shown is the unique serial number for the receiver. Diagnosis Provides a way to diagnose the audio, touchscreen or video portions of the Magellan CrossoverGPS. Additional Items Battery Life A battery charge indicator - Magellan CrossoverGPS 2500T | Manual - English - Page 55
screen will appear to begin the installation process. 5. Choose a destination for the application. Select Next to use the default location, or select Browse to choose a custom destination. 6. Next, choose a Program Folder to place the application icons. 7. The Magellan CrossoverGPS Tools software - Magellan CrossoverGPS 2500T | Manual - English - Page 56
CrossoverGPS POI Manager enables you to transfer custom points of interest files from your computer to your Magellan CrossoverGPS. Before we add any custom POI's to the Magellan CrossoverGPS, you should understand how the POI Manager plots POIs. Latitude Latitude can be expressed by dividing - Magellan CrossoverGPS 2500T | Manual - English - Page 57
port on your computer. Launch the Magellan CrossoverGPS PC Tools application and from the Magellan PC Tools screen, click on POI. The left side of the window shows the contents of your computer and the right side of the window shows the contents of the Magellan CrossoverGPS. Opening a POI File When - Magellan CrossoverGPS 2500T | Manual - English - Page 58
a file, the Copy To Unit arrow will turn green. Click on the arrow to copy the file to your Magellan CrossoverGPS. When you have finished copying files, remove the USB cable from the Magellan CrossoverGPS. Creating a New POI FIle There are two ways to create a POI file. You can either add POI - Magellan CrossoverGPS 2500T | Manual - English - Page 59
range of alert in degrees from the POI. Select Activate alert for this category to enable the alert settings. When you have finished, select OK. Magellan POI Manager 50 - Magellan CrossoverGPS 2500T | Manual - English - Page 60
Importing a Data FIle The POI Manager software supports ASCII file format (.ASC,.CSV,.TXT); GPS Exchange file format (.GPS,.XML); Magellan Waypoint file format (.WPT,.RTE); and Garmin PCX5 Waypoint file format (.WPT,.RTE). Click on the Open button . Select the file you wish to import - Magellan CrossoverGPS 2500T | Manual - English - Page 61
an available USB port on your computer. Launch the Magellan CrossoverGPS Tools application. From the Magellan CrossoverGPS Tools screen, click on Music. The left side of the window shows the contents of your computer and the right side of the window shows the contents of the memory card installed in - Magellan CrossoverGPS 2500T | Manual - English - Page 62
an available USB port on your computer. Launch the Magellan CrossoverGPS Tools application. From the Magellan CrossoverGPS Tools screen, click on Photo. The left side of the window shows the contents of your computer and the right side of the window shows the contents of the memory card installed in - Magellan CrossoverGPS 2500T | Manual - English - Page 63
Tools to load music files onto the SD Card. Press the MENU key on the Magellan CrossoverGPS and select the Music Player. . The Music Player control pad will appear. Single Song Play Select Browse Music Use the Navigation key or the Down arrow wish to play and press OK. to select the - Magellan CrossoverGPS 2500T | Manual - English - Page 64
the keypad to enter a new name for your playlist. When you have finished, select OK. The next screen to appear shows the song files stored on the memory card on the left side, and the playlist on to confirm your selection. Select Yes to delete the playlist. Magellan CrossoverGPS Music Player 55 - Magellan CrossoverGPS 2500T | Manual - English - Page 65
Select the equalizer preset by pressing the button at the top of the screen . When you are satisfied with your selection, select OK. To exit without setting the equalizer, select ESC. Help Select Help for descriptions of the Music Player buttons. Magellan CrossoverGPS Music Player 56 - Magellan CrossoverGPS 2500T | Manual - English - Page 66
Photo viewer will show the contents of the SD or MMC card installed in your Magellan CrossoverGPS. View Single Photo The next screen to appear shows the file structure of the memory card. Select List Files . Use the Navigation key or the Down arrow to highlight the photo you wish to view and - Magellan CrossoverGPS 2500T | Manual - English - Page 67
through all the photos in the Pictures folder automatically. Pan If you enlarge an image beyond the screen boundaries, press the Pan button to enable image scrolling. While enabled, you can drag the image the width and height in pixels, the size, and the format Magellan CrossoverGPS Photo Viewer 58 - Magellan CrossoverGPS 2500T | Manual - English - Page 68
will appear asking to confirm your selection. Select Yes to delete the file. About This option will display the current version of the Photo Viewer software. Magellan CrossoverGPS Photo Viewer 59 - Magellan CrossoverGPS 2500T | Manual - English - Page 69
Support]; or web URL: http://www.magellanGPS.com/support/. Customer Service If you need to order accessories or obtain unlock codes, you can call our Customer Service register your Magellan CrossoverGPS at www.magellanGPS.com. By registering, you will be informed of the latest product updates. 60
-
 1
1 -
 2
2 -
 3
3 -
 4
4 -
 5
5 -
 6
6 -
 7
7 -
8
-
9
-
10
-
11
-
12
-
13
-
14
-
15
-
16
-
17
-
18
-
19
-
20
-
21
-
22
-
23
-
24
-
25
-
26
-
27
-
28
-
29
-
30
-
31
-
32
-
33
-
34
-
35
-
36
-
37
-
38
-
39
-
40
-
41
-
42
-
43
-
44
-
45
-
46
-
47
-
48
-
49
-
50
-
51
-
52
-
53
-
54
-
55
-
56
-
57
-
58
-
59
-
60
-
61
-
62
-
63
-
64
-
65
-
66
-
67
-
68
-
69
 |
 |
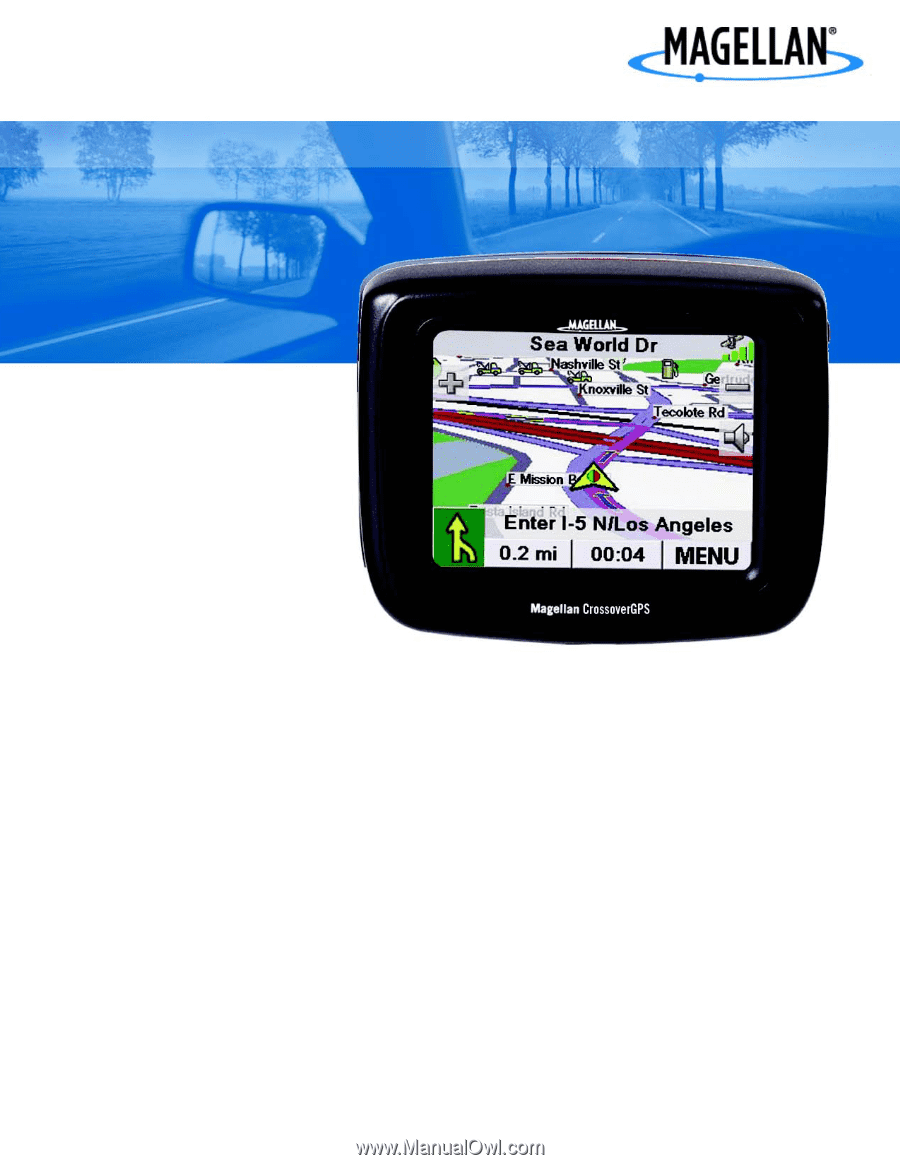
Magellan
®
CrossoverGPS
™
Reference Manual
Instructions for Operating the
Magellan CrossoverGPS