Magellan Maestro 4220 Manual - English
Magellan Maestro 4220 - Automotive GPS Receiver Manual
 |
UPC - 763357118018
View all Magellan Maestro 4220 manuals
Add to My Manuals
Save this manual to your list of manuals |
Magellan Maestro 4220 manual content summary:
- Magellan Maestro 4220 | Manual - English - Page 1
Magellan® Maestro™ 4220 User Manual Magellan Navigation, Inc. 960 Overland Court, San Dimas, CA 91773 - Magellan Maestro 4220 | Manual - English - Page 2
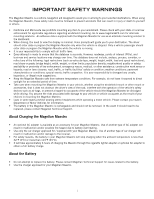
contact Magellan Technical Support. About Charging the Magellan Maestro • An optional AC adapter is available as an accessory for your Magellan Maestro. Use of another type of AC adapter can result in malfunction and/or possible fire hazard due to battery over heating. • Use only the car charger - Magellan Maestro 4220 | Manual - English - Page 3
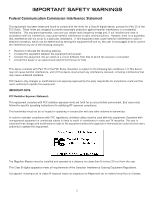
exposure limits set forth for an uncontrolled environment. End users must follow the specific operating instructions for manufacturer could void the user's authority to operate this equipment. The Magellan Maestro must be installed and operated at a distance no closer then 8 du Canada. ii - Magellan Maestro 4220 | Manual - English - Page 4
www.magellanGPS) for product updates and additional information. © 2007 Magellan Navigation, Inc. All rights reserved. The Magellan Logo, Magellan, Maestro, TrueView, SmartDetour, and SmartVolume are trademarks of Magellan Navigation, Inc. No part of this user manual may be reproduced or transmitted - Magellan Maestro 4220 | Manual - English - Page 5
Contents ...1 Magellan Maestro 4220 ...1 Front View ...2 Side Views ...2 Back View ...2 Installation Instructions ...3 Magellan Maestro 6 Turning the Magellan Maestro On 6 Turning the Magellan Maestro Off 6 Selecting Auto-Power Shutdown Time 6 Volume ...6 Changing the Volume from the Map - Magellan Maestro 4220 | Manual - English - Page 6
Status Screen 16 Accessing the GPS Status Screen 17 Zoom Levels ...17 Setting Zoom Levels 17 Volume ...17 Changing the Volume from the Map Screen 17 Home Address ...18 Creating a Home Address 18 Creating a Editing an Address in Your Address Book 24 Table of Contents Magellan Maestro 4220 2 - Magellan Maestro 4220 | Manual - English - Page 7
POI by Name 30 Enhanced POIs ...30 Loading a POI File 30 Selecting Categories for Display on the Map 31 Setting Alarms 31 Setting Alarm Parameters 32 Routing to an Enhanced POI 32 Saving an Enhanced POI to 37 Trip Planner ...38 Creating a Trip 38 Table of Contents Magellan Maestro 4220 3 - Magellan Maestro 4220 | Manual - English - Page 8
Exit 42 User Options ...43 Selecting Map Region 43 Accessing System Settings 43 Checking Battery Life 43 GPS Information 50 Setting the GPS Position 50 Backing Up and Restoring Data 51 Backing Up Data 51 Restoring Data 51 Viewing Map Information 51 Table of Contents Magellan Maestro 4220 - Magellan Maestro 4220 | Manual - English - Page 9
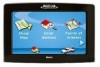
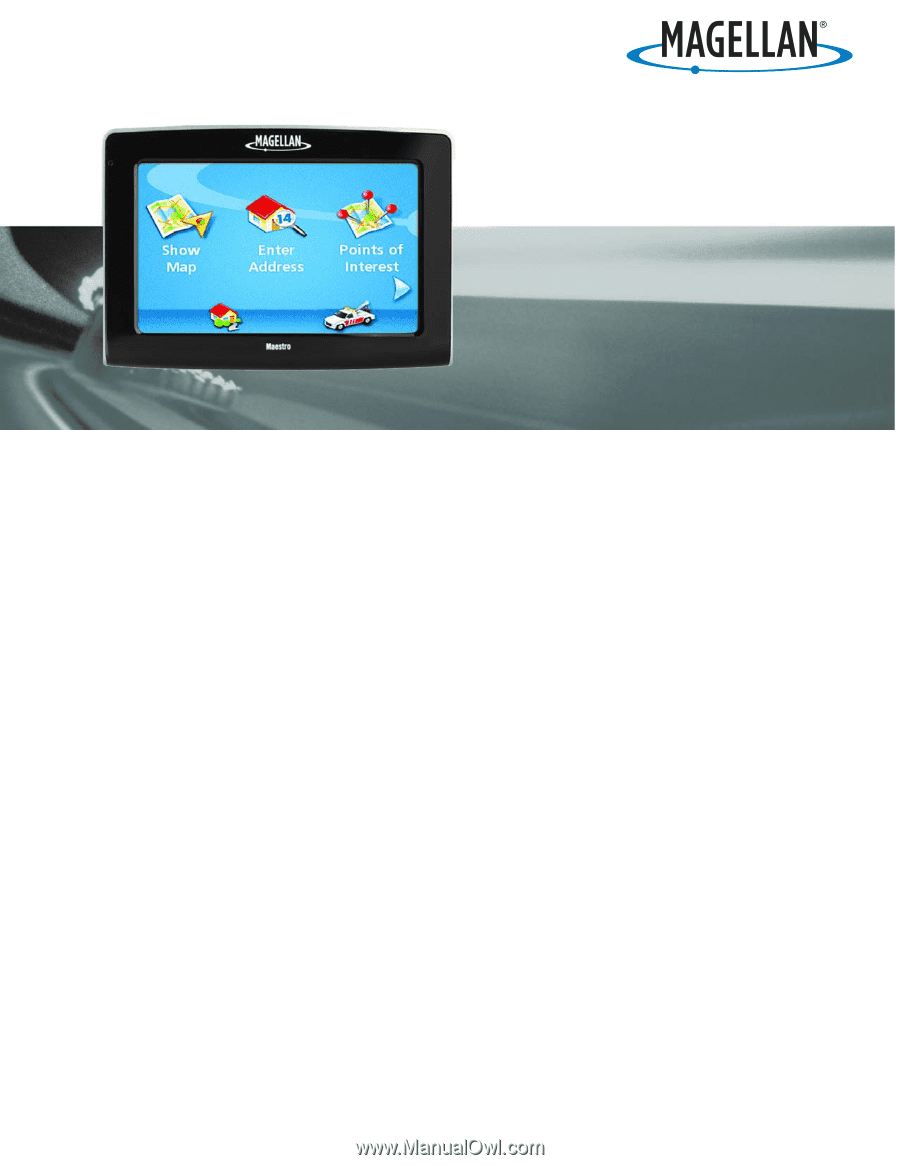
Magellan Maestro 4220 The Magellan Maestro 4220 is a vehicle navigation product that utilizes GPS signals from satellites to calculate your precise location and compute details about its travel. Knowing its position and movement, it can then overlay this information on detailed maps provided by - Magellan Maestro 4220 | Manual - English - Page 10
Front View A Power (Top) A B Reset (Bottom) Side Views Back View B C FM Antenna input. (not currently used) C D USB connector. Power input from cigarette lighter adapter or AC power adapter (+5 VDC / 2A). D E SD/MMC card slot E F Speaker F Magellan Maestro 4220 2 - Magellan Maestro 4220 | Manual - English - Page 11
Installation Instructions Installation of the Magellan Maestro is simple and easy. The hardest part will be picking the best location. Selecting the Location A few tips on selecting the proper location. • Mount the Magellan Maestro in a place where it can be easily seen and will not interfere with - Magellan Maestro 4220 | Manual - English - Page 12
Adjustable Mount Line up the two tabs on the adjustable mount with the holes on the back of the Magellan Maestro. Once the adjustable mount is flush with the Magellan Maestro, push the receiver down until it locks in place with the adjustable mount. Secure the Mount to the Windshield or Adhesive - Magellan Maestro 4220 | Manual - English - Page 13
Region By default, the Magellan Maestro has the region setting for the lower 48 United States. If you are travelling in Canada or Mexico you must change the region in User Options. 1 From the Main Menu, tap on the right arrow to access the second page of the Main - Magellan Maestro 4220 | Manual - English - Page 14
Magellan Maestro Off 1. Press and hold the On/Off button for 1-2 seconds. Selecting Auto-Power Shutdown Time The Magellan Maestro Page 2. 3. Tap User Options. 4. Tap System Settings. 5. Tap Power. 6. Select Auto-Power Map screen and the other is through User Options. Changing the Volume from the Map - Magellan Maestro 4220 | Manual - English - Page 15
Next arrow to access the Main Menu Page 2. 3. Tap User Options. 4. Tap System Settings. 5. Tap Volume. 6. Tap on the Mute button to mute the volume for the Magellan Maestro. The Main Menu consists of two pages with large, easy to access icons. Accessing the Main Menu From the Map screen tap the - Magellan Maestro 4220 | Manual - English - Page 16
with your current position (if computing a position from the GPS signals) indicated by the blue triangle. See the Map Screen chapter for details. Enter Address: Displays Enter Address menu. Addresses can be entered by first entering the city, zip code, or by selecting a city from a list of cities - Magellan Maestro 4220 | Manual - English - Page 17
presented and create a route to it. User Options: Accesses the User Options menu. This menu can be used to access functions used to customize the Magellan Maestro to your personal needs. Home: If you have created a Home address, press the Home button for quick access for routing to your home. If - Magellan Maestro 4220 | Manual - English - Page 18
Understanding the keypad while entering an address is an important part of using your Magellan Maestro. The keypad is the most common means of entering data into the Magellan Maestro. Keypad Overview Special Keys Alphabetic Keypad Symbols Keypad Backspace Accept Numeric Keypad Spacebar Cancel - Magellan Maestro 4220 | Manual - English - Page 19
Notes on Entering Data If you are having trouble getting the results you expected here are a few useful tips. • Make sure that you have spelled the name correctly. If you are unsure of the - Magellan Maestro 4220 | Manual - English - Page 20
modes that the Map screen can be displayed in; normal and routing. In normal mode, your position is shown on the map along with the time and your speed. As you travel, your position will be updated, giving you . All four bars in green is optimal. Tap to display the GPS Status screen. Map Screen 12 - Magellan Maestro 4220 | Manual - English - Page 21
about the route you've selected. A B N C M D L E K F G H J I Map Screen - Routing Mode A Street name currently on. B Direction indicator. Tap to view the Current Location screen where Satellite Status. All four bars in green is optimal. Tap to display the GPS Status screen. Map Screen 13 - Magellan Maestro 4220 | Manual - English - Page 22
, tap MENU. 2. Tap the Next arrow to access page 2 of the Main Menu. 3. Tap User Options. 4. Tap Map Options. 5. Tap 3D Map or 2D Map. 6. Tap Save. Map Screen in 2D Mode Panning on the Map Map Screen in 3D Mode 1. While viewing the Map screen in 2D mode, slide your finger or stylus across the - Magellan Maestro 4220 | Manual - English - Page 23
longitude. To the right is a compass point in your direction of travel, calculated elevation, and speed. The bottom bar displays the current time and date. Accessing the Current Location Screen 1. From the Map screen, tap the direction icon in the upper left corner. Saving Your Current Location to - Magellan Maestro 4220 | Manual - English - Page 24
of the streets listed. Instructions to exclude one of the maneuvers is described Magellan Maestro recalculates the route and displays the Maneuver List with the newly computed maneuvers. GPS Status Screen 1. The GPS Status screen is also accessed from the Map screen and displays the status of the GPS - Magellan Maestro 4220 | Manual - English - Page 25
Accessing the GPS Status Screen 1. From the Map screen, tap the GPS Signal Strength icon in the upper right corner. Tap on the back arrow to return to the Map screen. Zoom Levels There are 23 zoom levels in the Magellan Maestro, ranging from 100 feet to 1200 miles. Select the zoom level that best - Magellan Maestro 4220 | Manual - English - Page 26
Home Address Your home address can be entered and saved in the Magellan Maestro for quick and easy access when you need to create a route home. Creating a Home Address These instructions only apply if you have never entered a home address or if it has been deleted. 1. Tap the Home Address icon on - Magellan Maestro 4220 | Manual - English - Page 27
5. When the Address screen is displayed, edit the information and top SAVE to continue. 6. The new HOME address is saved in your address book and you are returned to the Main Menu screen. Accessing the Home Address from the Address Book 1. From the Main Menu, tap the Enter Address icon. 2. Tap the - Magellan Maestro 4220 | Manual - English - Page 28
can be done by inputting the name of the city, entering the zip code for the city or by selecting a city that has been previously used. Address icon. 2. Select the method to enter the city: Enter City, Enter Zip Code, or Previous City. Enter City: Use the keypad to enter the first few characters - Magellan Maestro 4220 | Manual - English - Page 29
"ALLE" results in: Entering "N A" or "N. A" results in: However, typing in "NOR" can give some unexpected results if you are trying to type in the word "NORTH ALLEN".: Entering "NOR" To resolve this, use the back arrow from the street list and continue typing in the word - Magellan Maestro 4220 | Manual - English - Page 30
4. Use the scroll bars to the right if necessary to view the name of the street desired. Tap on the street name to continue. 5. Use the keypad to enter the street number for the address. Note in the top left corner is the range of acceptable street numbers. 6. Tap Done when the address is complete. - Magellan Maestro 4220 | Manual - English - Page 31
Routing to a Previous Destination (Method 2) 1. From the Main Menu, tap the Enter Address icon. 2. Tap on the my addresses icon. 3. Tap on Previous Destinations. 4. Select the destination from the list of previous destinations. 5. Tap on Route. 6. Select the Route Method and tap the orange Calculate - Magellan Maestro 4220 | Manual - English - Page 32
It is possible to delete all of the destinations in the Previous Destination List by accessing User Options > Address Book Options > Clear Previous. Address Book Accessing an Address in Your Address Book 1. From the Main Menu, tap the Enter Address icon. 2. Tap on the my addresses icon. 3. Tap on - Magellan Maestro 4220 | Manual - English - Page 33
book. Addresses in your address book can be marked as favorites to speed up the search for commonly used addresses. Accessing an Address from Favorites your address book. You can create an entry by selecting it on the map, entering the address, selecting an address from the list of POIs or choosing - Magellan Maestro 4220 | Manual - English - Page 34
be found in this chapter in the Entering an Address section, 6. Edit the name, information and phone numbers for the location you selected on the map. Tap the Favorites checkbox if you want this saved as a favorite address. 7. Tap Save. Creating a New Entry to You Address Book from a POI 1. From the - Magellan Maestro 4220 | Manual - English - Page 35
code or selecting from the previous cities list. 6. Search for the first street by spelling out the street name following the guidelines presented in Entering an Address. Tap on the street from the list of streets. 7. Search for the second street the same as in step 6. However, the Magellan Maestro - Magellan Maestro 4220 | Manual - English - Page 36
code or selecting from the previous cities list. 4. Search for the first street by spelling out the street name following the guidelines presented in Entering an Address. Tap on the street from the list of streets. 5. Search for the second street the same as in step 6. However, the Magellan Maestro - Magellan Maestro 4220 | Manual - English - Page 37
Points of Interest (POI) The Magellan Maestro has POIs preloaded that can be used as a destination for a route. Selecting a restaurant or finding an ATM nearby is at your fingertips. Categories and Subcategories - Magellan Maestro 4220 | Manual - English - Page 38
Enhanced POIs Enhanced POIs are points of interest that are user-created using the POI Manager software found on the CD-ROM. After loading a POI file to an SD / MMC card and loading it in the Magellan Maestro, you can route to those POIs quickly. Loading a POI File 1. Save a POI file created with - Magellan Maestro 4220 | Manual - English - Page 39
checkbox to the left of the category name to select or deselect the category. (Checked means this category will have its icon displayed on the map.) Tap Mark All to check all categories or Clear All to uncheck all categories. 7. Tap Save when done. Enhanced POI Category List Setting Alarms A POI - Magellan Maestro 4220 | Manual - English - Page 40
4. Select Change My POI FIle. 5. Select Set Alarms. 6. Use the checkbox to the left of the category name to select or deselect the category. (Checked means this category will have its alarms turned on.) Tap Mark All to check all categories or Clear All to uncheck all categories. 7. Tap Save when - Magellan Maestro 4220 | Manual - English - Page 41
8. Tap Route. 9. Select the routing method desired and tap the orange Calculate Route button to continue. Saving an Enhanced POI to Your Address Book A POI file must be loaded (see Loading a POI File) for this function to operate. 1. From the Main Menu, tap the Points of Interest icon. 2. Select - Magellan Maestro 4220 | Manual - English - Page 42
Options > Tone Options.) Split-Screen As a maneuver is approached, the Magellan Maestro displays a split-screen alerting you of the upcoming maneuver. This screen corner of the Map screen. (The Maneuver List is described in detail in the Map chapter of this manual.) Split-Screen Maneuver List Travelling on - Magellan Maestro 4220 | Manual - English - Page 43
will provide a visual alert when you have arrived at the destination. Tap the Back arrow to return to the Map screen. (The Magellan Maestro will automatically return to the Map screen after a fixed time if you do not tap the Back arrow.) You Have Arrived. Types of Routes There are a wide variety - Magellan Maestro 4220 | Manual - English - Page 44
route is active, the Main Menu functions are changed to support special routing functions. Routing to a POI Near an Approaching . You will need to reset the original route when you are ready to continue. 1. From the Map screen, tap MENU. 2. Tap the Exit POIs icon. 3. Tap on the POI icon (restaurant - Magellan Maestro 4220 | Manual - English - Page 45
Method If you travel off the computed route, the Magellan Maestro will automatically re-calculate the routing information to get off the route), you will need to use the re-route function. 1. From the Map screen, tap MENU. 2. Tap the Reroute icon. 3. Select the desired routing method and tap the - Magellan Maestro 4220 | Manual - English - Page 46
. Tap Add. 6. Select the method to be used to find or create the destination icon: Enter Address, Address Book, POIs, or Intersection. 7. Follow the instructions for the method chosen to select the destination. See the chapters on Enter Address and POI for help in selecting destinations. 8. When the - Magellan Maestro 4220 | Manual - English - Page 47
9. The list of trip destinations is displayed. 10. Tap on the destination name to bring up the menu. 11. Repeat steps 5 though 9 until the trip is complete with all desired destinations. 12. Tap Save. First Destination Added Tap to open menu. Saving completed trip. Optimizing a Trip While - Magellan Maestro 4220 | Manual - English - Page 48
Starting a Trip 1. From page 2 of the Main Menu, tap the Trip Planner icon. 2. Select Guide Me from the Trip Planner Menu. 3. Select the trip to be used from the stored trips list. 4. Tap on the destination in the list to - Magellan Maestro 4220 | Manual - English - Page 49
1. From page 2 of the Main Menu, tap the Trip Planner icon. 2. Select Delete, Rename from the Trip Planner Menu. 3. Tap Rename. 4. Select the trip to be renamed from the stored trips list. 5. Use the keypad to edit the name of the trip. 6. Tap OK. Trip Planner 41 - Magellan Maestro 4220 | Manual - English - Page 50
will be cancelled if you are travelling on a route. You will need to reset the original route when you are ready to continue. 1. From the Map screen, tap MENU. 2. Tap the Exit POIs icon. 3. Tap on the POI icon (restaurant, gas station or hotel) for the exit required. 4. A list of POIs - Magellan Maestro 4220 | Manual - English - Page 51
Magellan Maestro to better suit your needs from a GPS navigator. Tapping the Back arrow from any of the User Option screens will cancel the changes. Selecting Map Region Choose the map speaker icon on the Map screen. 1. From page 2 of the Main Menu, tap User Options. 2. Tap System Settings. 3. Tap - Magellan Maestro 4220 | Manual - English - Page 52
Off Time The auto power setting will define the time that the Magellan Maestro will automatically turn off if it hasn't moved or the touchscreen accessed. 1. From page 2 of the Main Menu, tap User Options. 2. Tap System Settings. 3. Tap Power. 4. Select Never, 10 Minutes, 20 Minutes or 30 Minutes - Magellan Maestro 4220 | Manual - English - Page 53
Miles/Feet or Kilometers/Meters. 5. Tap Save. Displaying Contact Us Information 1. From page 2 of the Main Menu, tap User Options. 2. Tap System Settings. 3. Tap . 4. Tap Contact Us. 5. Tap Back arrow. Displaying Product Information 1. From page 2 of the Main Menu, tap User Options. 2. Tap - Magellan Maestro 4220 | Manual - English - Page 54
of the Main Menu, tap User Options. 2. Tap System Settings. 3. Tap Next. 4. Tap Diagnostics. 5. Tap Audio Test, Touchscreen Test or Video Test. 6. When done, tap the Back arrow to exit. Accessing the Trip Computer The trip computer records your average speed, the time in hours of the trip, the time - Magellan Maestro 4220 | Manual - English - Page 55
. 4. Tap the Back arrow to exit. Setting the Map in 3D or 2D Mode See the chapter on Maps for information regarding 3D and 2D modes of the map. 1. From page 2 of the Main Menu, tap User Options. 2. Tap Map Options. 3. Select 3D Map or 2D Map. 4. Tap Save to record the changes and exit. User - Magellan Maestro 4220 | Manual - English - Page 56
displayed with the top of the display in the direction of your heading or North. 1. From page 2 of the Main Menu, tap User Options. 2. Tap Map Options. 3. Select Heading Up or North Up. (Note, North Up is available only when the map is set to 2D mode.) 4. Tap Save to record the changes and exit - Magellan Maestro 4220 | Manual - English - Page 57
the Auto Night Mode will keep the map display using the pastel colors. 1. problems while routing. Set the alert timer. (Enter the time from the keypad.) Check Enable automatic detour on or off. (Checked is on and the Magellan Maestro training purposes. Tap on the speed factor desired. Tap - Magellan Maestro 4220 | Manual - English - Page 58
is useful if you are not getting satellite information quickly because the Magellan Maestro has travelled over 500 miles while turned off. Setting the GPS position will allow the Magellan Maestro to compute which satellites are available and calculate the position quicker. 1. From page 2 of - Magellan Maestro 4220 | Manual - English - Page 59
the SD slot of the Magellan Maestro. Note that backing up data will overwrite any back up files on the SD or MMC card. 3. Tap Backup and Restore. 4. Tap Restore. 5. Confirm restore. Tap Yes. 6. Operation successful! Tap OK. 7. Tap Back arrow to exit. Viewing Map - Magellan Maestro 4220 | Manual - English - Page 60
2. Tap Map Information. 3. Tap Back arrow to exit. Map Information Screen User Options 52
-
 1
1 -
 2
2 -
 3
3 -
 4
4 -
 5
5 -
 6
6 -
 7
7 -
8
-
9
-
10
-
11
-
12
-
13
-
14
-
15
-
16
-
17
-
18
-
19
-
20
-
21
-
22
-
23
-
24
-
25
-
26
-
27
-
28
-
29
-
30
-
31
-
32
-
33
-
34
-
35
-
36
-
37
-
38
-
39
-
40
-
41
-
42
-
43
-
44
-
45
-
46
-
47
-
48
-
49
-
50
-
51
-
52
-
53
-
54
-
55
-
56
-
57
-
58
-
59
-
60
 |
 |
Magellan Navigation, Inc.
960 Overland Court, San Dimas, CA
91773
Magellan
®
Maestro™ 4220
User Manual