Magellan Meridian Platinum User Manual
Magellan Meridian Platinum Manual
 |
UPC - 763357103267
View all Magellan Meridian Platinum manuals
Add to My Manuals
Save this manual to your list of manuals |
Magellan Meridian Platinum manual content summary:
- Magellan Meridian Platinum | User Manual - Page 1
- Magellan Meridian Platinum | User Manual - Page 2
GPS. Additionally Meridian Marine and Meridian Color include marine data with its built-in map. The Meridian Platinum includes all the features of the Meridian Gold along with a 3-axis electronic compass and barometer. All five receivers accept map data from any of the Magellan® MapSend® software - Magellan Meridian Platinum | User Manual - Page 3
civil GPS user policy and the Federal Radionavigation Plan. Accuracy can also be affected by poor satellite geometry. USE PROPER ACCESSORIES Use only Magellan cables and antennas; the use of non-Magellan cables and antennas may severely degrade performance or damage the receiver, and will void - Magellan Meridian Platinum | User Manual - Page 4
sales receipt, purchaser's Thales Navigation warrants their GPS receivers return address and the RMA number clearly and hardware accessories to be free of defects printed on the outside of the package to the in material and workmanship and will conform Authorized Thales Navigation Service - Magellan Meridian Platinum | User Manual - Page 5
not apply to you. (8) that the receiver will be free from any claim for infringement of any for the International limited to changes in the GPS or Sale of Goods, and shall benefit Thales GLONASS transmission Thales Navigation Service APPLICABLE LAWS IN FORCE IN THEIR Center will void this - Magellan Meridian Platinum | User Manual - Page 6
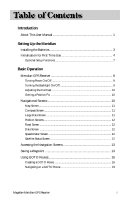
First Time Use 4 Optional Setup Functions 7 Basic Operation Meridian GPS Receiver 8 Turning Power On/Off 9 Turning the Backlight On/Off 9 Adjusting the Contrast 10 Getting a Position Fix 10 Navigational Screens 10 Map Screen 11 Compass Screen 11 Large Data Screen 11 Position Screens 12 - Magellan Meridian Platinum | User Manual - Page 7
29 Terrain Projection Description 31 Changing the Map Orientation 32 Selecting Primary Usage 32 Selecting Track Mode 32 Auto vs. Auto Detailed 33 Compass Screen 34 Customizing the Data Fields 35 Large Data Screen 35 Customizing the Data Fields 36 ii Magellan Meridian GPS Receiver - Magellan Meridian Platinum | User Manual - Page 8
Manually 47 Creating New Waypoint with Map Cursor 48 Deleting a User Waypoint 48 Editing a User Waypoint 48 Viewing a Map Object on the Map 49 Viewing a User Waypoint on the Map 49 Saving a Map Object as a User Waypoint 49 Searching for a Street Address 50 Magellan Meridian GPS Receiver - Magellan Meridian Platinum | User Manual - Page 9
a Route on the Map Screen 56 Creating a Route Units 61 Selecting the North Reference 62 Selecting Daylight Savings 62 Power Off Timer 63 Setting the Backlight Timer 63 Turning the Beeper On/Off 64 Selecting NMEA Message 64 Selecting the Baud Rate 64 iv Magellan Meridian GPS Receiver - Magellan Meridian Platinum | User Manual - Page 10
XTE Alarm 69 Setting the GPS Fix Alarm 69 Using the Simulator 70 Turning on the Simulator - Auto Mode 70 Turning on the Simulator - User Mode 70 Turning the Simulator Off 70 Using the Memory Card 72 Changing the Detailed Map 73 Formating the Memory Card 73 Magellan Meridian GPS Receiver v - Magellan Meridian Platinum | User Manual - Page 11
77 Appendix Troubleshooting 78 Waypoint Icons 79 Contacting Magellan 80 Updating Your Meridian 81 Specifications 82 Accessories 83 MapSend® Streets 84 Using MapSend 85 Installing Memory Card 88 Connecting to External Devices 89 WAAS 91 Glossary 92 vi Magellan Meridian GPS Receiver - Magellan Meridian Platinum | User Manual - Page 12
instructions for using the basic functions of the Meridian. This chapter will explain getting a position fix, viewing the Map screen, saving a waypoint and using a GOTO. Knowing these four basic steps will enable you to use the Meridian for most things you will want to do. Magellan Meridian GPS - Magellan Meridian Platinum | User Manual - Page 13
fullest. Experienced GPS users will probably not find any new information in this chapter but new GPS users may find many of their questions answered here. Appendix: Sections containing information about connecting your Meridian to external devices, accessories, troubleshooting and specifications - Magellan Meridian Platinum | User Manual - Page 14
data is not stored in permanent memory but will be held in memory for at least 12 hours without batteries installed. Always turn the Meridian off before removing the batteries or turning off external power. Failure to do so can cause loss or corruption of data. Magellan Meridian GPS Receiver 3 - Magellan Meridian Platinum | User Manual - Page 15
take anywhere from 3 to 8 minutes to compute its initial position. Follow these instructions to initialize the Meridian. Step 1: Turn the Meridian On Press [PWR] The Meridian turns on and displays the start-up screen, followed by the language selection screen. 4 Magellan Meridian GPS Receiver - Magellan Meridian Platinum | User Manual - Page 16
Meridian displays a message box indicating that the receiver needs to be initialized. Press [ENTER] Step 4: Select Your Region and Area Use the Up/Down arrows to highlight your general region. Press [ENTER] Use the Up/Down arrows to highlight your area. Press [ENTER] Magellan Meridian GPS Receiver - Magellan Meridian Platinum | User Manual - Page 17
. Using the arrow keys, enter the present date. Press [ENTER]. All the information that the Meridian needs to speed up the process of computing its first fix has been entered and the Done button is highlighted. To complete the initialization process, press [ENTER]. 6 Magellan Meridian GPS Receiver - Magellan Meridian Platinum | User Manual - Page 18
the unit of measure that you want and press [ENTER]. Press [ESC] to return to the last screen viewed. This completes the set up for your Meridian GPS receiver. The next chapter will describe the basic operation and use of the Meridian as a navigation tool. Magellan Meridian GPS Receiver 7 - Magellan Meridian Platinum | User Manual - Page 19
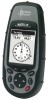
Meridian. They will be discussed here in detail. Other features and functions can be found in the Reference Section of the User Manual. Quadrifilar Antenna IN - Zooms in the display of the Map - Turns the Meridian on/off. Also used to turn the display backlight on/off. Magellan Meridian GPS Receiver - Magellan Meridian Platinum | User Manual - Page 20
turning the backlight on and leaving it on, the Meridian will turn the backlight off when there have been no buttons pressed for 4 minutes. Pressing any button will turn the backlight back on in this instance. You can change the time delay for the backlight in Setup. Magellan Meridian GPS Receiver - Magellan Meridian Platinum | User Manual - Page 21
. There is also Sat Status screen which enables you to view how well the Meridian is receiving satellite information. They will be described briefly here. More detailed information on the different screens can be found in the Reference chapter of the User Manual. 10 Magellan Meridian GPS Receiver - Magellan Meridian Platinum | User Manual - Page 22
compass has been removed to allow for large display of the navigation data. Ideal for when you have your Meridian mounted on the dashboard of a boat using the optional swivel mounting bracket. Even from a distance the customizable information can be read with ease. Magellan Meridian GPS Receiver - Magellan Meridian Platinum | User Manual - Page 23
compute the navigation data. The bar graph shows you the relative signal strength being received for each satellite. At the bottom of the display is an indication of the battery life remaining. When you are using external power, it will be indicated here as well. 12 Magellan Meridian GPS Receiver - Magellan Meridian Platinum | User Manual - Page 24
entering the coordinates of a position or saving the position of the cursor while viewing the Map screen. These waypoints can then later be used to create routes or as the destination quickly, but it will be difficult to figure out later which waypoint this is Magellan Meridian GPS Receiver 13 - Magellan Meridian Platinum | User Manual - Page 25
Chapter of the User Manual. When you have case to lower case or from lower case to upper case characters. Accepts the name and returns to the Mark screen. Backspace - Moves the cursor back one space, erasing the last character entered. Clears the entire name. 14 Magellan Meridian GPS Receiver - Magellan Meridian Platinum | User Manual - Page 26
the Meridian is computing position fixes. When the icon changes to an arrow, press and hold the [GOTO] button until the Mark screen is displayed. Change the waypoint name to "Home" and save the waypoint. We will use this waypoint in the next discussion on GOTO routes. Magellan Meridian GPS Receiver - Magellan Meridian Platinum | User Manual - Page 27
and are stored in permanent memory. If you have the Meridian Marine, you will notice your list is considerably longer then the one shown here as you have additional marine waypoints preloaded into your Meridian. (For this example, select the "User" category.) 16 Magellan Meridian GPS Receiver - Magellan Meridian Platinum | User Manual - Page 28
in this case "Home", and press [ENTER]. You are returned to the last NAV screen viewed with some noticeable changes. If you are viewing the Map screen, you will now notice the keyboard, you will be able to shorten the time by going to a specific point in the list. Magellan Meridian GPS Receiver 17 - Magellan Meridian Platinum | User Manual - Page 29
the next step. As a guide, entering the first five letters should case cities, is displayed with the waypoint that was previously selected at the top of the list. Now just use the Up/Down arrows to highlight the waypoint you are looking for and press [ENTER]. 18 Magellan Meridian GPS Receiver - Magellan Meridian Platinum | User Manual - Page 30
route using the route menu. This concludes the basic operation of the Magellan Meridian, but there is so much more. More detail on the mentioned functions, and information on the functions not mentioned can be found in the Reference chapter of the User Manual. Magellan Meridian GPS Receiver 19 - Magellan Meridian Platinum | User Manual - Page 31
the Meridian Off (Alternate) - To turn the Meridian off, press [PWR]. The countdown sequence will begin and you must press [ENTER] before the sequence ends. If you do not press [ENTER] before the sequence ends, the Meridian returns to the last screen displayed. 20 Magellan Meridian GPS Receiver - Magellan Meridian Platinum | User Manual - Page 32
Use only as needed as the backlight causes a large drain on the batteries. An automatic timer will turn the backlight off when a button has not been pressed for a selected duration. (See "Setup" Screen MENU Highlight Contrast ENTER ENTER Adjust Contrast Level Magellan Meridian GPS Receiver 21 - Magellan Meridian Platinum | User Manual - Page 33
navigation screens are turned on. Screens turned off in Setup will not be displayed.) Navigation Screen Sequence Map Screen NAV Compass Screen Large Data , press [ESC]. The cursor will disappear and the present position icon will appear centered on the map. 22 Magellan Meridian GPS Receiver - Magellan Meridian Platinum | User Manual - Page 34
on the Map screen. They are both customizable with 13 data types possible. Both of the data fields can be turned on or off allowing more viewable map area. Both features (customize and turning the data on/off) can be accessed from the MENU button. Position Mode Magellan Meridian GPS Receiver 23 - Magellan Meridian Platinum | User Manual - Page 35
. Waypoint Name Whenever the cursor is over a map object, the name of the map object is displayed, otherwise the word "cursor" appears. The data shown in the information block is the heading and distance from your present position to the cursor. Cursor Mode 24 Magellan Meridian GPS Receiver - Magellan Meridian Platinum | User Manual - Page 36
on the map screen represented by a dashed line. This function allows you to turn off or on these lines. Default is On. From MENU the MAP Screen Highlight Map Setup ENTER Use L/R arrows to select "Display" tab Use U/D arrows to select "Track Lines" ENTER Magellan Meridian GPS Receiver 25 - Magellan Meridian Platinum | User Manual - Page 37
this function will also turn off waypoints, track lines and, if applicable, topo lines. Be sure to turn these back on if you want to see them. Inversely, to globally turn on all of the map items, follow the above steps but select "Mark All" instead of "Clear All". 26 Magellan Meridian GPS Receiver - Magellan Meridian Platinum | User Manual - Page 38
Select Map Info ENTER Use U/D arrows to select desired information ENTER Two Data Fields Description - This option displays two boxes at the bottom of the map that can display data that you choose. Displaying these data fields is the default for the Meridian. Magellan Meridian GPS Receiver 27 - Magellan Meridian Platinum | User Manual - Page 39
Reference Possible Map Information Options Two Data Fields This option displays two fields at only in the Position Mode. Changing to the Cursor Mode will replace the horizontal profile with the cursor data. See text for additional information on these screens. 28 Magellan Meridian GPS Receiver - Magellan Meridian Platinum | User Manual - Page 40
ETA, ETE, XTE, turn, elevation, time, or date). Note: If you have selected Hide Map Info, this option will not be available in requires that map data has been uploaded from Magellan MapSend Topo for the United States and will revert back to the Horizontal Profile. Magellan Meridian GPS Receiver 29 - Magellan Meridian Platinum | User Manual - Page 41
, that it will take you to Turn This is the direction you need to turn to put you on the shortest distance to your destination from your present position. Elevation This is the distance above sea level that you are presently at. Time Local time. Date Current date. 30 Magellan Meridian GPS Receiver - Magellan Meridian Platinum | User Manual - Page 42
above the graph, next to the map scale indicator. (This function requires that map data has been uploaded from Magellan MapSend Topo for the United States and that your present position the Orientation back to "Track Up" will revert back to the projected terrain. Magellan Meridian GPS Receiver 31 - Magellan Meridian Platinum | User Manual - Page 43
mode, the Meridian uses a method for track point storage that maximizes memory. Using Auto, you will see more points on and near turns and less points on straight stretches of the map. You also have the option of selecting fixed intervals for track point storage. 32 Magellan Meridian GPS Receiver - Magellan Meridian Platinum | User Manual - Page 44
track rate options. In most cases, Auto should meet all of your requirements but if you want more detail on turns and still not clutter memory with excessive track points, select Auto Detailed. Track Mode Fixed Rate Track Mode Auto Track Mode Auto Detailed Magellan Meridian GPS Receiver 33 - Magellan Meridian Platinum | User Manual - Page 45
of the leg or GOTO is displayed outside the compass. This provides you with the direction you need to head to arrive at the destination. When you are on course and heading straight for the destination, the destination icon will be lined up with the heading marker. 34 Magellan Meridian GPS Receiver - Magellan Meridian Platinum | User Manual - Page 46
CTS, ETA, ETE, XTE, turn, elevation, time, or date) for any of the two fields. (See explanation of Data Types in the Map Screen section.) From the MENU Compass Screen Highlight Customize ENTER Use arrows to to be computed, invalid data is indicated by dashes. Magellan Meridian GPS Receiver 35 - Magellan Meridian Platinum | User Manual - Page 47
speed, heading, VMG, CTS, ETA, ETE, XTE, turn, elevation, time, or date) for any of the four fields. (See explanation of Data Types in the Map Screen section.) From the MENU Large Data Screen Highlight Customize car. It can be reset through the MENU button. 36 Magellan Meridian GPS Receiver - Magellan Meridian Platinum | User Manual - Page 48
displayed in different coordinate systems. This is useful when comparing navigation data between devices and charts that use different coordinate systems. The screen viewed can displayed by following the instructions in Setup - Selecting the Coordinate System. Magellan Meridian GPS Receiver 37 - Magellan Meridian Platinum | User Manual - Page 49
ETE, XTE, turn, elevation, time, or date) for any of the two fields. (See explanation of Data Types in the Map Screen section.) From manual. To access these functions from the Position screen, press [MENU], select the option, press [ENTER] and follow the prompts. 38 Magellan Meridian GPS Receiver - Magellan Meridian Platinum | User Manual - Page 50
Compass Displays your heading in a familiar compass will see upcoming turns Map Screen section.) From the Road Screen MENU Highlight Customize ENTER Use arrows to highlight the title for the data field to be changed ENTER Use arrows to ENTER select new data type Magellan Meridian GPS Receiver - Magellan Meridian Platinum | User Manual - Page 51
date) for any of the six fields. (See explanation of Data Types in the Map Screen section.) From the Data Screen MENU Highlight Customize ENTER Use arrows to highlight the title for the data field to be changed ENTER Use arrows to ENTER select new data type 40 Magellan Meridian GPS Receiver - Magellan Meridian Platinum | User Manual - Page 52
speedometer is not adjustable but will change dynamically to best display Map Screen section.) From the Speed Screen MENU Highlight Customize ENTER Use arrows to highlight the title for the data field to be changed ENTER Use arrows to ENTER select new data type Magellan Meridian GPS Receiver - Magellan Meridian Platinum | User Manual - Page 53
horizon, or directly overhead. Satellite Signal Strength Chart Clear bar indicates that the Meridian is starting to get information from the Meridian is not computing a position fix. Satellite Position Where the satellite is located relative to your position. 42 Magellan Meridian GPS Receiver - Magellan Meridian Platinum | User Manual - Page 54
near the bottom of the database list with the name of the detailed map(s) you have uploaded. To select a category for the detailed map, you need to highlight the name of the uploaded map and press [ENTER]. Then highlight the category from the newly displayed list. Magellan Meridian GPS Receiver 43 - Magellan Meridian Platinum | User Manual - Page 55
you need. With "User" selected as the category, you will go directly to the alphabetized list. Since the number of waypoints in the other categories can be in the thousands, the Meridian has provided you with cursor if you are in the Cursor Mode on your Map screen. 44 Magellan Meridian GPS Receiver - Magellan Meridian Platinum | User Manual - Page 56
map User" By to Nearest To waypoint Selecting Preloaded Waypoints (Nearest To Position) From Database Screen Use up/down arrows to highlight Preloaded Category Use left/right arrows to set Find By to Nearest To ENTER Use up/down arrows to select waypoint ENTER Magellan Meridian GPS Receiver - Magellan Meridian Platinum | User Manual - Page 57
will allow you to change the "Nearest To" from Position to any other category in the database. The first step is to follow the instructions provided above for selecting user . (The option "Cursor" only appears if the Map screen is in th Cursor Mode.) For this example Magellan Meridian GPS Receiver - Magellan Meridian Platinum | User Manual - Page 58
you can personalize the waypoint, making it easy to remember what it is.) Creating New Waypoint Manually - Allows the creation of a new waypoint with coordinates other than your present position. The coordinates ENTER. You are then placed into the Edit Mode.) Magellan Meridian GPS Receiver 47 - Magellan Meridian Platinum | User Manual - Page 59
are computed automatically based on the location of the map cursor. From Map Screen Use arrow keys to move cursor to desired position a User Waypoint - Deletes a waypoint that you have created. From Any Screen MENU Highlight Database ENTER Highlight User left/ Magellan Meridian GPS Receiver - Magellan Meridian Platinum | User Manual - Page 60
object as a waypoint in the Sun/Moon or Fish/Hunt functions. Follow the instructions above for Viewing a Map Object on a Map. Press and hold GOTO for 2-3 seconds. Edit any field of the waypoint that you want and when you are done, highlight "Save" and press ENTER. Magellan Meridian GPS Receiver 49 - Magellan Meridian Platinum | User Manual - Page 61
Use arrows to enter address number. Number must fall betweein limits indicated ENTER Highlight "Mark" to create ENTER a waypoint or "View" to view on the Map screen 50 Magellan Meridian GPS Receiver - Magellan Meridian Platinum | User Manual - Page 62
started, following the same route you just took. All you need do is follow the instructions below and let the Meridian take you there. From Any Screen MENU Highlight Routes ENTER Select ENTER "Backtrack" from Route List Highlight Activate Backtrk ENTER Magellan Meridian GPS Receiver 51 - Magellan Meridian Platinum | User Manual - Page 63
they are always in memory and if activated they remain activated, even when you turn the Meridian off and then back on, and C) they can be saved and used over it in the Meridian's memory.) Sample Route List (Bold route indicates "Active" route) 52 Sample Route Create Magellan Meridian GPS Receiver - Magellan Meridian Platinum | User Manual - Page 64
a route to navigate with, follow these steps to activate it. From Any Screen MENU Highlight Routes ENTER Select Route MENU Highlight Activate or Deactivate ENTER Magellan Meridian GPS Receiver 53 - Magellan Meridian Platinum | User Manual - Page 65
be one. Select route to be edited. Highlight destination MENU See Instructions for waypoint for leg that will Viewing a Route have a leg inserted. Highlight Insert ENTER Select Database waypoint "E". Your route would then be "A" to "B" to "E" to "C" to "D". 54 Magellan Meridian GPS Receiver - Magellan Meridian Platinum | User Manual - Page 66
edited. Highlight destination MENU See Instructions for waypoint for leg that will Viewing a Route be replaced. user-generated position or by using Map Cursor to locate position. Edit/Modify Waypoint as desired. Highlight "Route" Button ENTER Select Route ENTER Magellan Meridian GPS Receiver - Magellan Meridian Platinum | User Manual - Page 67
route using your track history. This route will be saved to your route list with a naming convention of "T01P01 to T01Pxx" where Pxx indicates the number of points in the route. From Any Screen MENU Highlight Routes ENTER MENU Highlight Save Trk to Rte ENTER 56 Magellan Meridian GPS Receiver - Magellan Meridian Platinum | User Manual - Page 68
are available at all times. For example, if you have a topographical map loaded but the cursor or present position is not on a road, the option "Highlighted road" will not be displayed. From Any Screen MENU Highlight Vert. Profile ENTER Select option ENTER Magellan Meridian GPS Receiver 57 - Magellan Meridian Platinum | User Manual - Page 69
viewing the Vertical Profile of the path you created, press ESC to return to the map screen. Now you can continue adding legs to the path. Tip: You can convert this path into a stored route by simply pressing the MENU key and selecting the Save To Route option. 58 Magellan Meridian GPS Receiver - Magellan Meridian Platinum | User Manual - Page 70
sequence of nav screens for your selections to be saved. As an example, if you turn the Sat Status screen off and press ESC before confirming all of the nav screens, your selection will not be saved and the Sat Status screen will still be on.) Default: All On Magellan Meridian GPS Receiver 59 - Magellan Meridian Platinum | User Manual - Page 71
and the datums do not match, you may find irregularities when comparing the coordinates. From Any Screen MENU Highlight Setup ENTER Highlight ENTER Map Datum Select Primary or ENTER Select ENTER Secondary Datum Default: Primary - WGS84 Secondary - WGS84 60 Magellan Meridian GPS Receiver - Magellan Meridian Platinum | User Manual - Page 72
Units - Allows you to select the units of measure that will be used when displaying navigational data. Options are: Miles/MPH, NM/Knots or KM/KPH. From Any Screen MENU Highlight Setup ENTER Highlight Nav Units ENTER Select ENTER Nav Units Default: Miles/MPH Magellan Meridian GPS Receiver - Magellan Meridian Platinum | User Manual - Page 73
Saving ENTER ENTER Use up/down arrows ENTER to select region from list Default: The appropriate daylight savings time (United States or European Union only) will automatically be set by the Meridian during startup when you use the Meridian for the first time. 62 Magellan Meridian GPS Receiver - Magellan Meridian Platinum | User Manual - Page 74
to turn off the display backlight when not in use. Times available are: 30 seconds, 1 Minute, 2 Minutes, 4 Minutes, 10 Minutes or Timer Off. From Any Screen MENU Highlight Setup ENTER Highlight Light Timer ENTER Select Timer Duration ENTER Default: 4 Minutes Magellan Meridian GPS Receiver - Magellan Meridian Platinum | User Manual - Page 75
the baud rate that the receiving device is set for. You can choose from 1200 baud, 4800 baud, 9600 baud, 19200 baud, 57600 baud or 115200 baud. From Any Screen MENU Highlight Setup ENTER Highlight Baud Rate ENTER Select Baud Rate ENTER Default: 4800 Baud 64 Magellan Meridian GPS Receiver - Magellan Meridian Platinum | User Manual - Page 76
This will change how the [PWR] operates in turning the Meridian on or off. No Protection: Turn Meridian On. Press the [PWR] button. Turn Meridican Off. Press the [PWR] button. On/Off Protected: Turn Meridian Languages ENTER Select desired language ENTER Magellan Meridian GPS Receiver 65 - Magellan Meridian Platinum | User Manual - Page 77
instructions, the Meridian will shut off. The next time it is turned on, it will prompt you that it needs to be initialized. From Any Screen MENU Highlight Setup ENTER Highlight ENTER Clear Memory Highlight All ENTER Confirm? ENTER Yes/No Meridian will shut off 66 Magellan Meridian GPS - Magellan Meridian Platinum | User Manual - Page 78
displays the sunrise time, sunset time and lunar phase for any waypoint you have stored in the User category in the waypoint database. All times displayed are local times to your present position. From ENTER arrows to select "Find By" Highlight ENTER Waypoint Magellan Meridian GPS Receiver 67 - Magellan Meridian Platinum | User Manual - Page 79
Hunt screen displays the best times for fishing or hunting for the position you choose from your User waypoints. From Any Screen MENU Highlight Fish/Hunt ENTER Changing the Fish/Hunt Date - Allows you Highlight ENTER arrows to select Waypoint "Find By" 68 Magellan Meridian GPS Receiver - Magellan Meridian Platinum | User Manual - Page 80
turns on or off the alarm that can sound whenever the Meridian has lost its ability to compute position fixes due to loss of signal from the satellites. This is handy in that it alerts you that you may need to move to an area that has a clearer view of the sky. Magellan Meridian GPS Receiver - Magellan Meridian Platinum | User Manual - Page 81
Heading ENTER Confirm ENTER User and Speed Clearing of Data Track Turning the Simulator Off - Turns the simulator off and returns the Meridian to normal operation. From Any Screen MENU Highlight Setup ENTER Highlight Simulate ENTER Highlight ENTER Off 70 Magellan Meridian GPS Receiver - Magellan Meridian Platinum | User Manual - Page 82
. This will place all of your waypoints and routes on the SD card you have inserted in your Meridian. These waypoints and routes are not erased from your Meridian, only will overwrite any route occupying that route number. If you go to your route list, you will Magellan Meridian GPS Receiver 71 - Magellan Meridian Platinum | User Manual - Page 83
the Meridian does some checking and displays information on the SD card. One of the items displayed is lost clusters. This is for reference only. While the Meridian was checking the SD card, all lost clusters were recovered. This only displays how many were found. 72 Magellan Meridian GPS Receiver - Magellan Meridian Platinum | User Manual - Page 84
Screens, Map, Routes, Setup, Database, User Waypoints and Misc Topics. Each topic has a number of tips available that can be viewed. From Any Screen MENU Highlight Help ENTER Select Topic Use the "Next" and "Prev" buttons to scroll the Meridian Help Files. Magellan Meridian GPS Receiver 73 - Magellan Meridian Platinum | User Manual - Page 85
is not computed. Any elevation displayed by the Meridian during 2D operation is the elevation you entered. In 3D (three-dimensional), a minimum of four satellites are needed to compute the position and at the same time, elevation is computed by the Meridian. 74 Magellan Meridian GPS Receiver - Magellan Meridian Platinum | User Manual - Page 86
is that the Meridian has no reference to use as a guide to tell it what satellites should be overhead. Without a reference to start with, the Meridian will have to " the Meridian will always be available, even when all of the Meridian's memory has been cleared. Magellan Meridian GPS Receiver 75 - Magellan Meridian Platinum | User Manual - Page 87
by comparing your present position to the last position taken, it requires that you be moving to compute your compass heading. Furthermore, to eliminate error, you must be moving at a minimum of 2.0 mph. The exception is the Meridian Platinum, which has an electronic compass which will compute - Magellan Meridian Platinum | User Manual - Page 88
Baud Rate.) Can I interface my Meridian with a Macintosh computer? Magellan does not supply cabling or software for the Macintosh line of computers. For information on a cable or software that may meet your requirements, visit GPSy at www.gpsy.com on the internet. Magellan Meridian GPS Receiver 77 - Magellan Meridian Platinum | User Manual - Page 89
road. It could be caused by distance shifts to the map. Use map data for reference and do not rely completely on it. Data was not saved or was corrupted. This can be caused because you removed the batteries or removed external power with the Meridian turned on. 78 Magellan Meridian GPS Receiver - Magellan Meridian Platinum | User Manual - Page 90
Floating Buoy Fuel Garden Golf Hotel Hunt/Fish Large City Lighthouse Major City Marina Medium City Museum Obstruction Park Resort Restaurant Rock Scuba RV Service Shooting Sight Seeing Small City Sounding Sports Arena Tourist Info Truck Service Winery Wreck Zoo Magellan Meridian GPS Receiver 79 - Magellan Meridian Platinum | User Manual - Page 91
, please have your receiver with you. Packages should be sent to: Thales Navigation Magellan Products 960 Overland Court San Dimas, CA 91773 ATTN: Warranty/Repair Additional information regarding software updates to your Meridian can be found in the Product Support section of the Magellan web site - Magellan Meridian Platinum | User Manual - Page 92
. Your Meridian will turn itself off and power up again. Verify that the software has been uploaded by checking the "About" screen again as you did in step 1. The software to your Meridian is complete and you can now disconnect the Meridian from the data cable. Magellan Meridian GPS Receiver 81 - Magellan Meridian Platinum | User Manual - Page 93
Receiver 12 parallel-channel technology, tracks up to 12 satellites to compute and update information with quadrifilar antenna Acquisition Times (under optimal conditions): Accuracy Position Velocity Warm Cold Update power cable Battery Life Up to 14 hours 82 Magellan Meridian GPS Receiver - Magellan Meridian Platinum | User Manual - Page 94
's to your Meridian receiver. (Available only with United States topographic information.) Secure Digital (SD) Memory Cards: Available in 8, 16, 32 or 64 MB configurations. Increased the amount of additional map data that can be uploaded to the Meridian receiver. Magellan Meridian GPS Receiver 83 - Magellan Meridian Platinum | User Manual - Page 95
maps for any region in the United States or Europe into the Merdian. • Allows you to cut any rectangular map region you choose to load into the receiver. Maps are not pre-cut to counties or other boundaries. • Creation, management and upload/download NT 4.0 (or higher) Magellan Meridian GPS Receiver - Magellan Meridian Platinum | User Manual - Page 96
PC. Run the MapSend application from your PC. Set Up Map: Using the zoom in and out tools, select the location on the map for the area that you want to get the detailed map from. In this example, a detailed map from the Southern California area will be selected. Magellan Meridian GPS Receiver 85 - Magellan Meridian Platinum | User Manual - Page 97
map that you want to upload into your Meridian. Here is the region selected for this example. Notice that when you move the cursor inside the rectangle, the memory space that this region will occupy on your SD indication of what region(s) are to be uploaded. 86 Magellan Meridian GPS Receiver - Magellan Meridian Platinum | User Manual - Page 98
the Meridian is turned on and click on the "Upload Regions" button. You will be given the option of Upload to GPS Unit, Upload to SD Card Programmer or Store on Hard Drive. Select Upload to GPS Unit and press "Next". MapSend will then poll the COM ports looking for the Meridian receiver. When - Magellan Meridian Platinum | User Manual - Page 99
Appendix The Magellan Secure Digital (SD) Memory Cards can be added to any of the Meridian line of GPS receivers through the battery compartment. Magellan offers the memory cards in 8, 16, 32 and 64 MB configurations. The addition of the memory card to your Meridian will increase the amount of data - Magellan Meridian Platinum | User Manual - Page 100
Appendix Available as accessories for your GPS receiver are the following cables: External Power Cable with Cigarette Lighter Adapter, Power/Data Cable, Data Cable and PC Cable with Cigarette Lighter Adapter. The instructions given below apply to all cables, unless otherwise stated. The cable can be - Magellan Meridian Platinum | User Manual - Page 101
Do not bypass the power supply box or you will damage your unit and void the warranty. Power Plug Cut Here Cable Wiring Color Code Power Red: Power + Black: GND Data (Power/Data, PC cable & Data cable only) Yellow: Data In Orange: Data Out Black: GND 90 Magellan Meridian GPS Receiver - Magellan Meridian Platinum | User Manual - Page 102
the country and then transmitting the error corrections to special WAAS satellites. In turn, these satellites broadcast the error corrections to WAAS-capable GPS receivers around the world. WAAS is a free service and, with the small exception of two additional satellites displayed on the Satellite - Magellan Meridian Platinum | User Manual - Page 103
, use WGS84. The value or setting automatically chosen by the unit unless otherwise directed. Can be changed in Setup. Distance. Distance from position to destination. Estimated Time of Arrival. The estimated time of day the leg's destination waypoint will be reached. Magellan Meridian GPS Receiver - Magellan Meridian Platinum | User Manual - Page 104
Meridian) as measured by lines perpendicular to the parallels and converging at the poles from 0˚ to 180˚. The direction relative to a magnetic compass as computed by the Meridian. Speed Over Ground. The speed at which the receiver is moving. Temperature. Magellan Meridian GPS Receiver 93 - Magellan Meridian Platinum | User Manual - Page 105
Universal Transverse Mercator metric grid system used on most large and intermediate scale land topographic charts and maps. Velocity Made Good. The component of the velocity that is in the direction of , right or left, of course when facing the destination. 94 Magellan Meridian GPS Receiver
-
 1
1 -
 2
2 -
 3
3 -
 4
4 -
 5
5 -
 6
6 -
 7
7 -
8
-
9
-
10
-
11
-
12
-
13
-
14
-
15
-
16
-
17
-
18
-
19
-
20
-
21
-
22
-
23
-
24
-
25
-
26
-
27
-
28
-
29
-
30
-
31
-
32
-
33
-
34
-
35
-
36
-
37
-
38
-
39
-
40
-
41
-
42
-
43
-
44
-
45
-
46
-
47
-
48
-
49
-
50
-
51
-
52
-
53
-
54
-
55
-
56
-
57
-
58
-
59
-
60
-
61
-
62
-
63
-
64
-
65
-
66
-
67
-
68
-
69
-
70
-
71
-
72
-
73
-
74
-
75
-
76
-
77
-
78
-
79
-
80
-
81
-
82
-
83
-
84
-
85
-
86
-
87
-
88
-
89
-
90
-
91
-
92
-
93
-
94
-
95
-
96
-
97
-
98
-
99
-
100
-
101
-
102
-
103
-
104
-
105
 |
 |
