Magellan RoadMate 1200 Manual - English
Magellan RoadMate 1200 - Automotive GPS Receiver Manual
 |
UPC - 763357119350
View all Magellan RoadMate 1200 manuals
Add to My Manuals
Save this manual to your list of manuals |
Magellan RoadMate 1200 manual content summary:
- Magellan RoadMate 1200 | Manual - English - Page 1
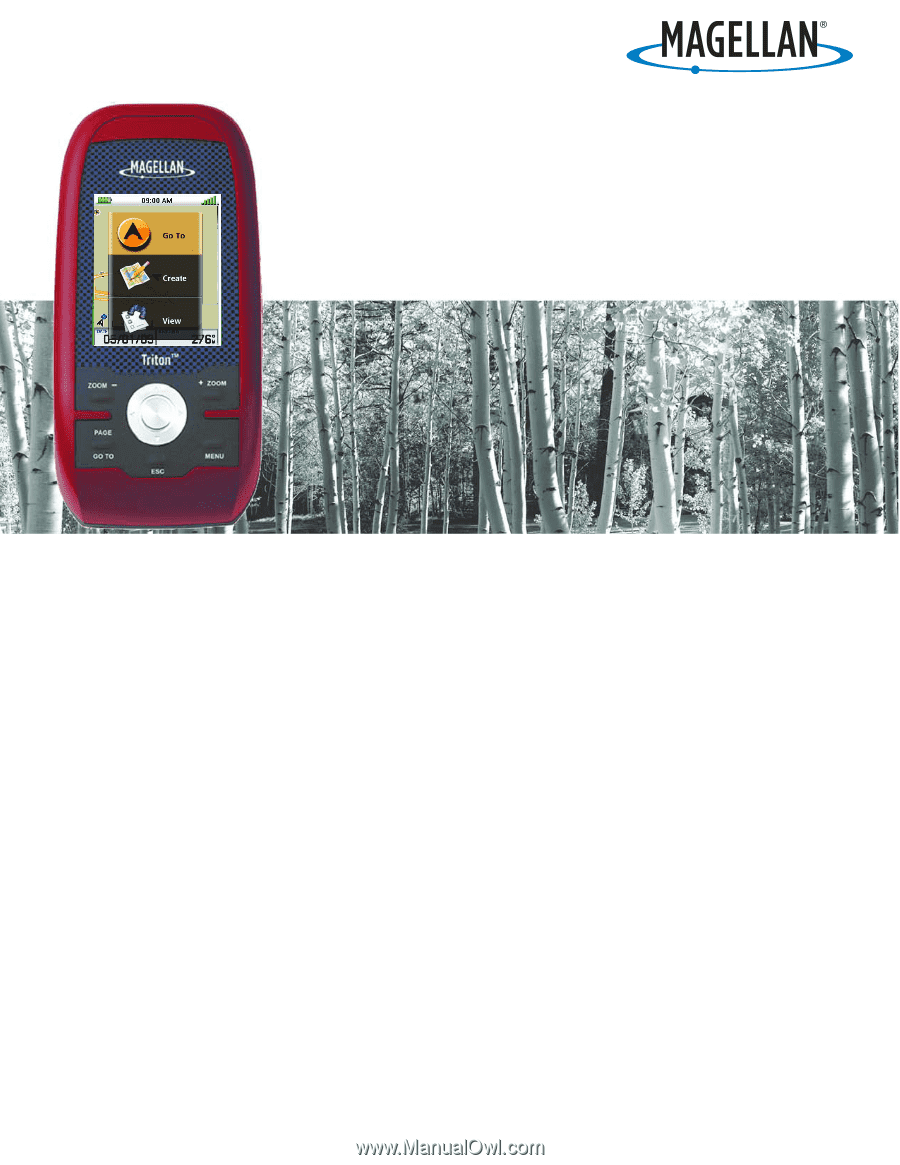
Magellan® Triton™ User Manual Magellan Triton 300 Magellan Triton 400 Magellan Triton 500 960 Overland Court, San Dimas, CA 91773 - Magellan RoadMate 1200 | Manual - English - Page 2
NAVIGATION DEVICE WHILE DRIVING A VEHICLE. Please do not try and change any settings on the Magellan Triton GPS user Magellan cables and antennas; the use of non-Magellan cables and antennas may severely degrade performance or damage the receiver, and will void the warranty. No part of this guide - Magellan RoadMate 1200 | Manual - English - Page 3
from that to which the receiver is connected. • Consult the dealer or an experienced radio/TV technician for help. This device complies with Part user's authority to operate this equipment. The Magellan Triton must be installed and operated at a distance no closer then 8 inches (20 cm) from the user - Magellan RoadMate 1200 | Manual - English - Page 4
any formal notification. Check the Magellan website (www.magellanGPS.com) for product updates and additional information. Maximum normal use temperature is 66°C. © 2009 MiTAC International Corporation. The Magellan logo, Magellan and Magellan Triton are registered trademarks of MiTAC International - Magellan RoadMate 1200 | Manual - English - Page 5
4 Setting the Time Zone 4 Changing Languages 5 Sleep Mode (Backlight Timer 5 Waking up the Triton from Sleep Mode 5 Setting the Backlight Timer 5 Automatic Power Off 6 Setting the Power Off Timer interval 6 Menus ...6 Accessing the Main Menu 6 Navigation Screens 7 Accessing the Map Screen - Magellan RoadMate 1200 | Manual - English - Page 6
Resetting Maximum Speed 14 The Compass Screen 15 The Strip Compass Screen 15 The Road Compass Screen 15 Turning on the Strip and Road Compass Screens 15 The Altimeter / Barometer Screen (Magellan Triton 500 16 The Satellite Status Screen 16 Explanation of Data Field Types 17 Map Screen ...19 - Magellan RoadMate 1200 | Manual - English - Page 7
37 Settings ...38 Customizing Navigation Settings 38 Setting Volume and Brightness 38 View Memory Usage 38 Clearing Memory 39 Restoring Factory Settings 39 Setting Connectivity 39 Getting Software Version Information 40 Viewing Copyright Information 40 Personalizing Magellan Triton 40 - Magellan RoadMate 1200 | Manual - English - Page 8
a Place Waypoint (Detail Map 54 Turning On/Off the Waypoint Proximity Alarm for a Place Waypoint 55 Viewing Best Fish and Hunt Times for a Place Waypoint 55 Viewing Sun and Moon Rise and Set Times for a Place Waypoint 56 Media ...57 Browsing Photographs 57 Table of Contents Magellan Triton 4 - Magellan RoadMate 1200 | Manual - English - Page 9
www.magellangps.com/support/ and select your Magellan Triton model for additional information and tips on the use of your Triton. Features of the Magellan Triton Ease-of-use - Simple menus and an intuitive interface makes using the Magellan Triton easy for first time GPS receiver users while still - Magellan RoadMate 1200 | Manual - English - Page 10
E F G D I H Magellan Triton A Backlight Button B Power Button C Zoom - (Zoom out) Button D Zoom + (Zoom in) Button E ENTER Button / Cursor Control F PAGE / GO TO Button G Esc (Escape) Button H Menu Button I SD Card Slot (under protective rubber cover) [Magellan Triton 400 & 500 only] Overview 2 - Magellan RoadMate 1200 | Manual - English - Page 11
, LED backlit Internal memory or Secure Digital (SD) Card (optional accessory) Built-in multidirectional patch Nine direct-access keys 14° to 140°F (-10° to 60°C) PERFORMANCE Receiver Acquisition Time Update Rate Accuracy Languages Coordinate Systems SiRF Star III™ 20 channels, WAAS/EGNOS - Magellan RoadMate 1200 | Manual - English - Page 12
Life for other tips on extending the Triton's battery life. Note: maximum backlight intensity is reduced as battery capacity gets lower. Press button momentarily Setting the Time Zone The time and date information will be computed from information from the GPS satellites so there is no requirement - Magellan RoadMate 1200 | Manual - English - Page 13
from Sleep Mode 1. Press any key and the Triton will wake up, turning the backlight on to the previous setting. Setting the Backlight Timer 1. From the Map screen, press MENU. 2. Select View. 3. Select Settings. 4. Select Volume & Brightness. 5. Using the cursor control, highlight the Backlight - Magellan RoadMate 1200 | Manual - English - Page 14
Magellan Triton as part of the internal base map or a destination waypoint found on a detailed map that has been loaded on an optional SD card (400 & 500) or into the Magellan Triton future update. Check the Magellan website at www.magellangps.com for information on updates to your Magellan Triton. - Magellan RoadMate 1200 | Manual - English - Page 15
for information on updates to your Magellan Triton. The View Menu has options for many of the support functions and tools found in the Magellan Triton. The Local Info option provides access to information about the best hunting and fishing times as well as solar and lunar rise and set times for your - Magellan RoadMate 1200 | Manual - English - Page 16
, can be purchased and downloaded from the Magellan Store and installed using the optional National Geographic software. Magellan Triton 300 installs the National Geographic maps into their internal memory, while Magellan Triton 400 and 500 stores the maps on an SD card. Once loaded, you will need - Magellan RoadMate 1200 | Manual - English - Page 17
the battery life in your Magellan Triton. Turn off backlight during daytime use. 1. Press the Backlight button (top left side of the receiver) to cycle through the backlight intensities. (Alternate method) 1. Press MENU. 2. Select View. 3. Select Settings. 4. Select Volume & Brightness. 5. Using the - Magellan RoadMate 1200 | Manual - English - Page 18
. 5. Press PAGE / GO TO to select the Sensors page. 6. Select Barometer and set it to OFF. Connect to PC using USB cable (if possible). 1. Connect the Magellan Triton to a computer using the USB cable supplied with the Magellan Triton. 2. Select POWER ONLY from the options menu that is displayed - Magellan RoadMate 1200 | Manual - English - Page 19
. CM PAGE C ESC OC Magellan Triton 500 only C Customizable screen O Optional screen* M Contextual menu All screens (except the Map screen) can be turned on or off in the Profile settings. C M * These screens are turned off by default. OC C Selecting Navigation Screens 1. While viewing one - Magellan RoadMate 1200 | Manual - English - Page 20
shown and press ENTER. 6. Press ESC when done. (Note: you can set the number of data fields displayed on the map screen to none, 2 or 4 by pressing ENTER, selecting Map Options and choose the desired number of data fields under MAP DATA FIELDS.) Customizing the Data Field for the Large Data, Compass - Magellan RoadMate 1200 | Manual - English - Page 21
if there is an active route being used. To reset the odometer, go to the Speedometer screen and follow the instructions provided for resetting the odometer. (Additionally, the odometer can be reset from the Map screen by accessing the contextual menu and selecting Reset... . Navigation Screens 13 - Magellan RoadMate 1200 | Manual - English - Page 22
customizable data fields in a large, easy-to-read format. This screen is a handy option for those times that you need to position the Magellan Triton at a distance but still need to view navigation information. To select the data displayed, press ENTER, select the field to change, press ENTER again - Magellan RoadMate 1200 | Manual - English - Page 23
find easier to use. The data fields are customizable and can be set to display the information you require. The bearing icon is also by default but can be turned on following these instructions. Turning on the Strip and Road Compass Screens 1. From the Map screen, press MENU. 2. Select View. 3. - Magellan RoadMate 1200 | Manual - English - Page 24
The Altimeter / Barometer Screen (Magellan Triton 500) The Altimeter / Barometer screen displays your screen as colored bars. The numbers indicate the GPS satellite ID while "W" indicates WAAS (Wide Area Augmentation System) satellites. There are also two customizable navigational screens displayed - Magellan RoadMate 1200 | Manual - English - Page 25
from the user to the next destination point in a route. In a route with multiple points, when the user arrives at one destination point, the unit should switch To or Route is set, this will appear blank or dashes. Time to End Time to End measures how much time it will take the user to arrive at the - Magellan RoadMate 1200 | Manual - English - Page 26
set, this will appear blank or dashes. Estimated Time of Arrival (ETA) Estimated Time of Arrival displays the time of day the user should arrive at a destination. If no Go To or Route is set GPS receivers too close in proximity. Velocity Made Good (VMG) Velocity Made Good calculates how fast the user - Magellan RoadMate 1200 | Manual - English - Page 27
in the Magellan Triton and it has a special contextual menu that can access the commonly used functions. This makes understanding the Map screen and all of the functions that can be performed directly from this screen an important part of getting the most out of your receiver. Map Screen Overview - Magellan RoadMate 1200 | Manual - English - Page 28
ENTER. 6. Press ESC to exit the customize mode. (Note: you can set the number of data fields displayed on the map screen to none, 2 or 4 by pressing ENTER, selecting Map Options and choose the desired number of data fields under MAP DATA FIELDS.) Creating Waypoints Waypoints can be created on the - Magellan RoadMate 1200 | Manual - English - Page 29
, pan around the map with the cursor control to select the desired position. 2. Press ENTER. 3. Scroll down the contextual menu to select Local Info. 4. Press ENTER. 5. Select Sun and Moon. 6. Press ENTER. 7. The sun rise and set times as well as the lunar rise and set times are displayed for the - Magellan RoadMate 1200 | Manual - English - Page 30
.) 2. Press ENTER. 3. Scroll down the contextual menu to select Go To. 4. Press ENTER. If the point you have selected is a waypoint, choose from Point on Map or the desired waypoint and press ENTER to continue. 5. Press ESC to exit the Pan mode. Viewing Waypoint Details from the - Magellan RoadMate 1200 | Manual - English - Page 31
. Backtrack Route As you travel, the Magellan Triton drops electronic breadcrumbs (track) to display Map Options The Map Options function provides a way for you to further customize the Map screen by indicating what is shown and how it is displayed. Follow the instructions here for accessing the Map - Magellan RoadMate 1200 | Manual - English - Page 32
) as the unit of measure for distances. Speed can be displayed as Kph (kilometers per hour), Mph (miles per hour) or Kts (knots). Elevation can be measured in Meters or Feet. (Magellan Triton 500 only) Choose between kPa, Millibar, inHg or mmHg. Resetting Speed and Odometers From the Map screen you - Magellan RoadMate 1200 | Manual - English - Page 33
Changing Map Units of Measure 1. Press ENTER. 2. Scroll down the contextual menu to highlight Reset... . 3. Press ENTER. 4. Use the UP and DOWN portion of the cursor control to highlight the item (or all) that you want to reset. 5. Press ENTER. Map Screen 25 - Magellan RoadMate 1200 | Manual - English - Page 34
alphanumeric characters into the Magellan Triton is done by the use of the keyboard. Key Types Alphanumeric Color Light Blue Sample Symbol Set Select Medium Blue Available only when symbol characters are displayed. Steps through three different sets of symbols and navigation terms. - Magellan RoadMate 1200 | Manual - English - Page 35
Extended Character Select Medium Blue Numeric Select Blue Alpha Select Blue Delete Medium Blue Changes the available characters to extended characters. Changes the available characters to numeric characters. Changes the available characters to alphabetic characters. Deletes the character to - Magellan RoadMate 1200 | Manual - English - Page 36
Cancel Red With alphabetic characters shown, shifts between upper and lower case characters. With extended characters shown, shifts between two character sets. Not functional when numeric or symbol characters are displayed. Adds a carriage return at the character cursor position. Saves the text - Magellan RoadMate 1200 | Manual - English - Page 37
to the day portion of the calendar. There is no option for inputting the current date for the Magellan Triton since the date is automatically received from the GPS satellite. Text Size Limitations Single-line fields: 50 characters. Multi-line fields (notes, comments, hints): 1024 characters. Page - Magellan RoadMate 1200 | Manual - English - Page 38
Sets the unit of measure for distance measurements. Sets the unit of measure for speed measurements. Sets the unit of measure for elevation measurements. (Magellan Triton 500 only) Sets the unit of measure for barometric measurements. Map Page ORIENTATION North Up, Course Up, Sets top of the Map - Magellan RoadMate 1200 | Manual - English - Page 39
or not. Low, Medium, High Sets the amount of detailed information that is displayed on the map. Sensors Page (Magellan Triton 500) ELECTRONIC COMPASS BAROMETER On, Off On, Off Turns the electronic compass on or off. Turns the barometer on or off. Alarms Page GPS FIX On, Off ALARM TONE ALARM - Magellan RoadMate 1200 | Manual - English - Page 40
media file to the waypoint. Select Add Media to assign an image to the waypoint. Options Set proximity alarm for the waypoint, duplicate the waypoint or delete the waypoint. * Note that media assigned to the waypoint is stored on the SD card and not in the Triton's internal memory. Waypoints 32 - Magellan RoadMate 1200 | Manual - English - Page 41
the proximity alarm on or off. 6. Select the icon to save the waypoint. Creating a Current Location Waypoint Using the Triton Menu 1. While viewing the Map screen, press MENU. 2. Select Create. 3. Select Waypoint. 4. Select Current Location. 5. The Waypoint Details screen is displayed with the - Magellan RoadMate 1200 | Manual - English - Page 42
7. Select the icon to save the waypoint. Creating a Waypoint from a Point on the Map Using the Triton Menu 1. While viewing the Map screen, press MENU. 2. Select Create. 3. Select Waypoint. 4. Select Point on Map. 5. The Map screen is displayed. Use the arrow keypad to move the pan cursor to the - Magellan RoadMate 1200 | Manual - English - Page 43
Creating a Custom Waypoint Using the Triton Menu 1. While viewing the Map screen, press MENU. 2. Select Create. 3. . Select the Viewing Waypoints icon to save the waypoint. Viewing a Saved Waypoint 1. From the Map screen, press MENU. 2. Select Go To. 3. Select Waypoint. 4. Change the order that - Magellan RoadMate 1200 | Manual - English - Page 44
the Media page to add or remove media files, or the Options page to set the proximity alarm on or off. 10. Press ESC to save the waypoint. create a Go To route to that waypoint.) Deleting a Saved Waypoint 1. From the Map screen, press MENU. 2. Select Go To. 3. Select Waypoint. 4. Change the order - Magellan RoadMate 1200 | Manual - English - Page 45
TO button to display the Options page. 8. Select Delete Waypoint. 9. Confirm the deletion by selecting Yes. Deleting All Saved Waypoints 1. From the Map screen, press MENU. 2. Select Go To. 3. Select Waypoint. 4. Highlight any waypoint in the list of waypoints. 5. When a waypoint name is highlighted - Magellan RoadMate 1200 | Manual - English - Page 46
gives you the means to customize the receiver and view details about the Magellan Triton receiver. Customizing Navigation Settings 1. From the Map screen press MENU. 2. Select View. 3. Select Settings. 4. Select Navigation. 5. Select the option you want to change and press ENTER to display the - Magellan RoadMate 1200 | Manual - English - Page 47
for the receiver. This option is used should you want to change how the Triton is connected after it has been connected to a PC or external power source. 1. From the Map screen press MENU. 2. Select View. 3. Select Settings. 4. Select Connectivity. 5. Select Connect to PC, NMEA - USB, NMEA - Serial - Magellan RoadMate 1200 | Manual - English - Page 48
to the About Menu. Personalizing Magellan Triton 1. From the Map screen press MENU. 2. Select View. 3. Select Settings. 4. Select About. 5. Select Map screen press MENU. 2. Select View. 3. Select Settings. 4. Select Diagnostics. 5. Select Audio Test, Video Test, Keypad Test or Touch Test. Settings - Magellan RoadMate 1200 | Manual - English - Page 49
6. Follow the displayed instructions for each test. 7. Press ESC to return to the Diagnostics Menu. Settings 41 - Magellan RoadMate 1200 | Manual - English - Page 50
. Some geocaches will have hints and descriptions included to help in finding the cache. Select the desired field and use the keyboard to enter the hint and descriptions. 7. Press PAGE / GO TO to add media (image) from the SD card installed in the Triton. 8. Press PAGE / GO TO to access the Options - Magellan RoadMate 1200 | Manual - English - Page 51
a Go To route to that waypoint.) Deleting a Saved Geocache Waypoint 1. From the Map screen, press MENU. 2. Select Go To. 3. Select Geocache. 4. Change the selecting Yes. Deleting a Saved Geocache Waypoint (Alternate Method) 1. From the Map screen, press MENU. 2. Select Go To. 3. Select Geocache. 4. - Magellan RoadMate 1200 | Manual - English - Page 52
to display the Options page. 8. Select Delete Waypoint. 9. Confirm the deletion by selecting Yes. Deleting All Saved Geocache Waypoints 1. From the Map screen, press MENU. 2. Select Go To. 3. Select Geocache. 4. Highlight any waypoint in the list of waypoints. 5. When a waypoint name is highlighted - Magellan RoadMate 1200 | Manual - English - Page 53
Magellan Triton continuously updates the information giving you the best possible directions to get you to your destination. A Multileg route is a series of Go To routes strung together. Using the same scenario as above, only this time to a Saved User-Created Waypoint. 1. From the Map screen press - Magellan RoadMate 1200 | Manual - English - Page 54
screen press MENU. (Alternate Method: Press and hold the GO TO button while the present position cursor is displayed on the Map screen.) 2. Select Go To. 3. Select Geocache. 4. If needed, change the order that the waypoints are displayed or search for a waypoint. ((Select the Search field under - Magellan RoadMate 1200 | Manual - English - Page 55
saved user-created waypoints and press ENTER. Geocache: Select a waypoint from the list of saved geocache waypoints and press ENTER. Place: Select the map to the deletion. (This does not remove the waypoint from the Triton's memory, only from the route.) Viewing the route: Select the View icon in - Magellan RoadMate 1200 | Manual - English - Page 56
enter the first few characters for a route you want to search for.) 5. Highlight the route and press ENTER. Deleting a Multileg Route 1. From the Map screen press MENU. 2. Select Go To. 3. Select Route. 4. If needed, change the order that the waypoints are displayed or search for a waypoint. (Select - Magellan RoadMate 1200 | Manual - English - Page 57
at the top of the display to change the visible start and end times. In the graphical area you can use the arrow keys to see the elevation for a specific position indicated by the dot icon. 1. From the Map screen press MENU. 2. Select Go To. 3. Select Route. 4. Change the order that the - Magellan RoadMate 1200 | Manual - English - Page 58
set the intervals that they are created in the Tracks Option function described in this chapter. The common term for these breadcrumbs is track. You may be familiar with this term from other navigation the Map screen as dotted lines. Creating a Trail Once you begin traveling with the Magellan Triton, - Magellan RoadMate 1200 | Manual - English - Page 59
selecting the info icon to the right of the name. When the info screen is displayed, select the color from the color icon to the left of the trail name. Deleting a Trail 1. From the Map screen press MENU. 2. Select Go To. 3. Select Trail. 4. Change the order that the trails are displayed if needed - Magellan RoadMate 1200 | Manual - English - Page 60
trail name. 7. Press the PAGE / GO TO button to display the Options page. 8. Select Reverse Trail. 9. Select Yes. Hiding/Showing a Trail 1. From the Map screen press MENU. 2. Select Go To. 3. Select Trail. 4. Change the order that the trails are displayed, if needed, or search for a trail. (Select - Magellan RoadMate 1200 | Manual - English - Page 61
might consider a Backtrack route as the most important function in a handheld GPS receiver. Being able to quickly create a route back to your starting travelling if you plan on saving the track as a trail. 1. From the Map screen press MENU. 2. Select View. 3. Select Tracks. 4. Select Erase Track. - Magellan RoadMate 1200 | Manual - English - Page 62
waypoints that are part of the base map that is installed in your Magellan Triton. These waypoints can't be deleted or duplicated but they can be used as the destination for a Go To route or a multileg route. Places are categorized as roads, world maps, waterways or city centers. When searching for - Magellan RoadMate 1200 | Manual - English - Page 63
or off. 11. Press ENTER to save your selection. Viewing Best Fish and Hunt Times for a Place Waypoint 1. From the Map screen, press MENU. 2. Select Go To. 3. Select Place. 4. From the Select Map display, select the background map or the detailed map for the waypoint. (If you do not have any detailed - Magellan RoadMate 1200 | Manual - English - Page 64
select a date. 13. Press OK when done. Viewing Sun and Moon Rise and Set Times for a Place Waypoint 1. From the Map screen, press MENU. 2. Select Go To. 3. Select Place. 4. From the Select Map display, select the background map or the detailed map for the waypoint. (If you do not have any detailed - Magellan RoadMate 1200 | Manual - English - Page 65
media options you need install an optional SD card in the SD card slot located on the right side of the Magellan Triton. Browsing Photographs 1. Press MENU. unless there are images available on the SD card.) 5. Select an image to display the image in full screen. Pressing the up and down arrows
-
 1
1 -
 2
2 -
 3
3 -
 4
4 -
 5
5 -
 6
6 -
 7
7 -
8
-
9
-
10
-
11
-
12
-
13
-
14
-
15
-
16
-
17
-
18
-
19
-
20
-
21
-
22
-
23
-
24
-
25
-
26
-
27
-
28
-
29
-
30
-
31
-
32
-
33
-
34
-
35
-
36
-
37
-
38
-
39
-
40
-
41
-
42
-
43
-
44
-
45
-
46
-
47
-
48
-
49
-
50
-
51
-
52
-
53
-
54
-
55
-
56
-
57
-
58
-
59
-
60
-
61
-
62
-
63
-
64
-
65
 |
 |
960 Overland Court, San Dimas, CA
91773
Magellan
®
Triton
™
User Manual
Magellan Triton 300
Magellan Triton 400
Magellan Triton 500